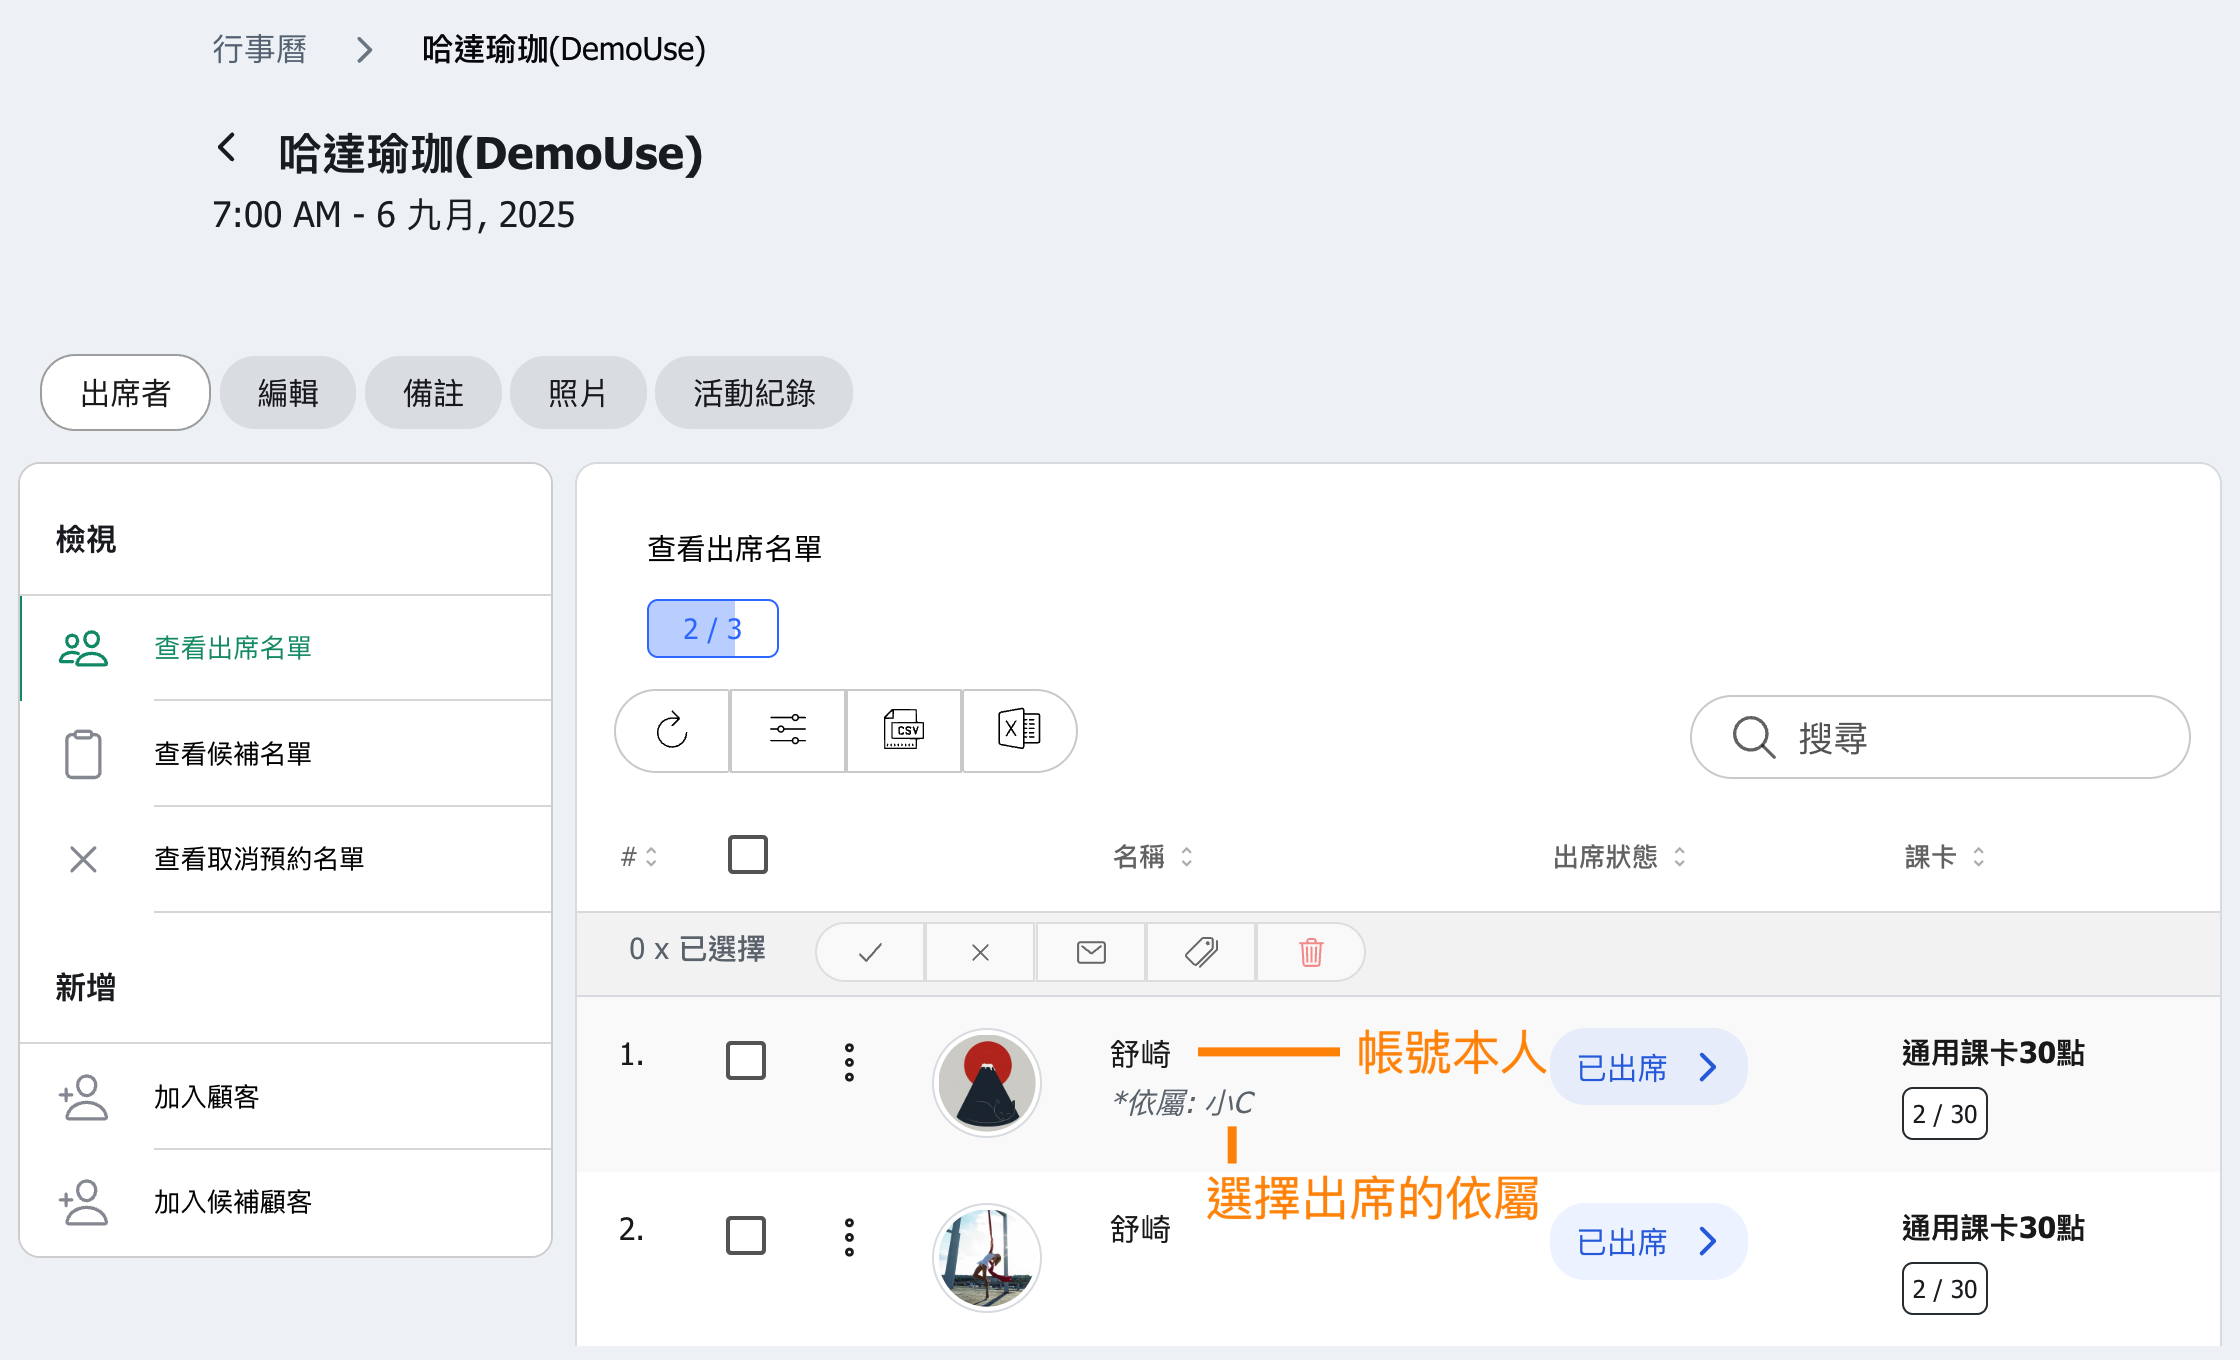
What is Dependent Feature?
After enabling the Customer dependents feature, a customer can add their children, siblings, or friends on the Dependents tab of their account.
*When making a reservation, customers can choose which dependent will attend the class.
*If your business uses a different word for these people, rename Dependent in Settings → Customization → Customize text and your wording replaces it everywhere.
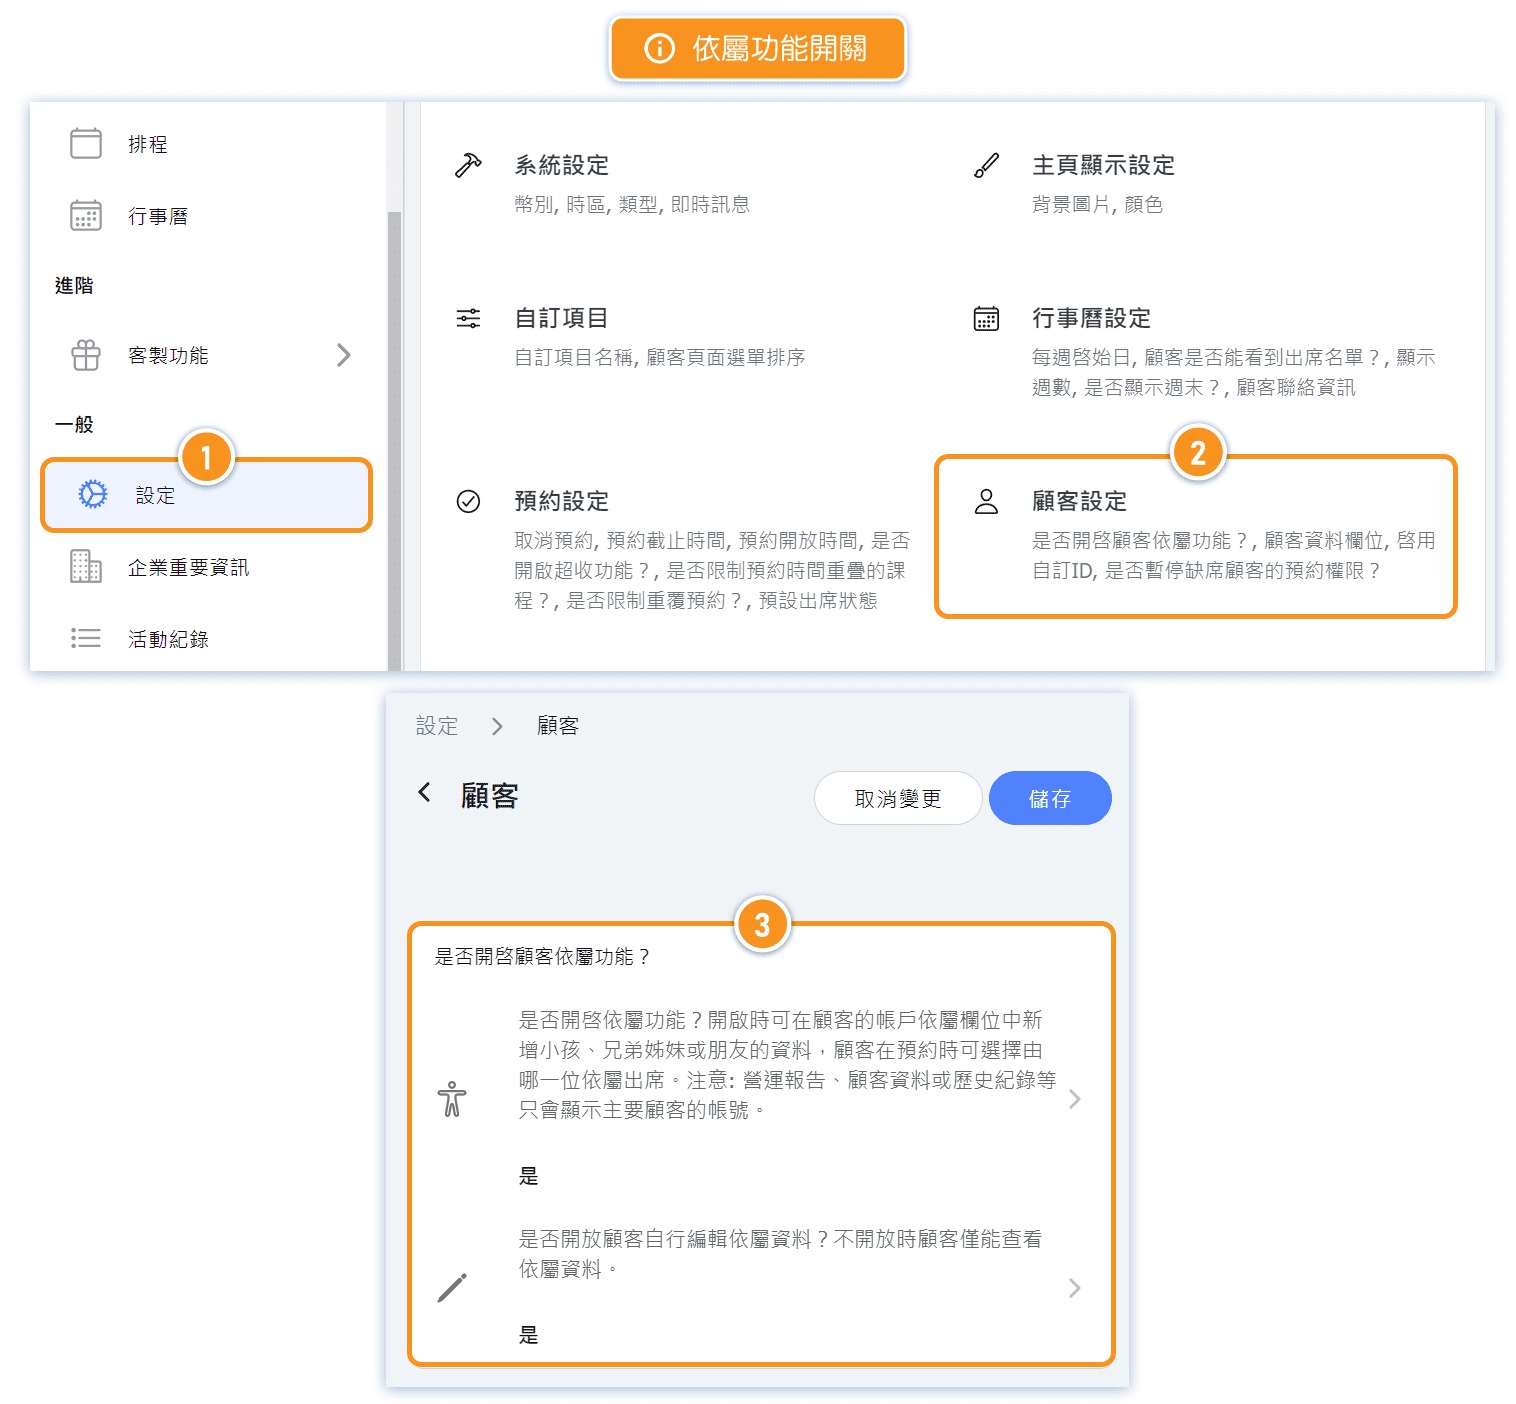
Turn on the Dependents feature
[Instructions]
- Click Settings in the left menu.
- Select Customer settings.
- Turn on the Customer dependents toggle.
- Use the Edit dependent toggle below it to decide whether customers can add and edit their own dependents, or only view them.
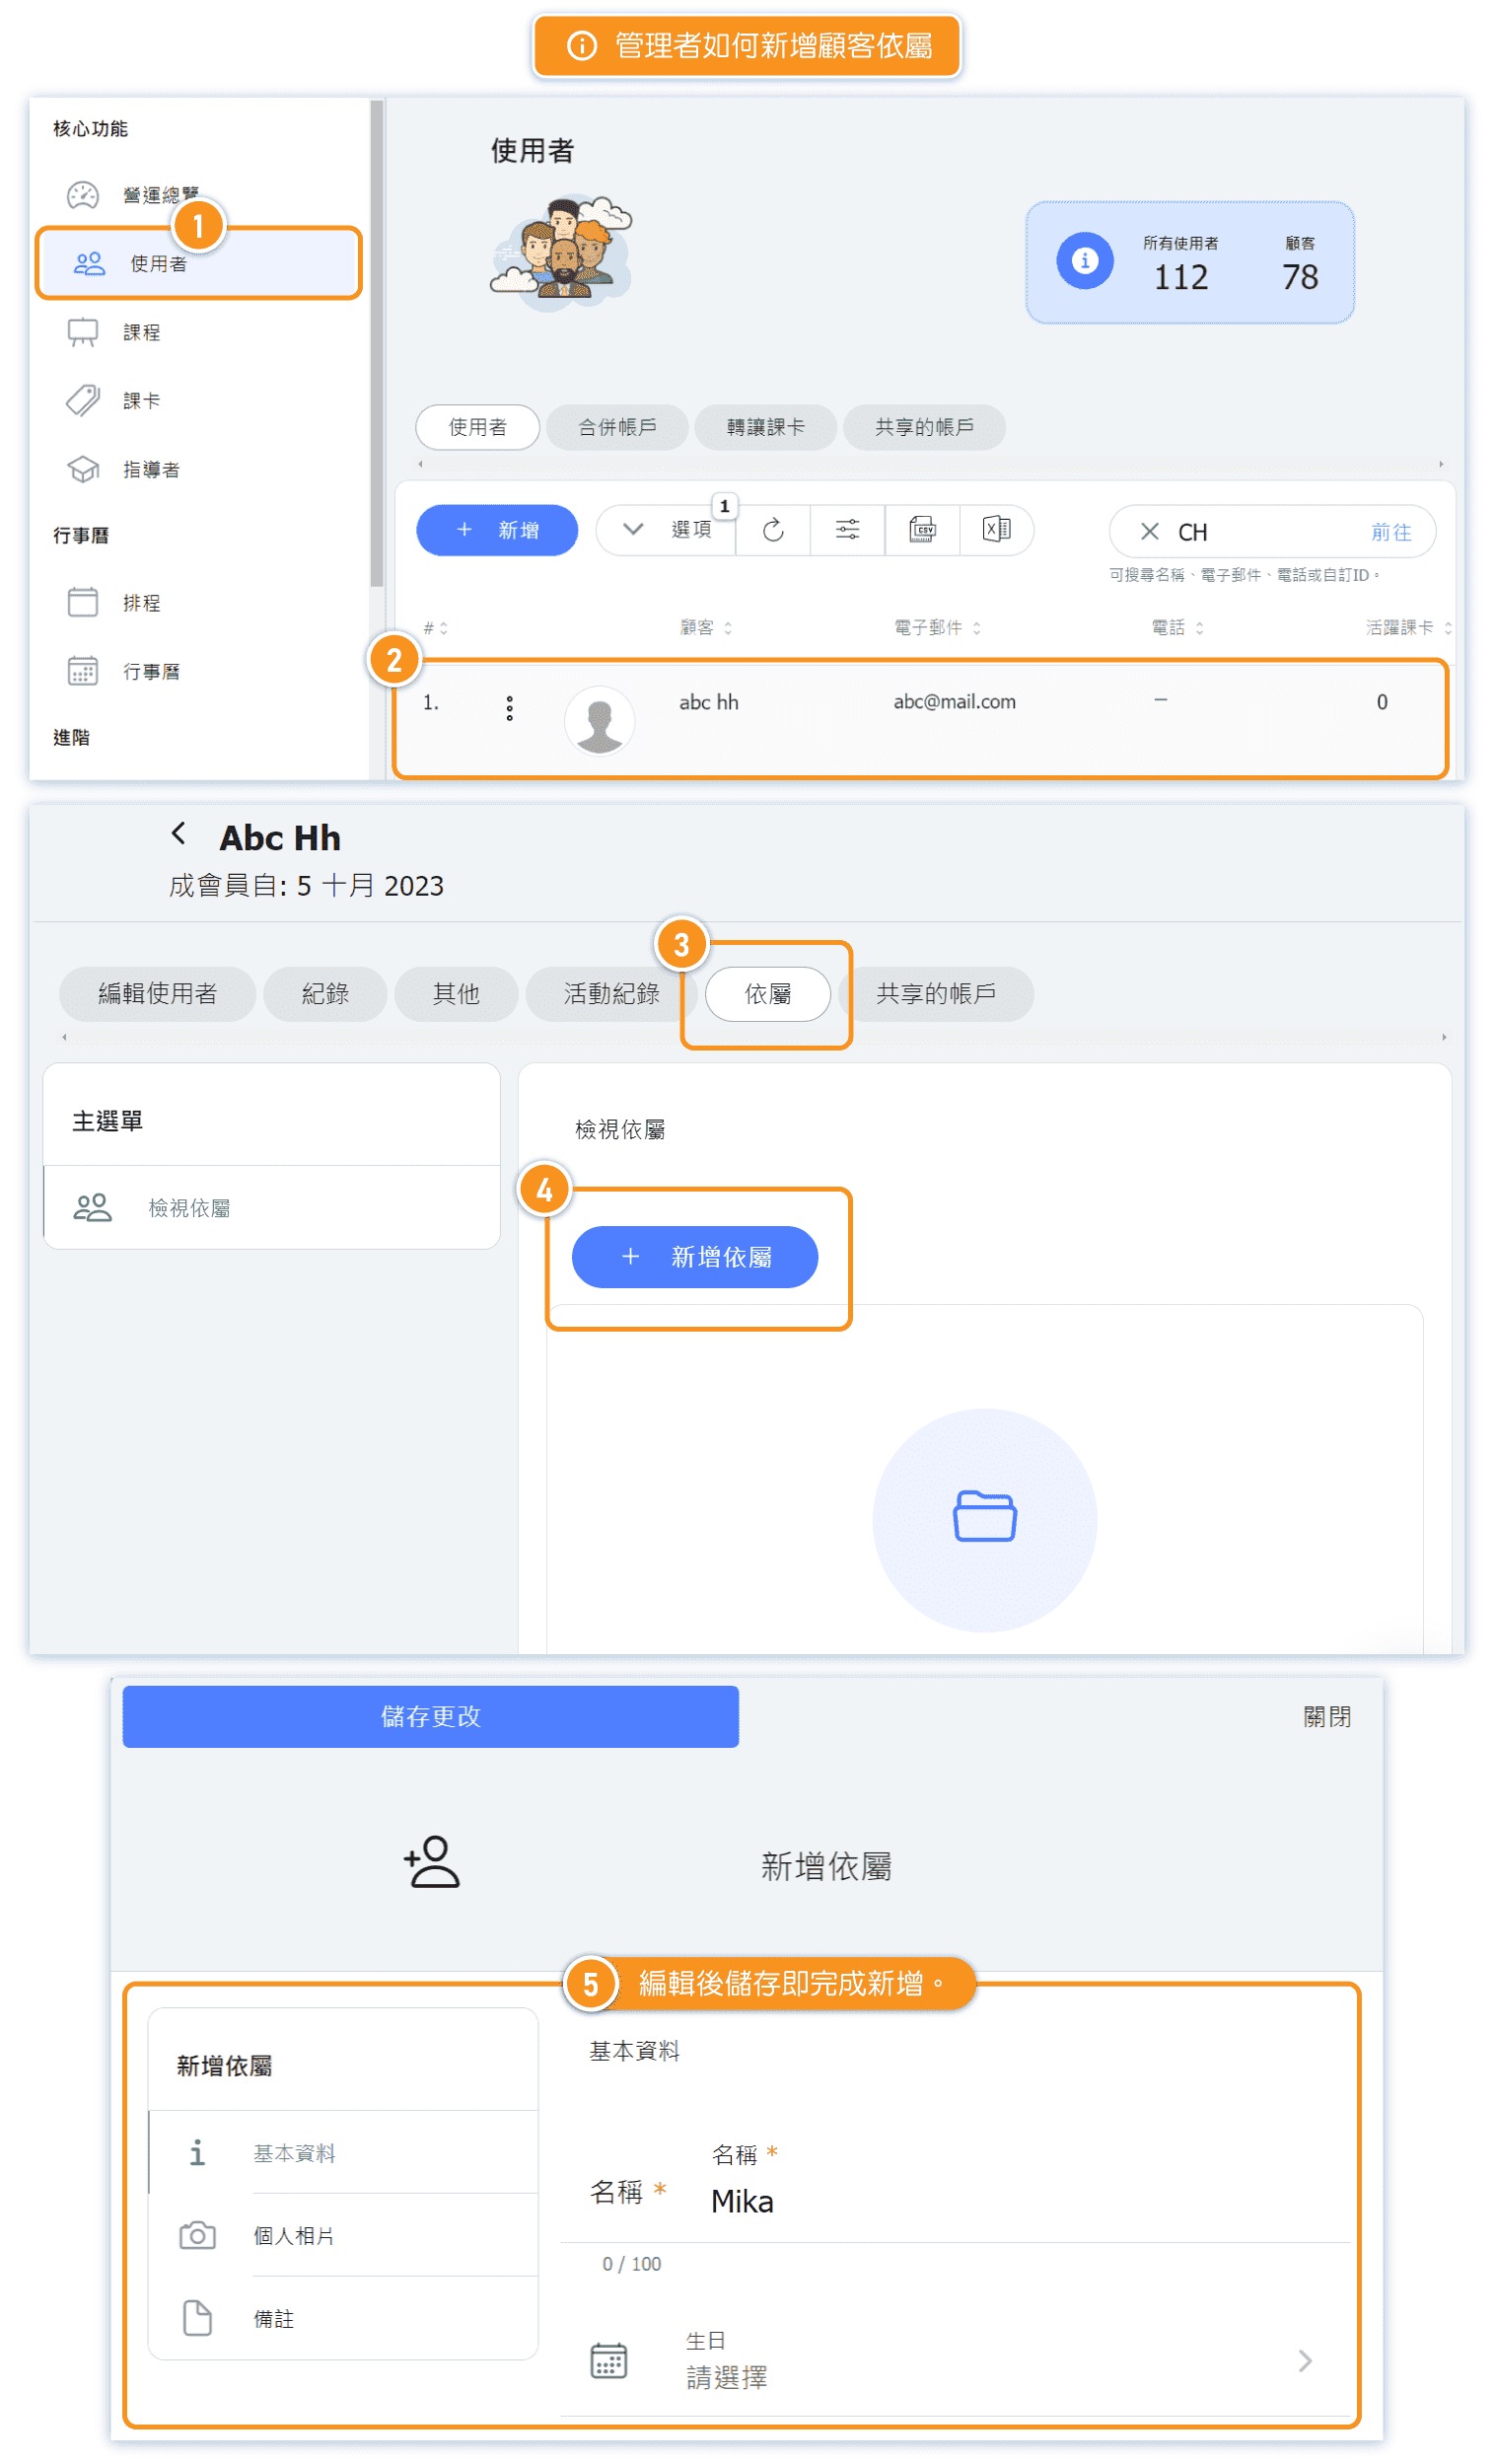
How to Add Customer Dependents (Admin Side)
[Instructions]
-
Click Users in the left menu.
-
Click on a user.
-
Select the Dependents tab.
-
Click Add Dependent.
-
Edit the details and click Save to complete adding the dependent.
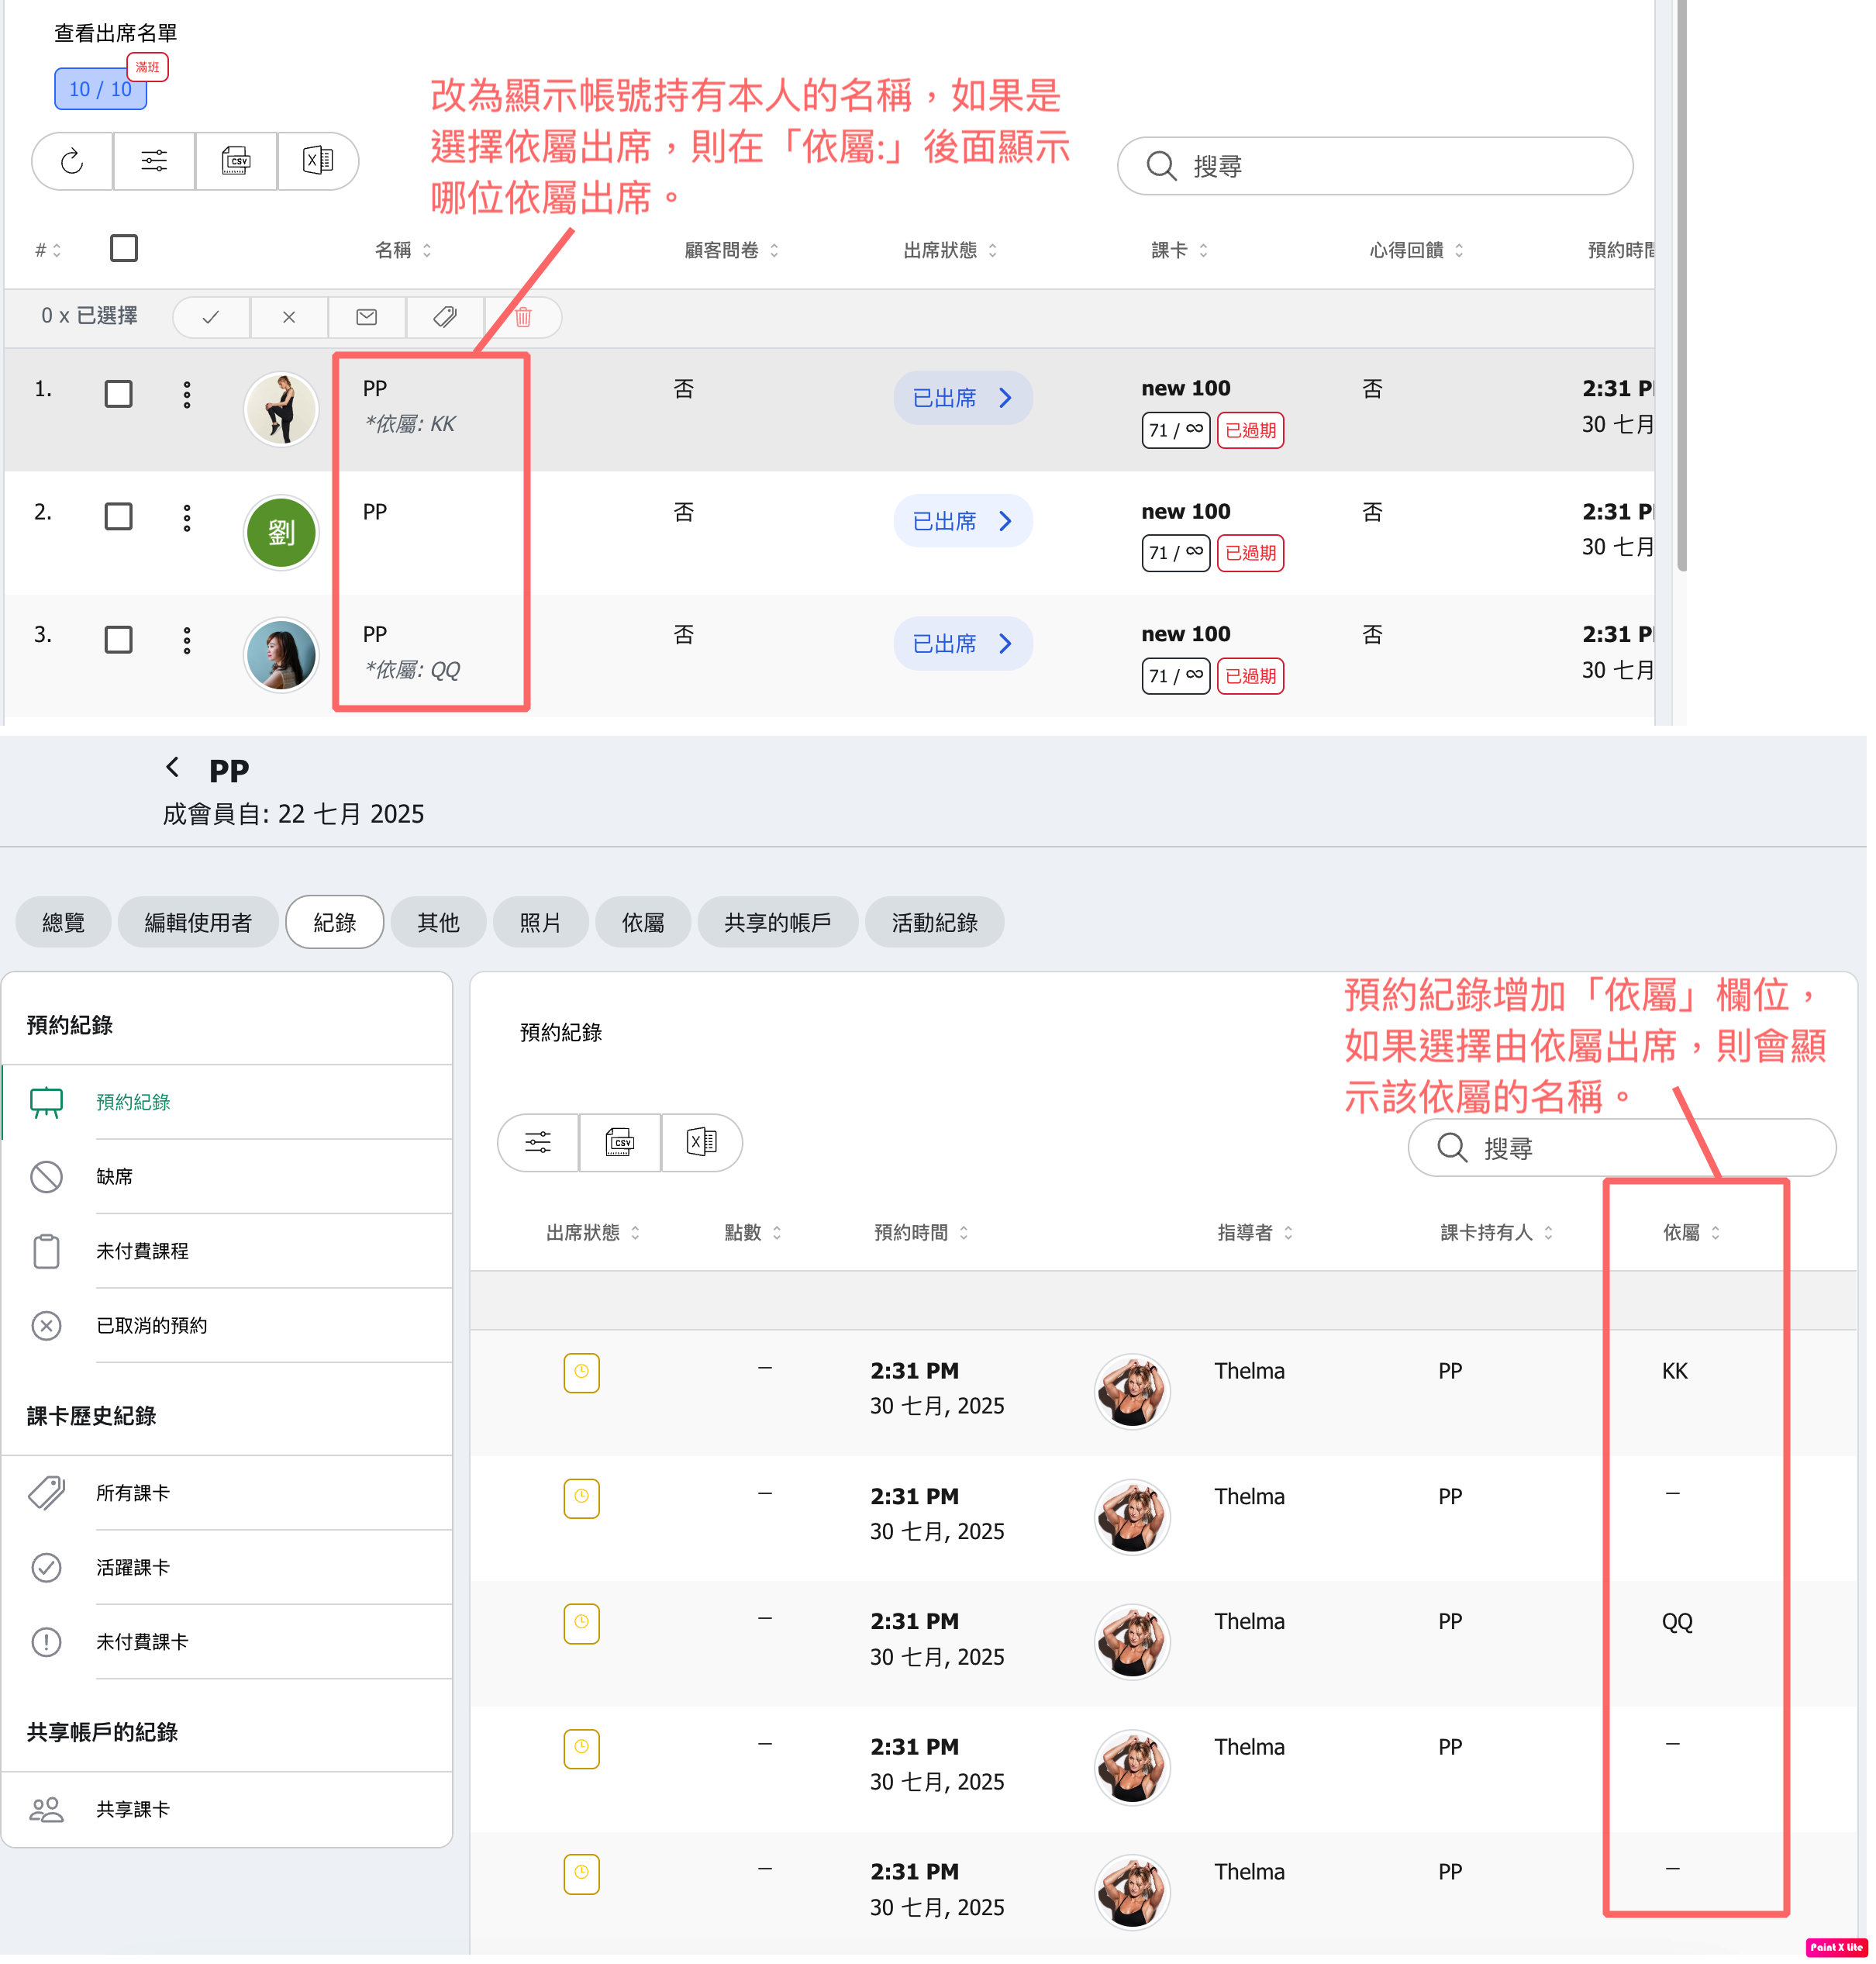
*Once the Customer dependents setting is on, the Users list also shows a Dependents column immediately after the Roles column, listing each customer's dependents by name, so you can see who a customer is responsible for without opening their record. Customers with no dependents show the usual empty value marker. If the setting is off, the column does not appear at all.
*Once a dependent's birthday is saved, their current age is shown beside the date in the Birthday column of the Dependents tab. The age is given as years, months and days (for example 5y 2m 3d), is calculated automatically from the birthday, and updates by itself each day, so you never have to maintain it. No age is shown when a dependent has no birthday saved, or the saved birthday is invalid or in the future.
*Which fields appear in this window depends on your settings. Birthday is shown unless you switch it off, and the extra detail field you set up under Settings → Customer → Customer dependents is shown beneath it, using the label you entered and limited to 50 characters. Either field can be marked required, in which case the dependent cannot be saved until it is filled in. The extra field also appears as its own column in the Dependents tab. If you switch a field off later, it is hidden from this window and from the list, but values already saved are kept — and the extra field's column and input still appear for any dependent that already has a value.
Using the admin AI assistant: Ask to create a dependent. Select the customer account and enter the dependent name in the same form, then click Create dependents. Submitting this form authorizes those exact details without another confirmation card. For up to 20 dependents, ask to create multiple dependents and separate their names with semicolons; only the submitted names are created, once each. Cancel or return to chat to make no change.
To change the dependent on existing bookings, identify the customer, the dependent and the bookings you want changed. For up to 50 bookings at a time, the assistant shows one review containing the customer name, dependent name and every class date and time. Approving that review covers only those bookings. The original booking and its pass/payment details are preserved; the assistant does not cancel and rebook. If an update cannot be confirmed, it stops and distinguishes confirmed updates, an uncertain result and bookings not yet attempted. Check an uncertain result before asking to retry.
How to Add Dependents (Customer Side)
[Instructions]
- On the account page, find the Dependents list and select Add Dependent.
- Edit the details and click Save to complete adding the dependent.
- To review or change someone already added, select View / Edit Dependents. If the business has turned Edit dependent off, this reads View Dependents and the details are read-only.
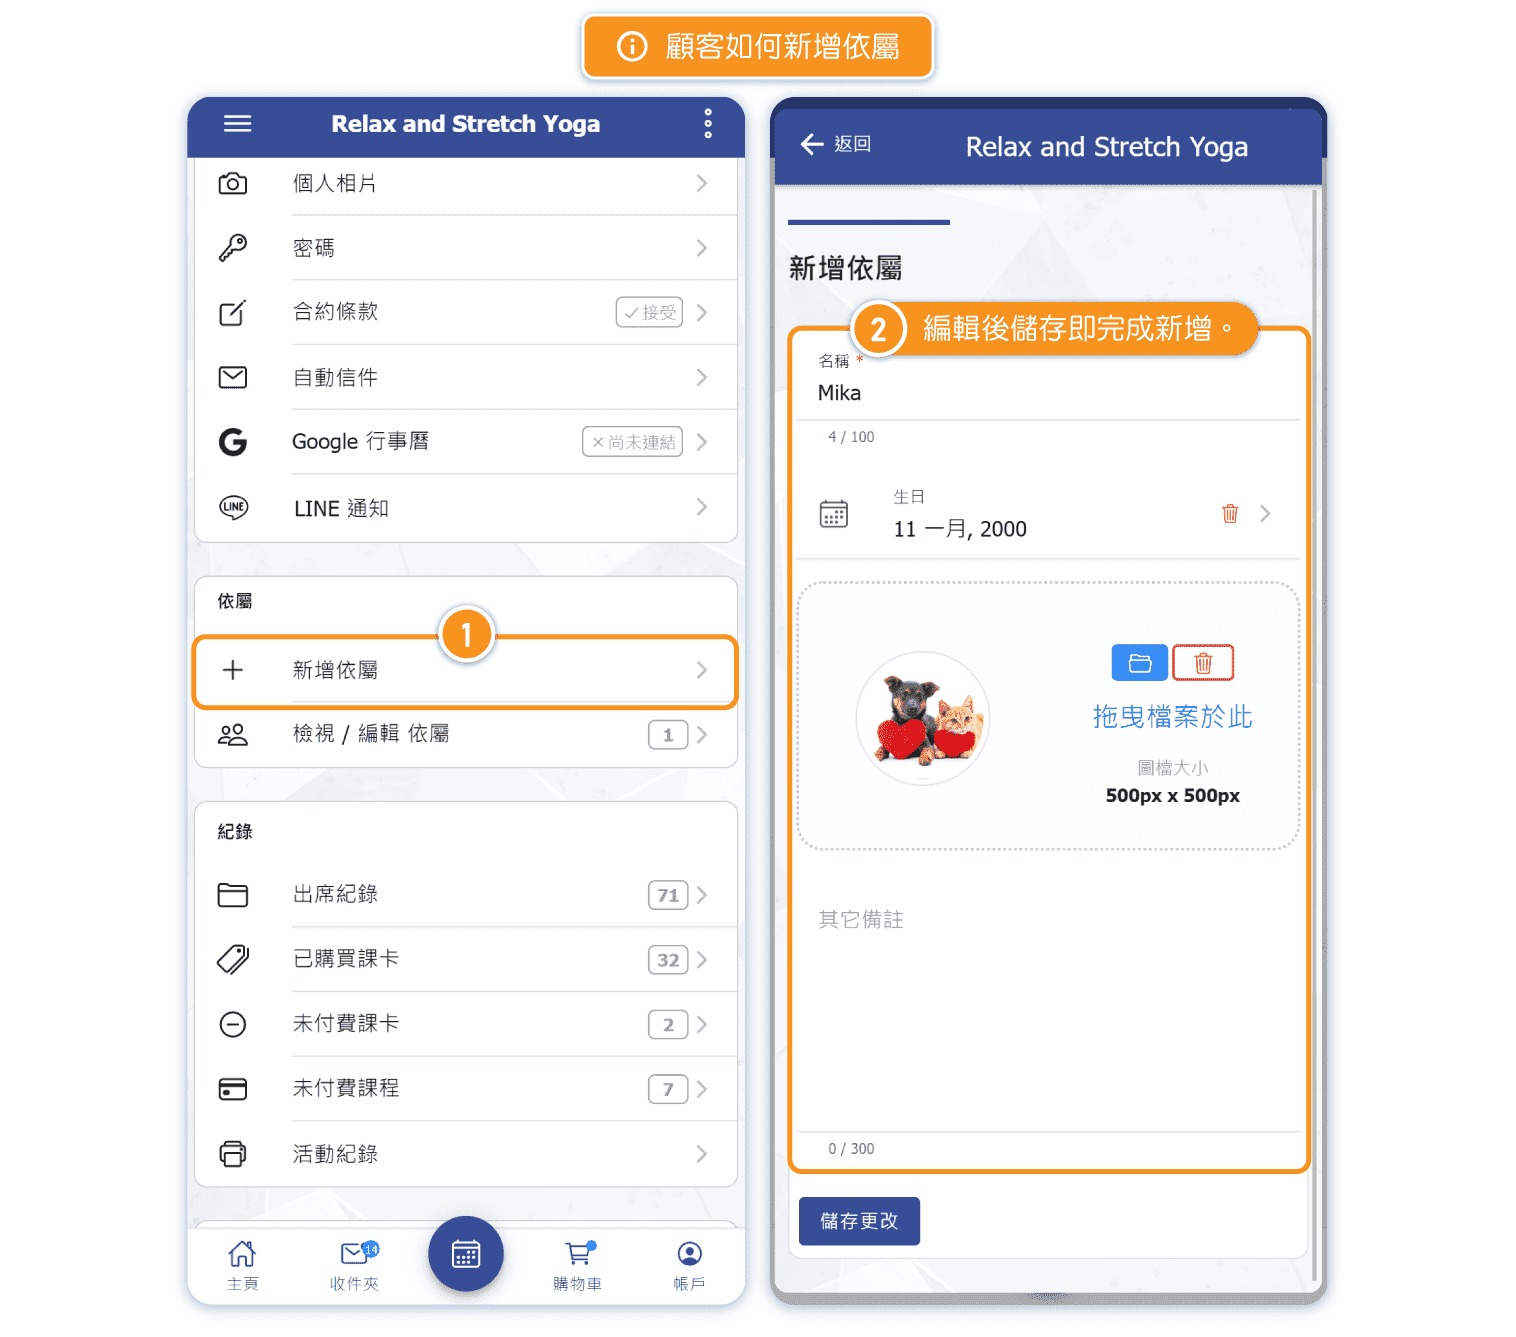
*When a dependent has a birthday saved, the customer's own Dependents list shows their current age next to the birthday, as years, months and days (for example 5y 2m 3d). The age is calculated automatically from the birthday and updates by itself each day. Nothing is shown beside the birthday when no birthday is saved, or the saved birthday is invalid or in the future.
*Customers see the same fields you switched on in your settings. If you switched the birthday off, it is not shown here or on the add/edit screen; if you switched the extra detail field on, it appears under the birthday with the label you chose, and its value is shown in the customer's Dependents list. Required fields must be filled in before the customer can save.
Add a dependent through an intake form
When the Intake Form feature is enabled, add an Add Dependent item to a form to collect Name, Profile picture, Notes, and whichever of Birthday and your extra detail field you have switched on under Settings → Customer → Customer dependents. Name is always required; the other fields are optional unless you marked Birthday or the extra field as required in those settings, and fields you switched off are not shown or asked for. Successful customer submission creates the dependent under their account. Previewing or editing the form definition does not create a dependent.
For example, show the child details item only when the customer answers Yes to "Are you booking for a child?". Use the item row's Add rule button to set visibility or required answers, save the rule, then save the form. The Add Dependent item cannot itself be a condition source. See the Intake Form guide for the full rule workflow.
How to Book as Dependents (Admin Side)
[Instructions]
-
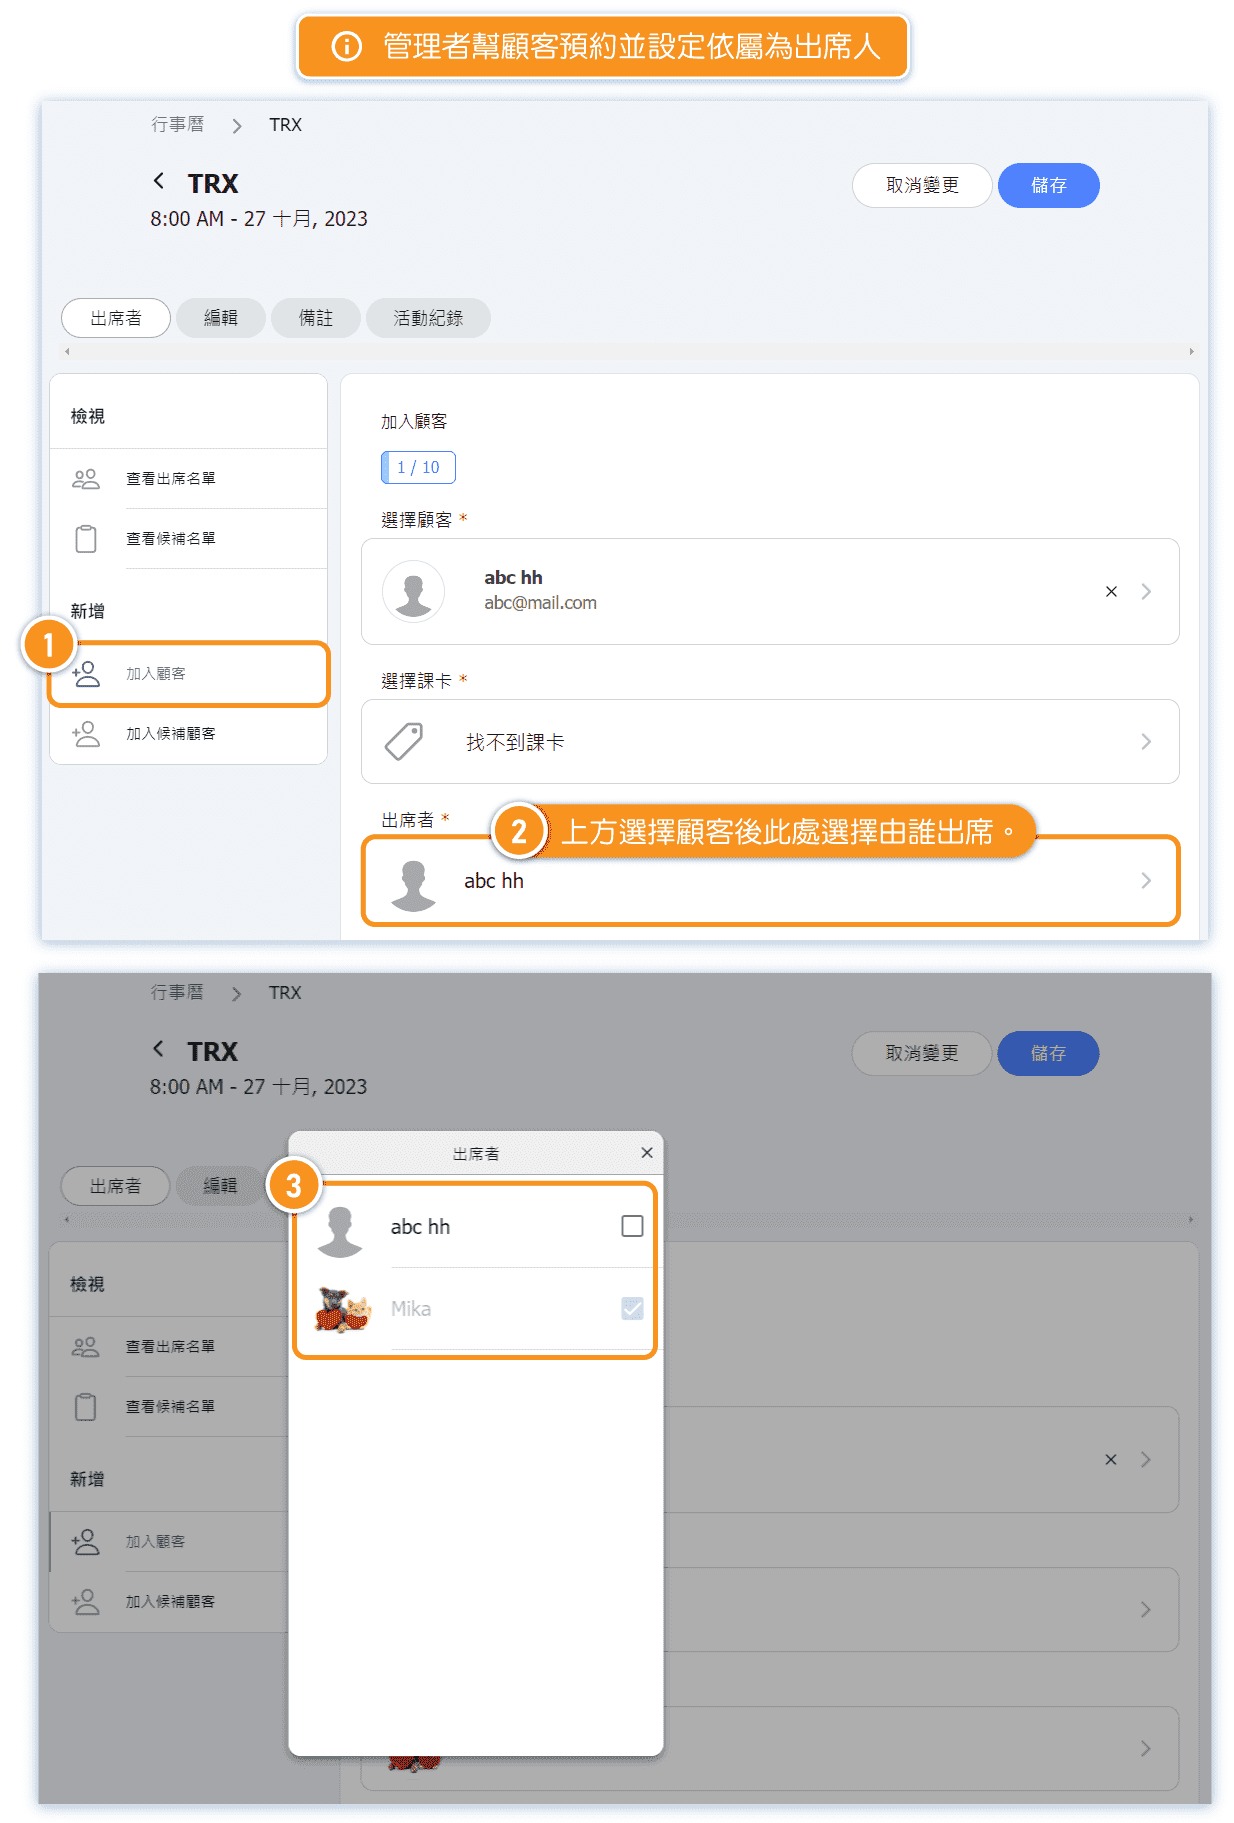
On the course page, click Add Customer.
-
After selecting a customer, choose the attendee below.
-
You can select either the customer themselves or a dependent.
How to Book as Dependents (Customer Side)
[Instructions]
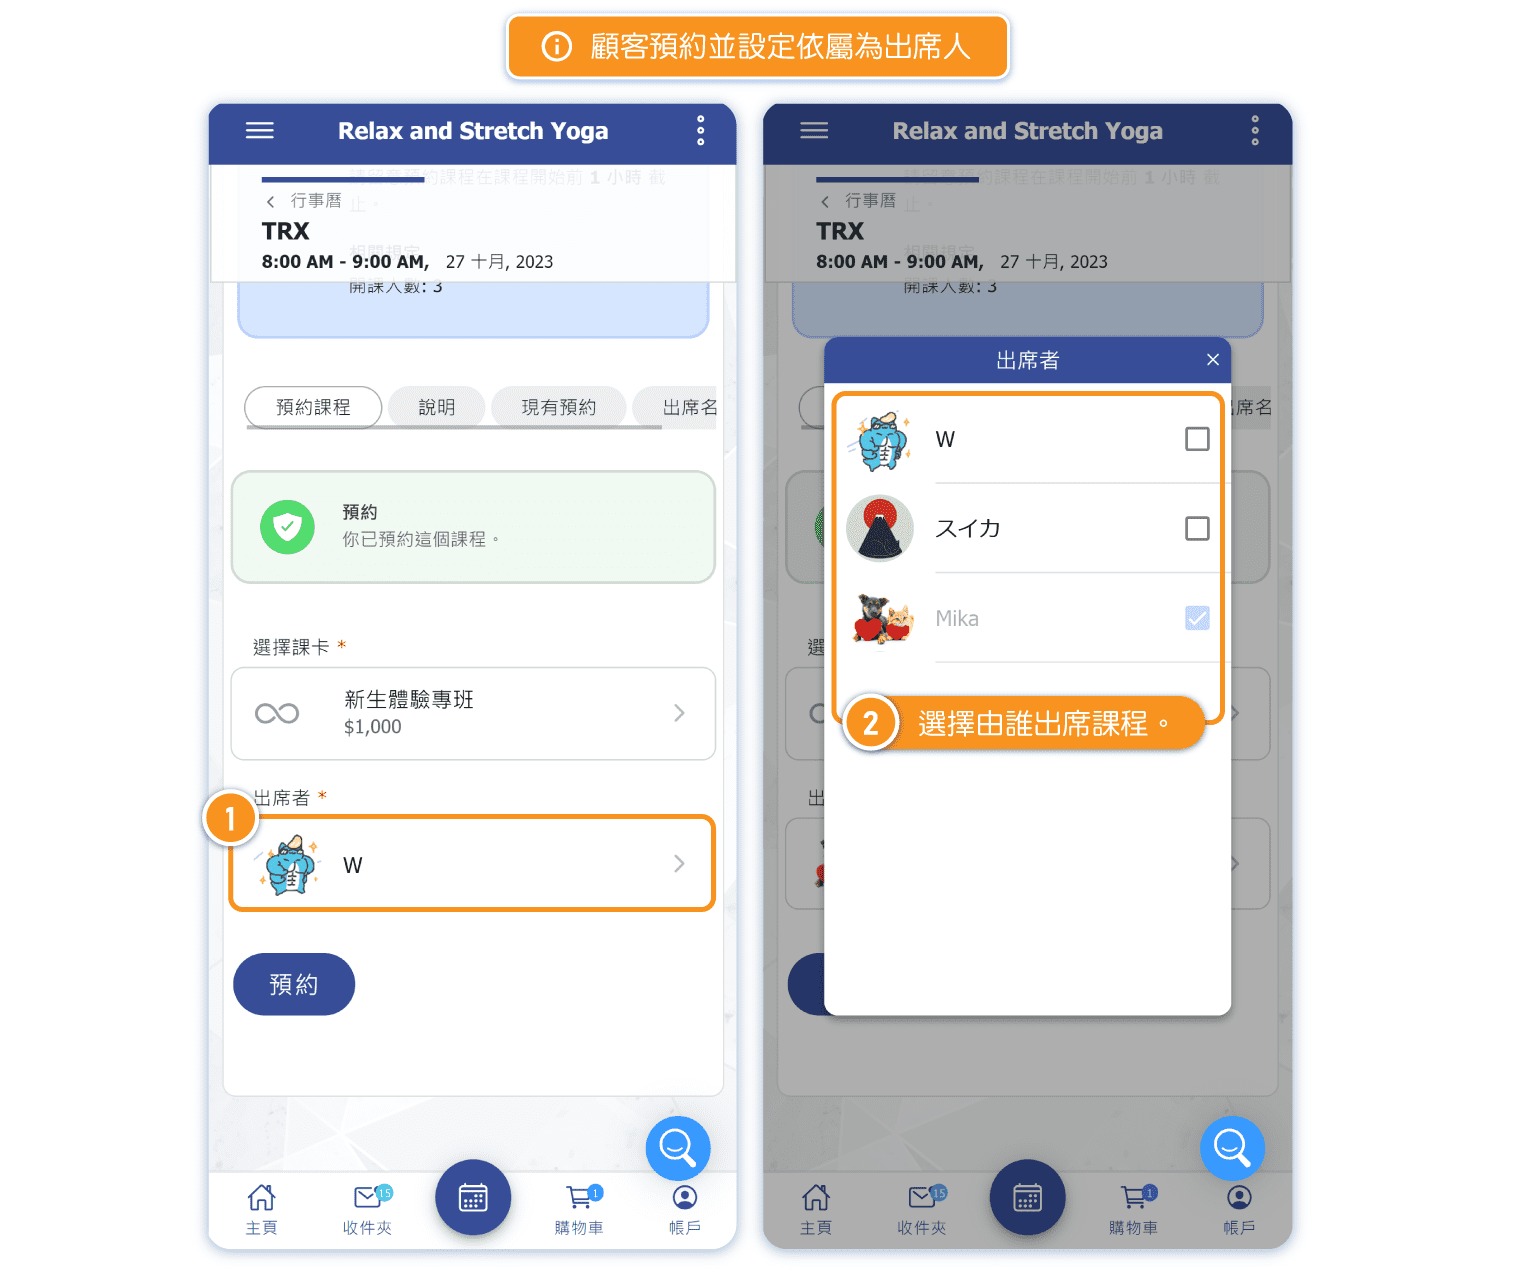
- On the course page, click Attendees.
- You can change an attendee to a dependent.
Two dependents already exist but cannot book the same class session? Check Admin → Settings → Reservation → One reservation per class. The limit applies to the primary customer account, including its dependents, not separately to each attendee. For ordinary class bookings, turn this restriction off and save to allow two dependents under the same account to book the same session. This change applies to all customer accounts. Enabling dependents alone does not override the restriction. If it is already off, check the actual booking error, class capacity and pass eligibility instead of assuming this switch is the cause.
Multiple reservations at once controls booking several future dates of a recurring class or course; it does not enable multiple people in one session. Do not enable overbooking to solve an account restriction. Class capacity and pass rules still apply. Booking cutoffs control when customers may book; they do not prevent duplicate bookings.
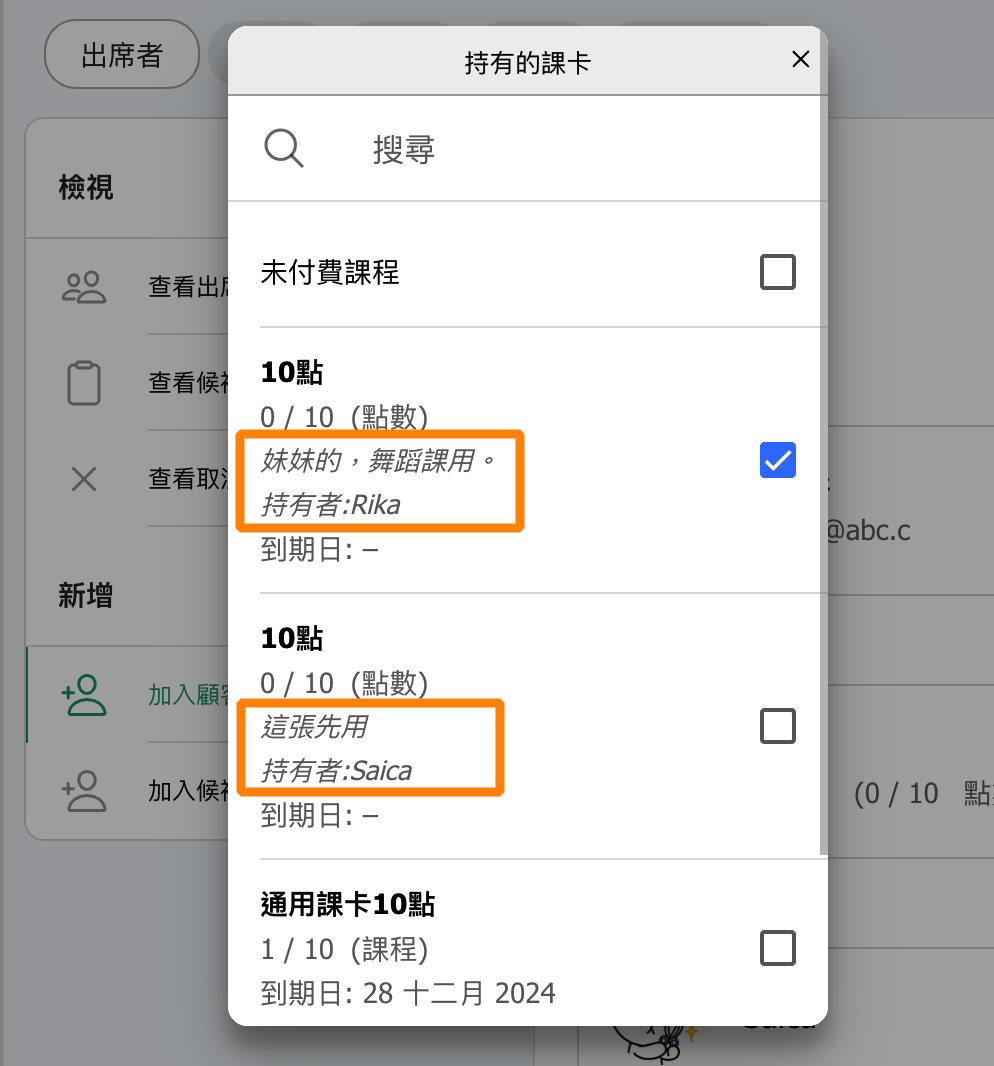
FAQ: How can I tell which pass belongs to each dependent?
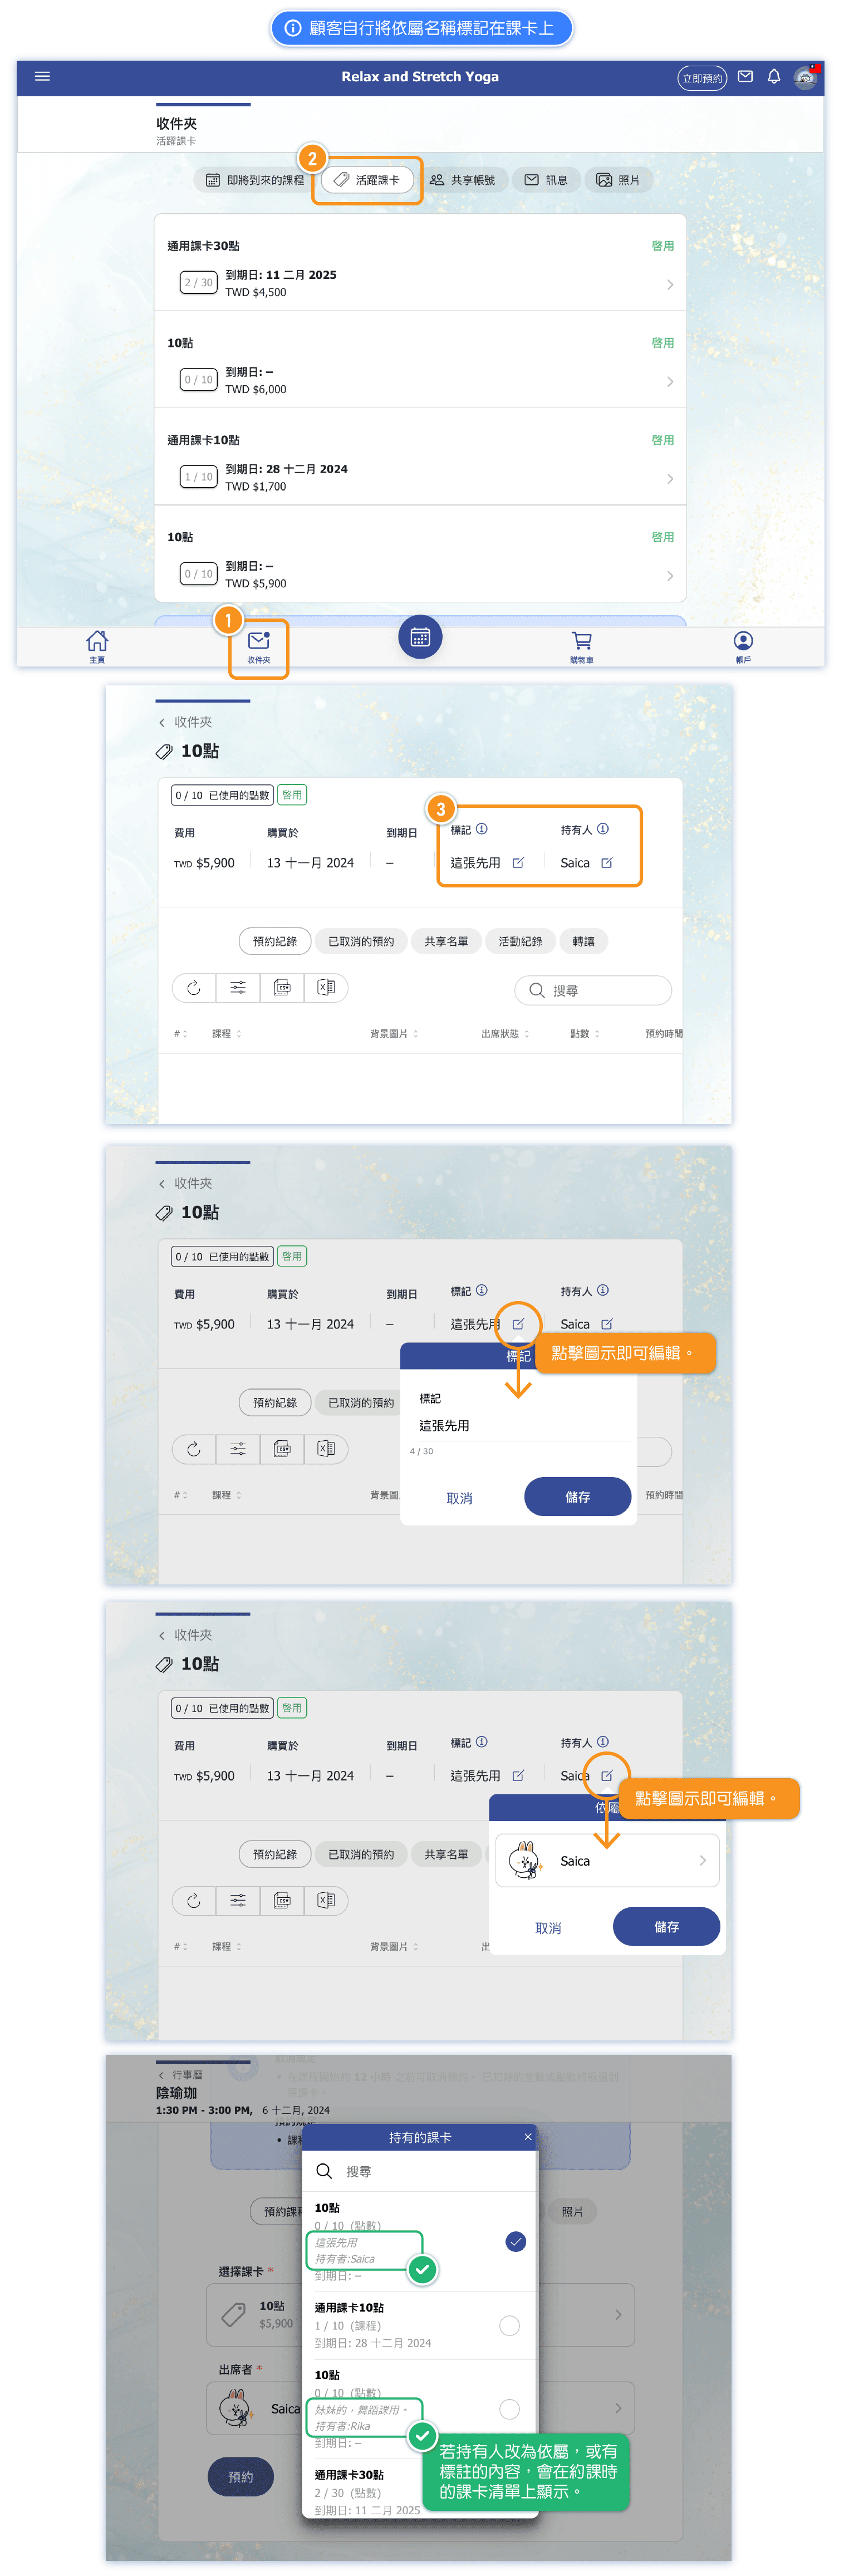
Starting from version 13.03, administrators can add a "Note" to the customer's pass, specifying the "Holder's Name" or adding a custom label.
These details will be displayed in the pass selection list, making it easier to identify the correct pass for each dependent.
Solution 2: Customer Tags Dependent's Name to the Pass
[Instructions]
- Click Inbox.
- Click Active Course Cards.
- Click the icon next to a tag or the holder to edit.