
What is a scheduled course?
A scheduled course is a complete series of classes that run over multiple weeks or sessions. Unlike one-off classes (single events) or repeating classes (ongoing weekly), scheduled courses have a defined beginning and end, with students enrolled for the entire duration.
Common examples of scheduled courses:
- Beginner Yoga 8-Week Program: A structured course for new students
- Summer Dance Intensive: A 4-week intensive program
- Prenatal Pilates Series: A 6-week course for expecting mothers
- Kids Art Class Term 1: A semester-long program for children
Key benefits:
- Simplified enrollment: Add students once for all classes in the series
- Better planning: Know your attendance for the entire term in advance
- Cohort learning: Students progress together through the curriculum
- Easy management: Track the entire course from one place
How do I create a scheduled course?
Follow these steps to create a scheduled course:
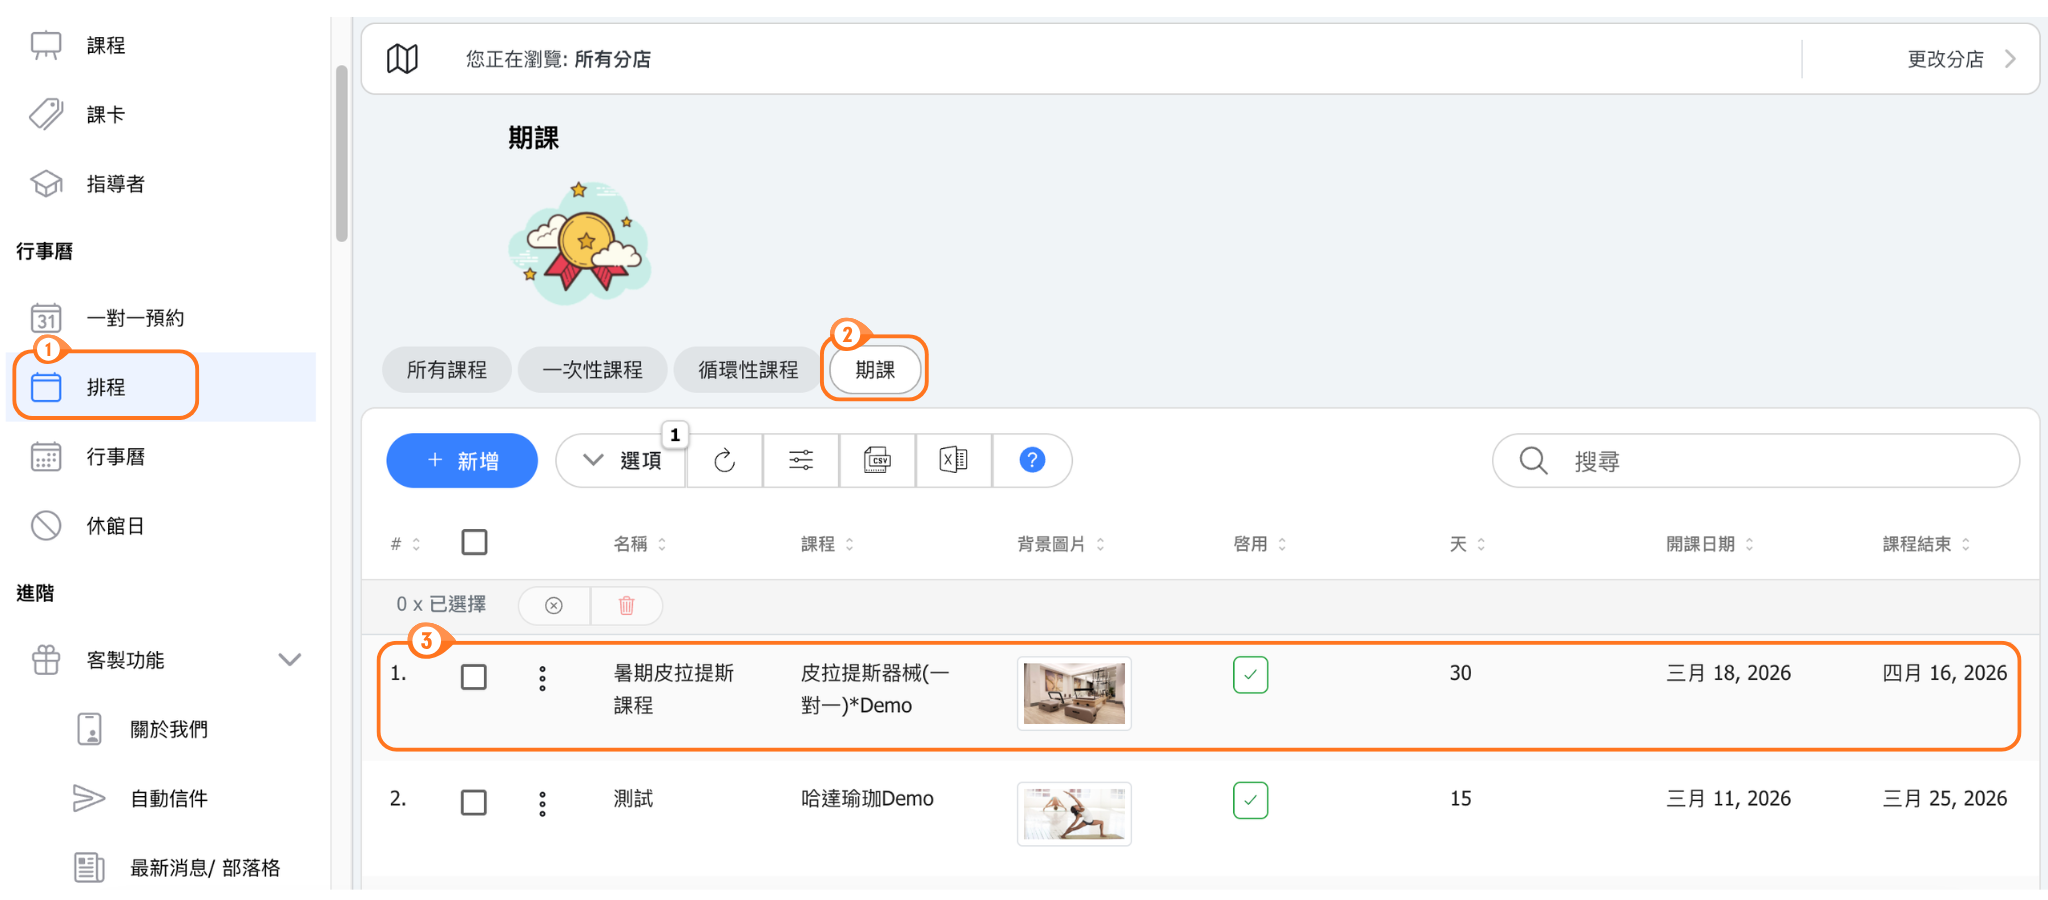
- Go to Schedule → Schedule courses.
- Select New.
- Enter the course name and choose the class it is based on.
- Configure its class size, classroom, primary and additional instructors, tags, reservation and cancellation rules, points when enabled, and an optional cover photo.
- Select Save. The new course receives its ID and opens the Scheduled tab.
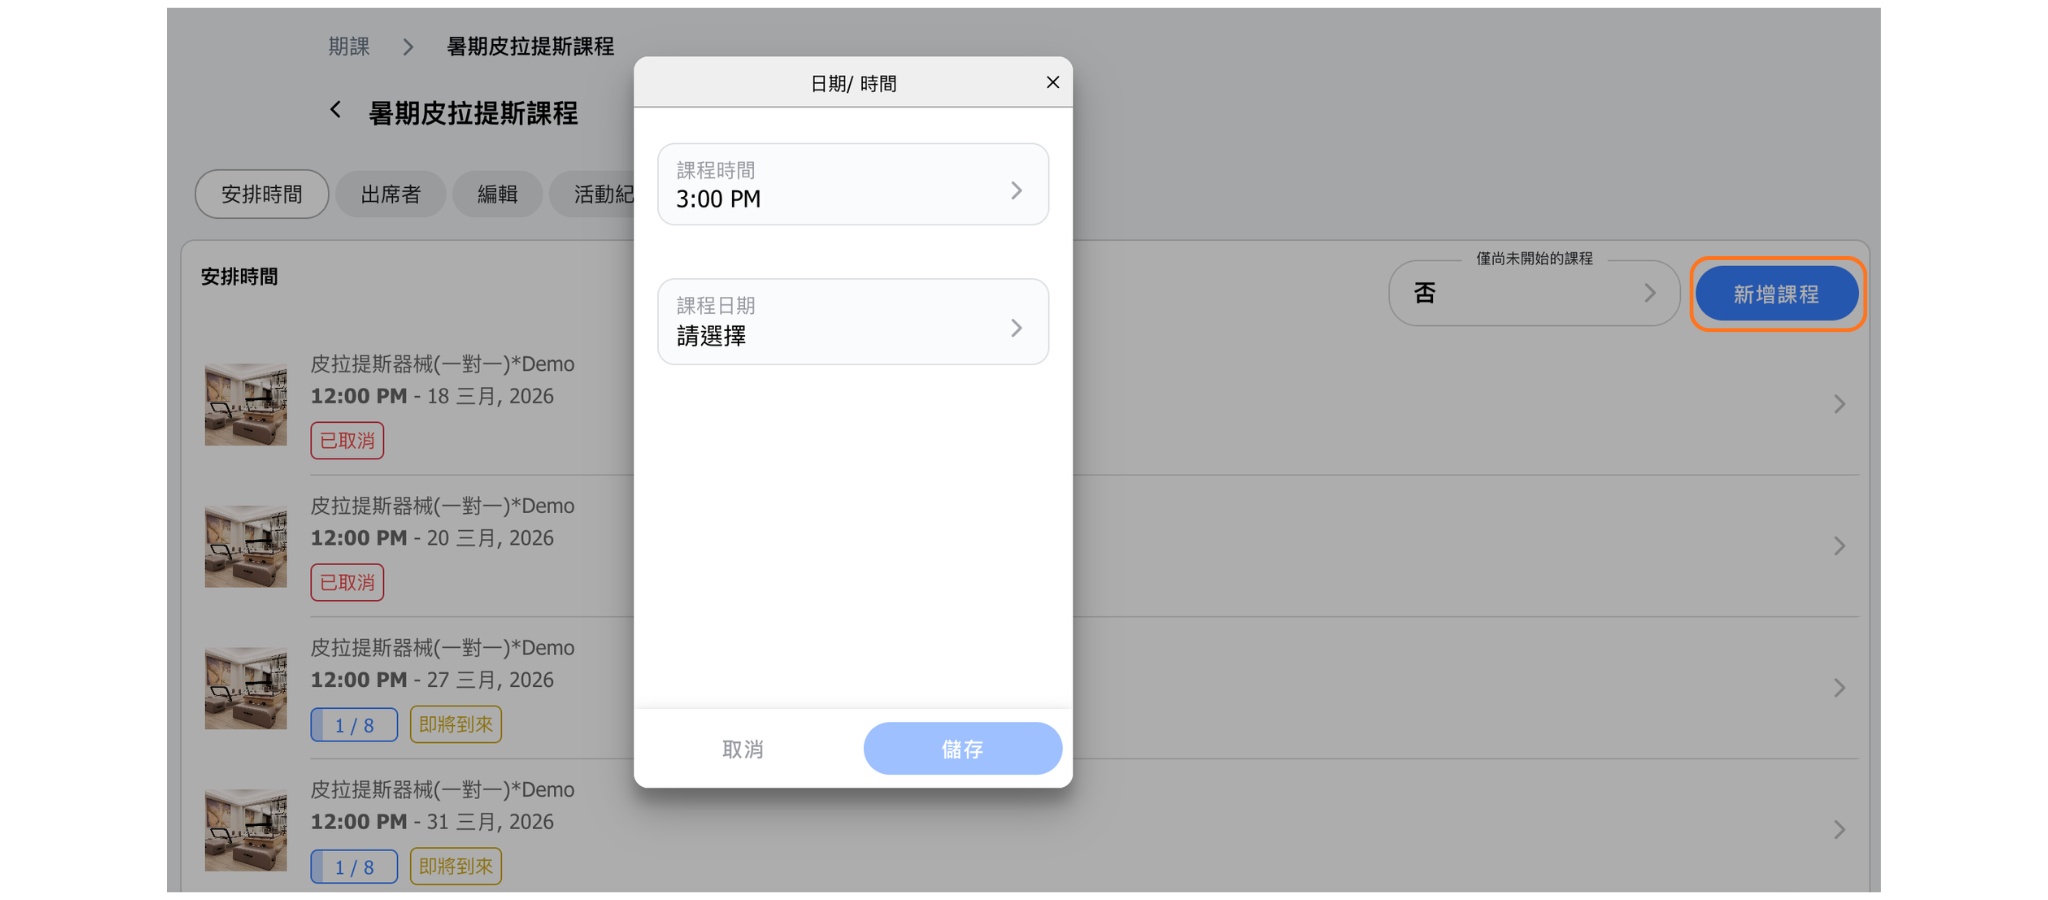
- Select Add class, choose the shared start time and one or more dates, and save the sessions.
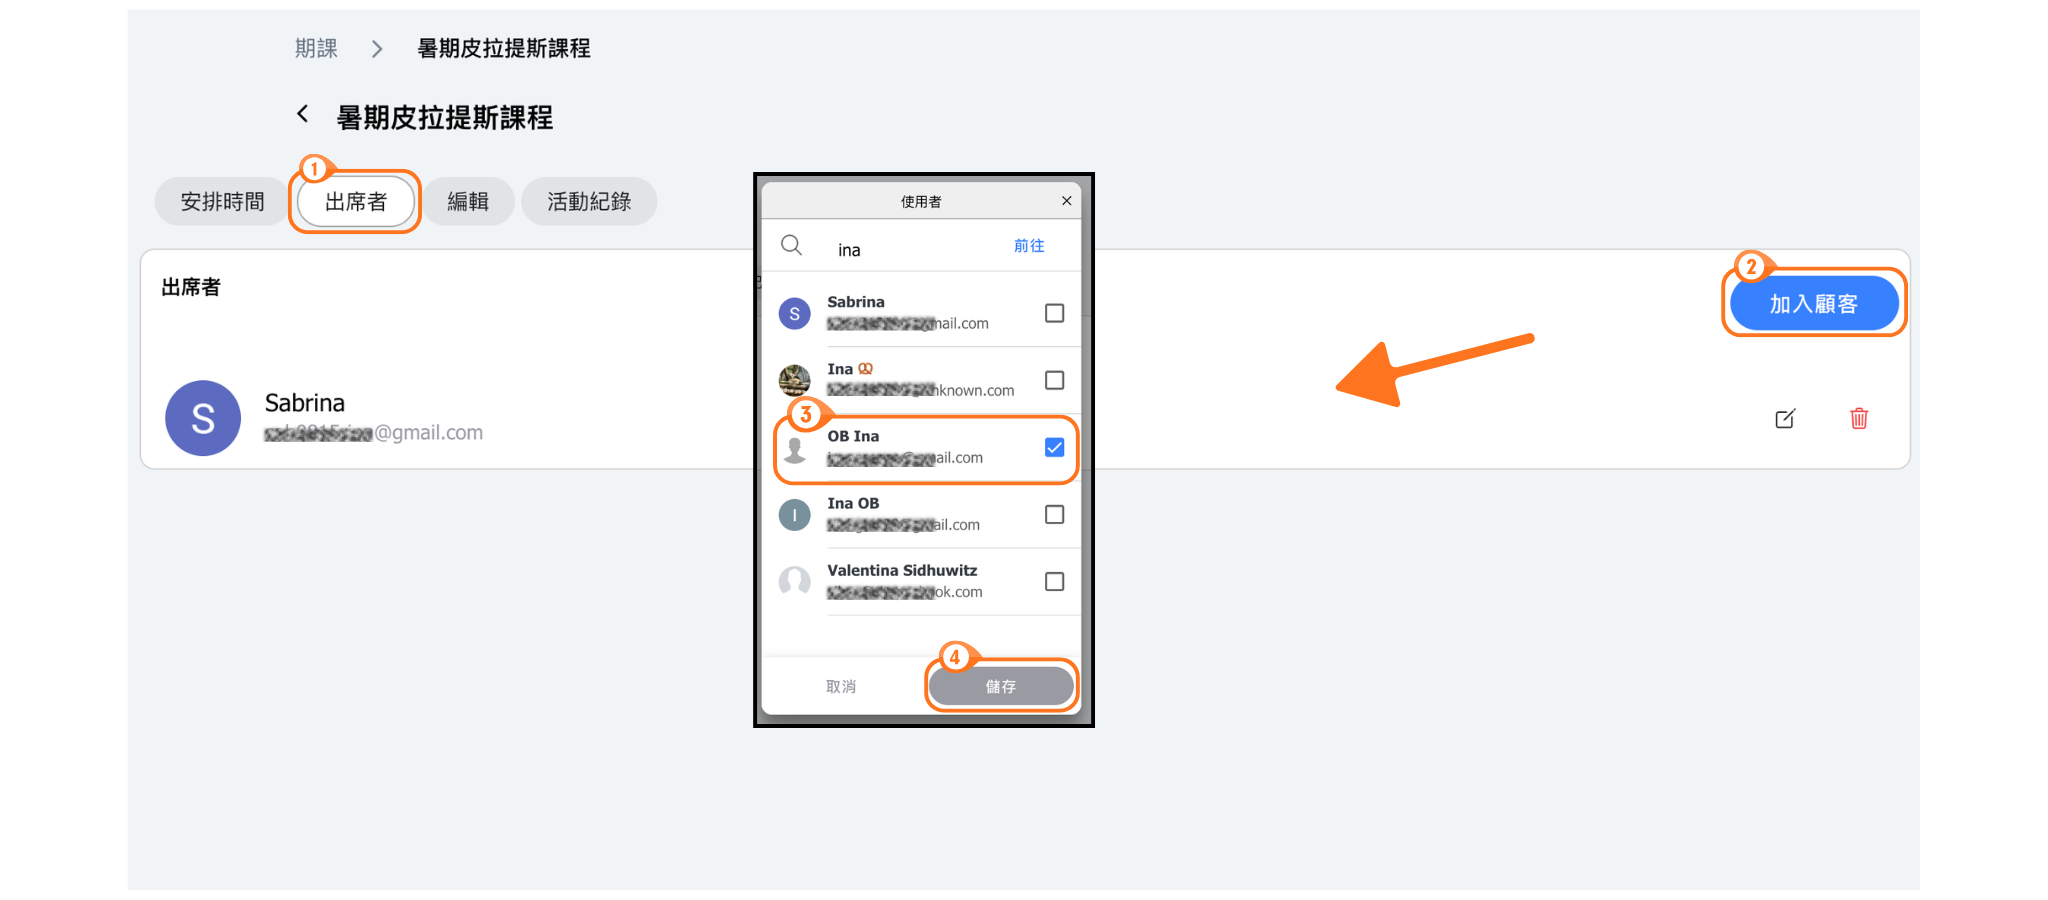
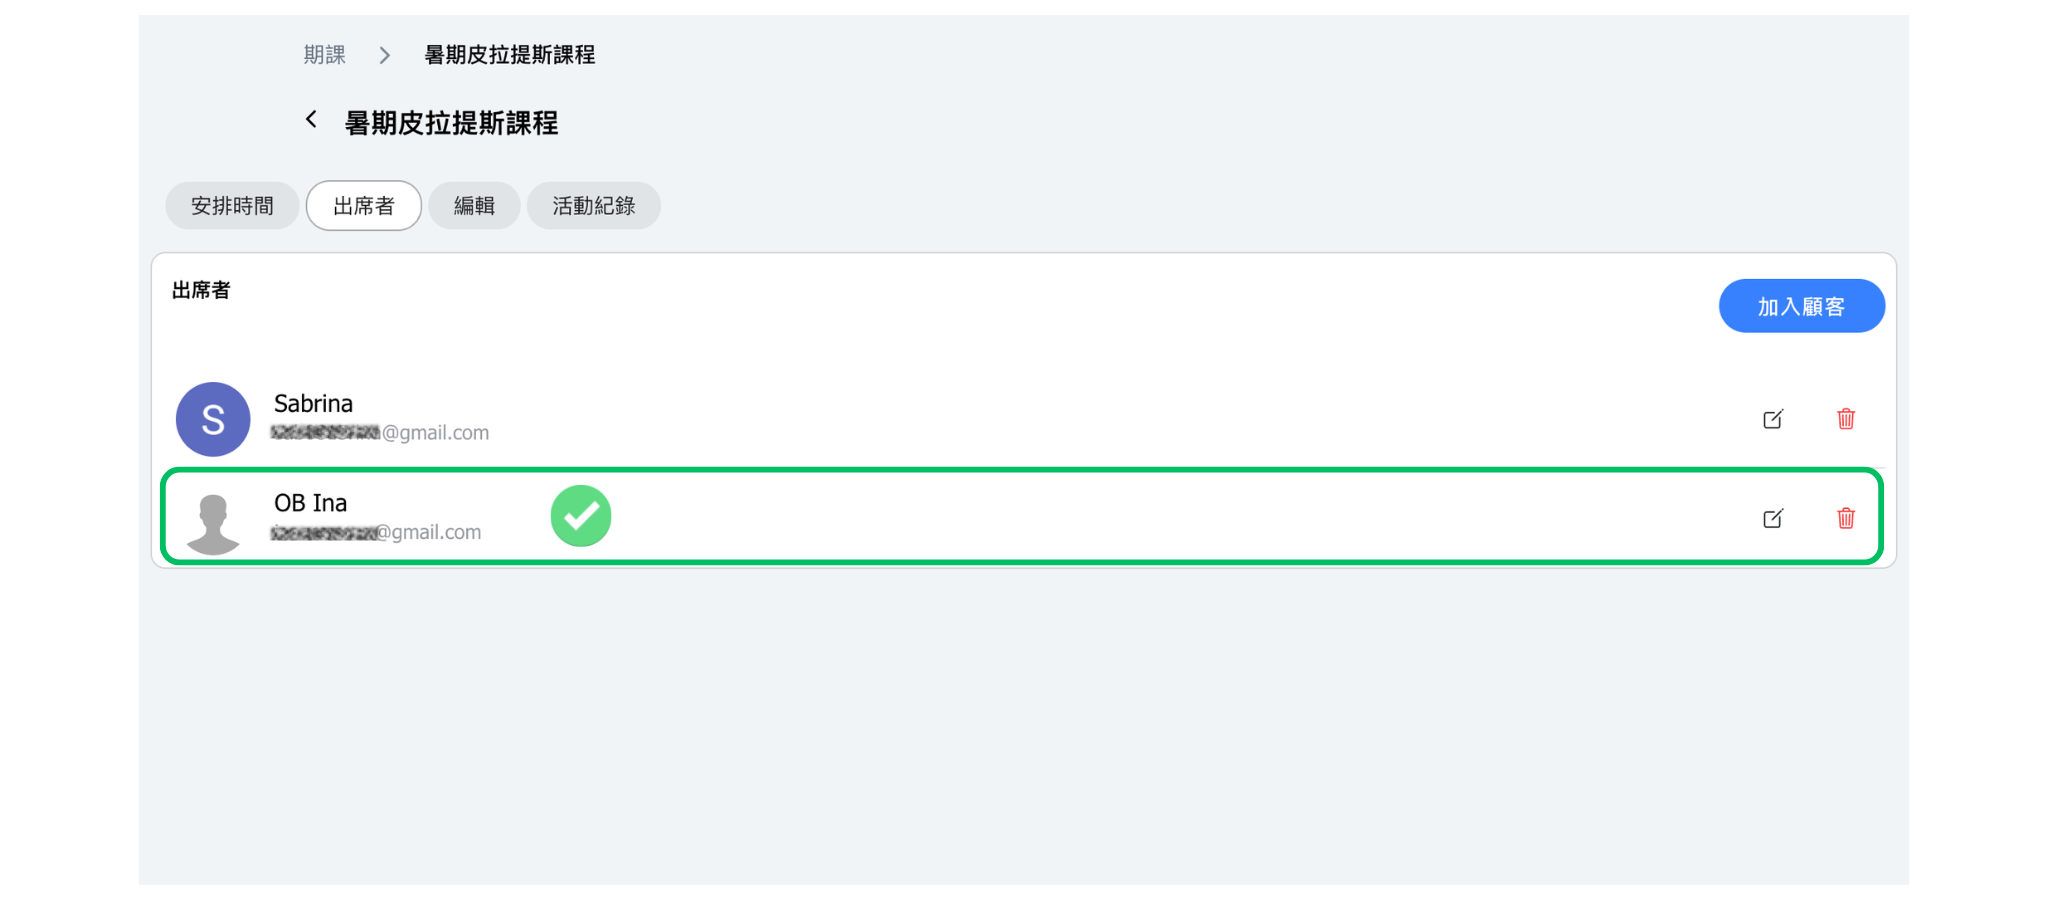
- Open Attendees and select Add customer to build the persistent course roster.

How do I add class dates to a scheduled course?
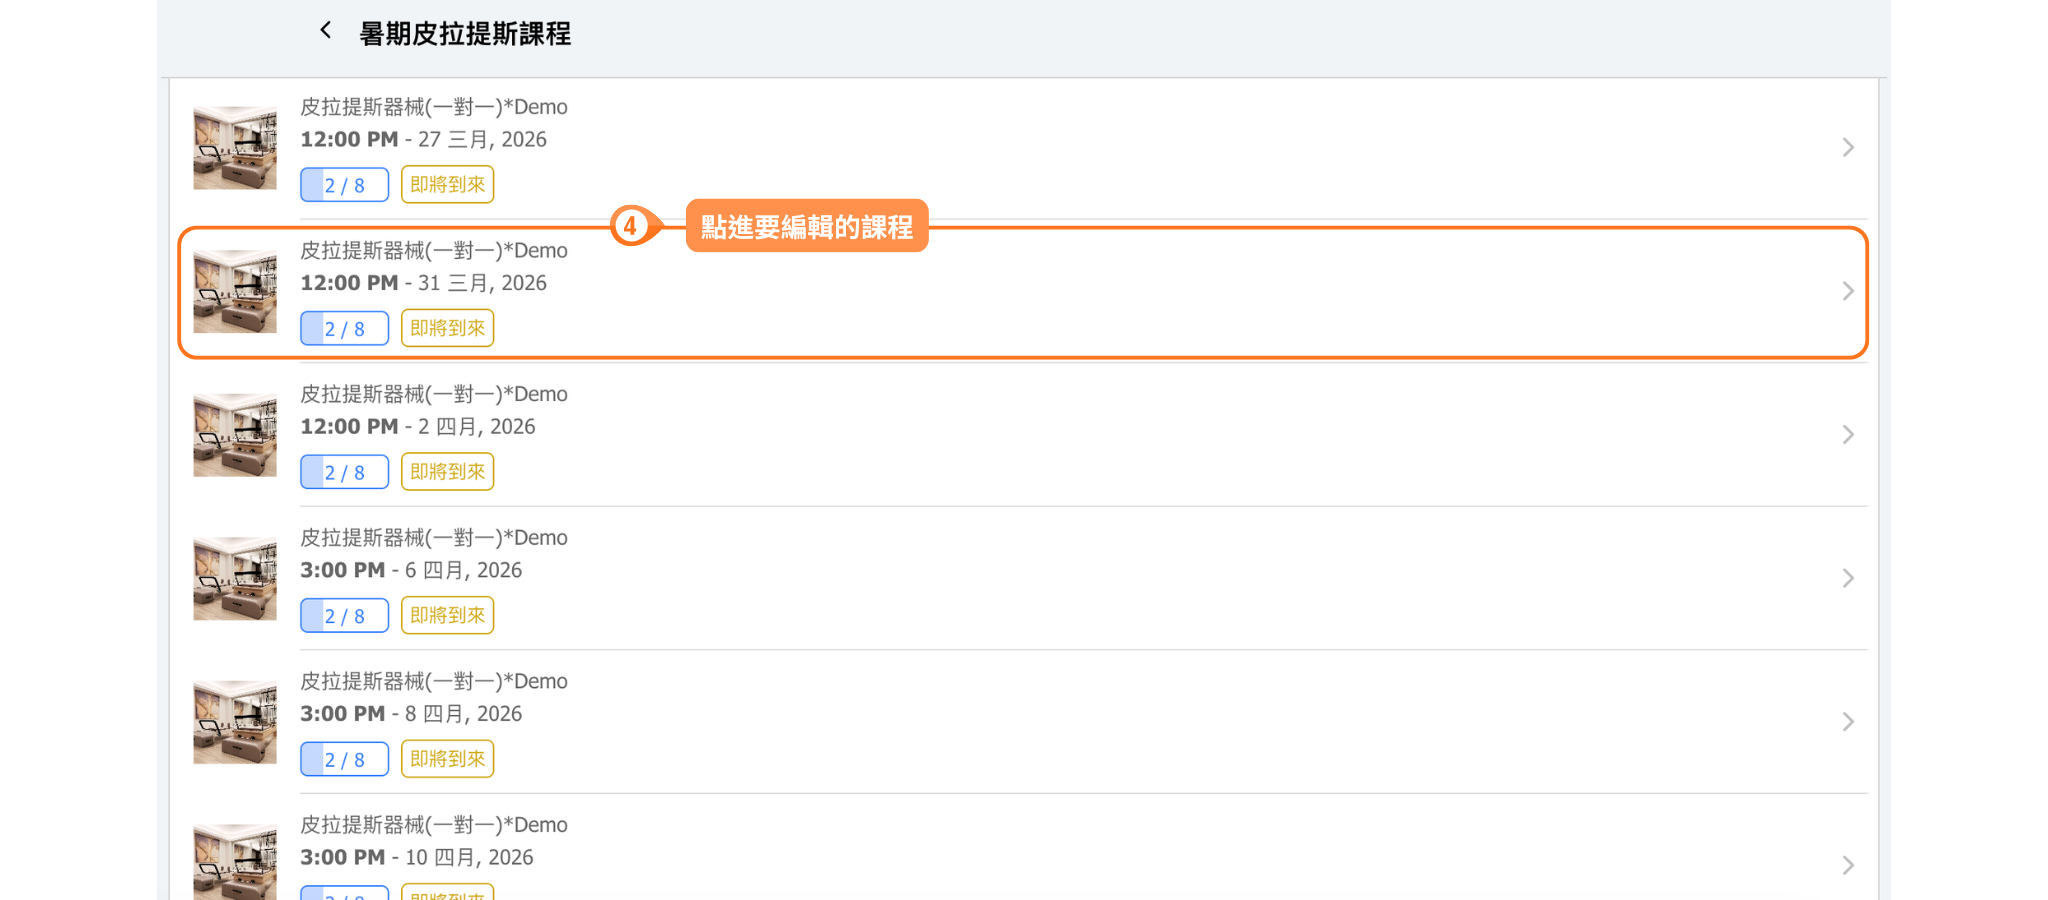
Save the course before adding dates. Open its Scheduled tab and select Add class. Choose one or more dates and the shared start time, then save. New sessions appear in the Scheduled table in start-time order.
Use Upcoming only to switch between every linked session and future sessions only. Select a row to open that session in the calendar, or use its ellipsis menu to message the class, cancel or restore it, and remove a cancelled session.
Update several scheduled sessions
Select the checkboxes beside the sessions you want to change. The action bar provides:
- Settings (cog): opens the bulk settings. Class is listed first, above Class size, Instructor and Time. Turn on Edit beside the setting you want to change, enter the new value, and save to apply it to every selected session.
- Cancel: cancel the selected sessions after confirmation.
- Restore: restore selected cancelled sessions.
- Remove: permanently remove the selected sessions after confirmation.
Change the class for several sessions
- Select the checkboxes beside the scheduled sessions.
- Select the cog to open the bulk settings.
- Turn on Edit beside Class.
- Choose one class. A class is required; saving without one shows an error.
- Select Save.
Changing the class keeps each session's existing points, room and capacity. Turn Edit off again if you decide not to change the class.
Use these actions only after checking the selected count and sessions. The table refreshes after a successful settings update.
How do I enroll students in a scheduled course?
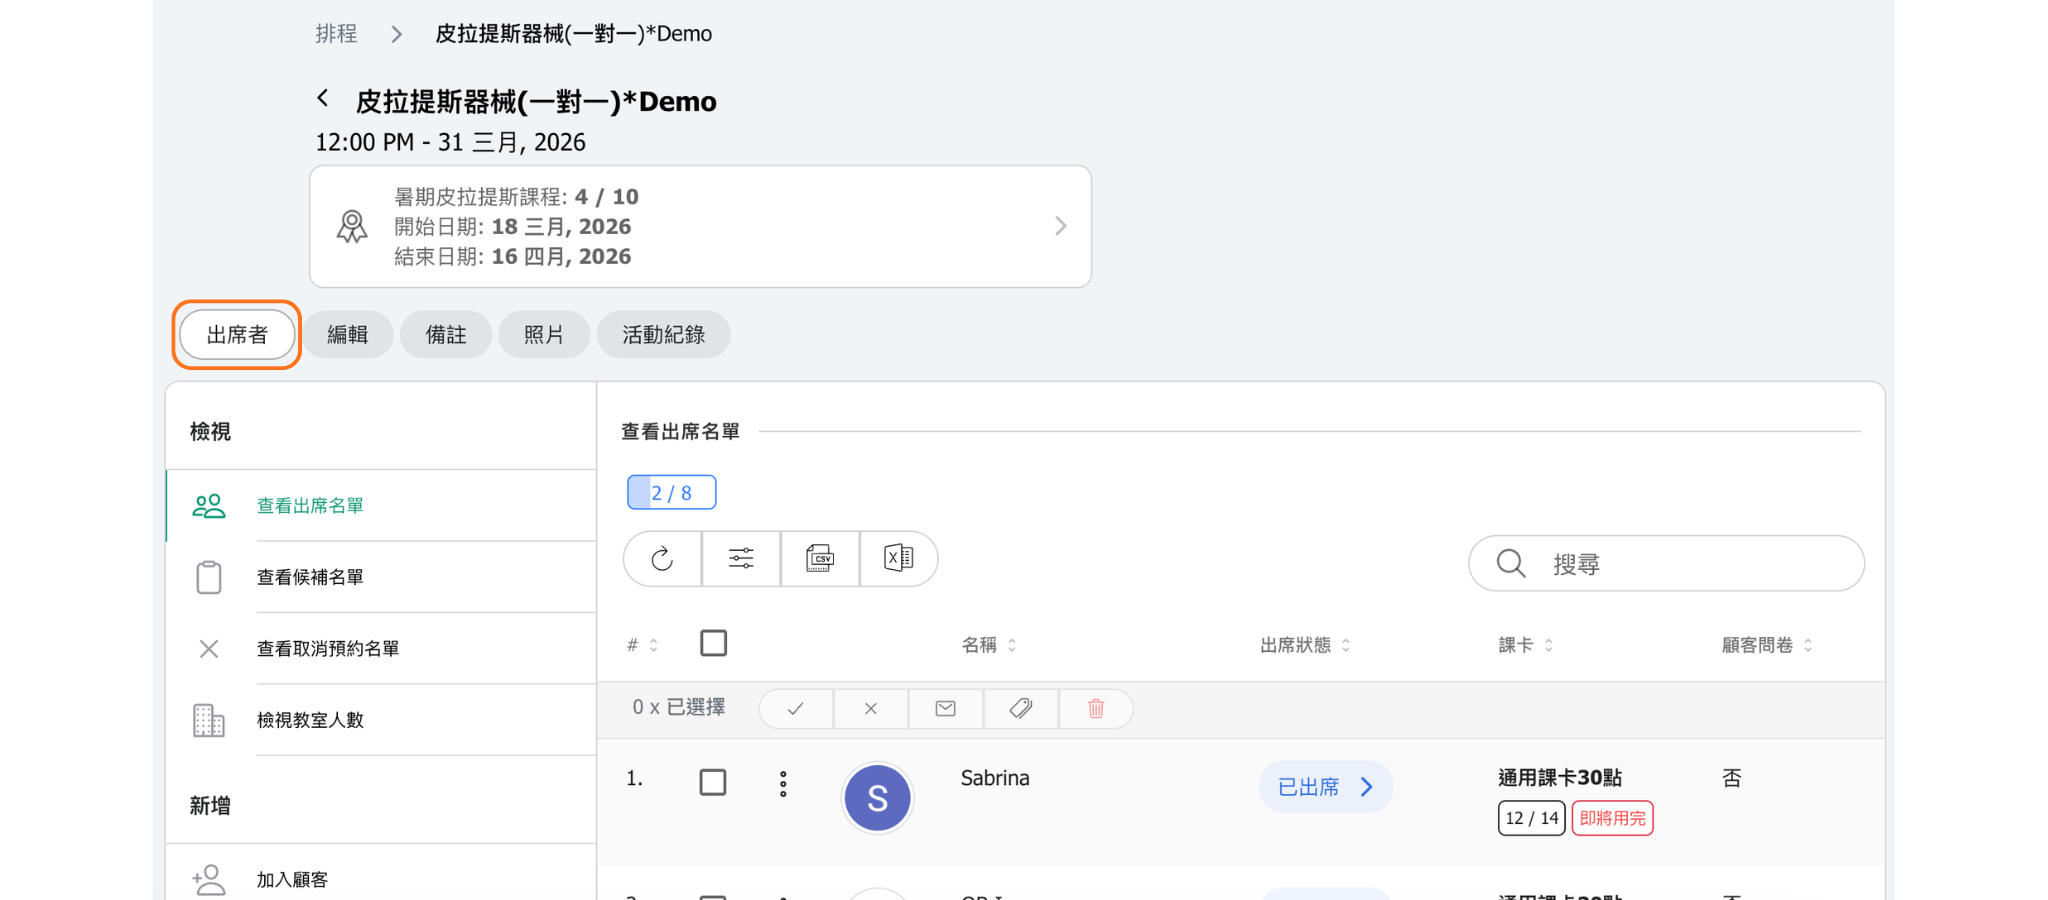
Open a saved course and select Attendees. The shared table shows each roster member's name, email, and Added time, which records when that customer was added to the course roster. Use search, refresh, and column customization to review the list.
Add customers
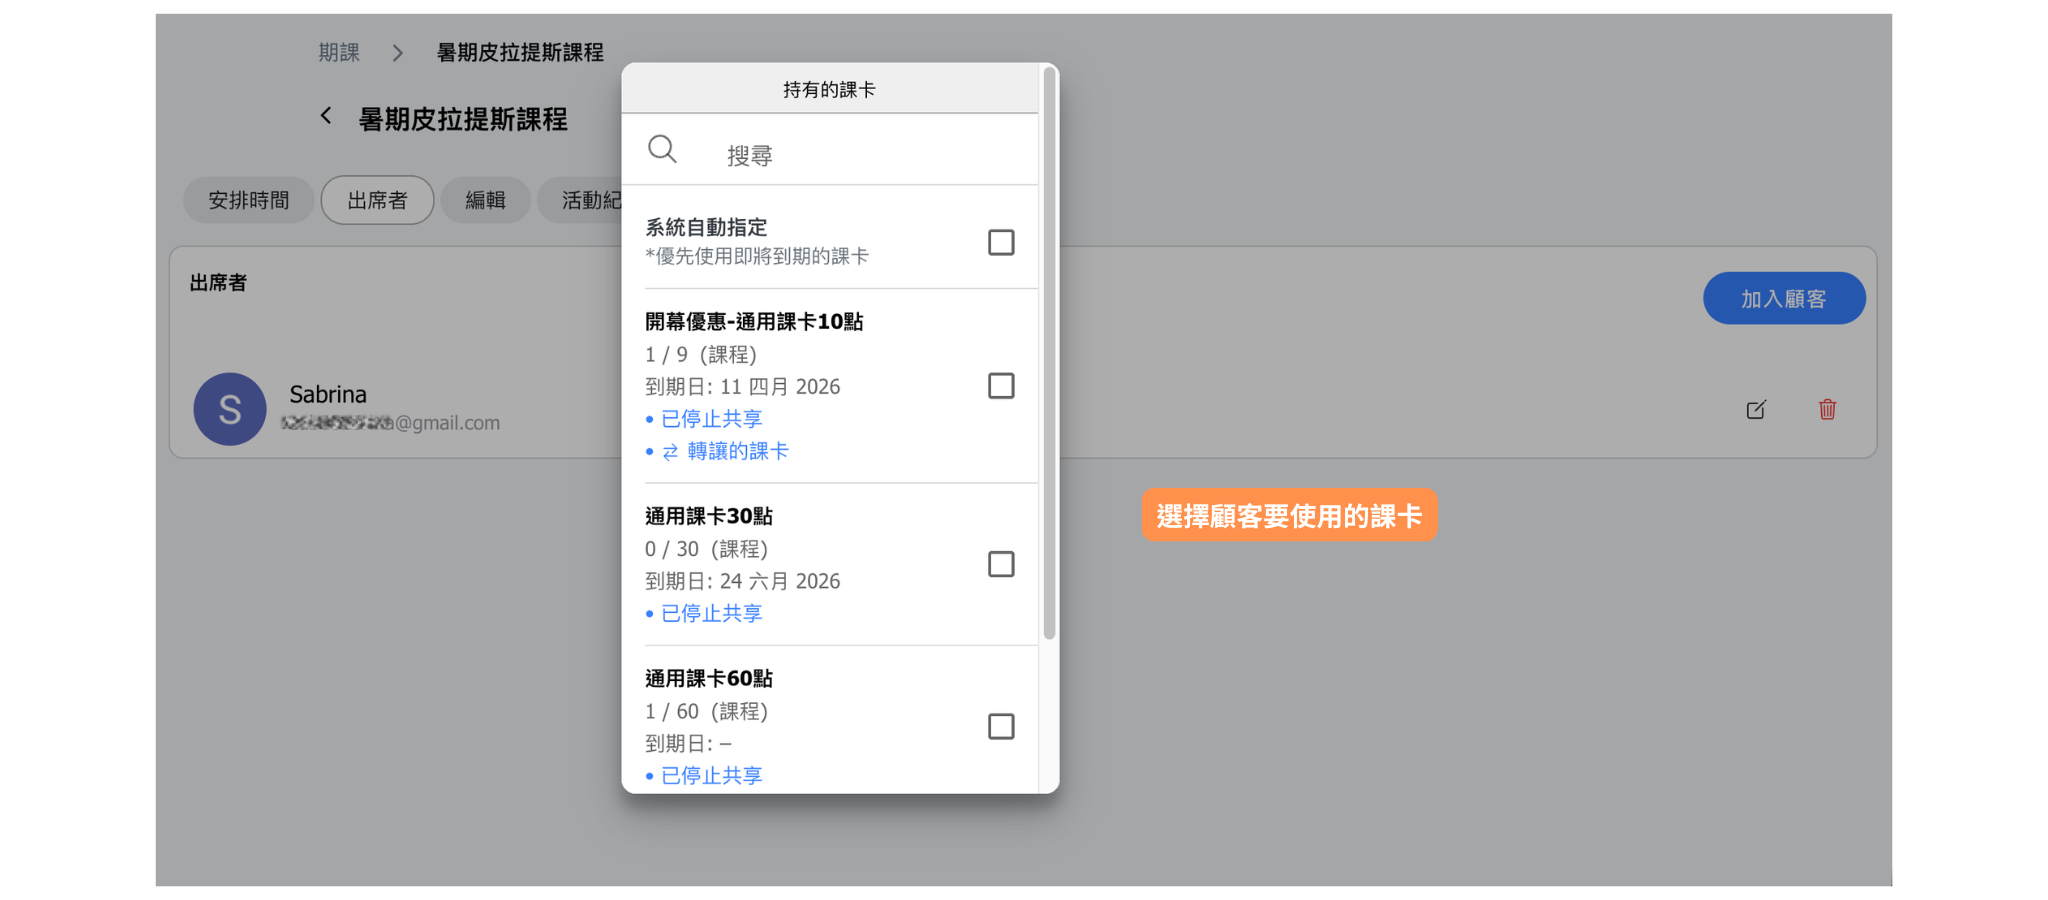
Select Add customer, search for the customer or customers, and confirm the addition. When one customer is selected, the flow may let you choose the pass used for the linked reservations. The course roster is persistent and can add the customer to the course's linked sessions.
Manage one attendee
Open the row's ellipsis menu. Edit lets you change the dependent when Customer dependents is enabled. Remove asks whether to update upcoming sessions only or every linked session. This Attendees table currently manages customers one at a time; the multi-row checkbox and cog actions belong to the Scheduled sessions table.
What's the difference between scheduled courses, repeating classes, and one-off classes?
Understanding when to use each scheduling type:
| Feature | Scheduled Course | Repeating Class | One-off Class |
|---|---|---|---|
| Duration | Fixed start and end dates | Ongoing, no end date | Single occurrence |
| Enrollment | Students enroll for entire course | Students book individual classes | Students book single class |
| Best for | Term programs, workshops, intensives | Regular weekly classes | Special events, guest teachers |
| Booking style | Commit to full series | Drop-in or recurring | One-time attendance |
Choose scheduled courses when:
- You want students to commit to a complete program
- The curriculum builds progressively over sessions
- You need to know enrollment before the course starts
- You're offering term-based or semester pricing
How do I edit or cancel a scheduled course?
Go to Schedule → Schedule courses and open the course. Use Edit for course-level content and settings, Attendees for its persistent roster, and Scheduled for individual linked sessions.
On Scheduled, open a session's ellipsis menu to cancel or restore that one session. A cancelled session can then be removed. To apply the same action to several sessions, select their checkboxes and use Cancel, Restore, or Remove in the bulk action bar. Use the cog when the same class or class size should be applied to every selected session.
Ending or deleting the whole course is a separate action on the Schedule courses list. Review attendees and linked sessions before destructive changes, and communicate schedule changes to enrolled customers.
How booking cutoffs work on a course
Selecting a class copies its current booking-cutoff choice into the course. The course may follow the business default from Settings → Reservation or keep its own value before, at, or after session start. Sessions added to the course receive the course setting.
Existing sessions store their own setting. When the course cutoff changes, choose Upcoming only or All classes as appropriate; even All classes updates only eligible linked sessions with no attendees. Inspect an individual occurrence when diagnosing one date or when it was excluded from propagation.