Schedule Module - How to Assist Customers with Booking a Class
Suppose the administrator needs to assist customer "Emma" in booking the "Stretching and Flexibility Training class taught by Norma at 3:00 PM on 5/8."
[Instructions]
- Click Calendar in the left menu.
- Select a course.
- Click Add Customer.
- Choose a customer.
- Select the course card to use for the booking.
- Click Save.
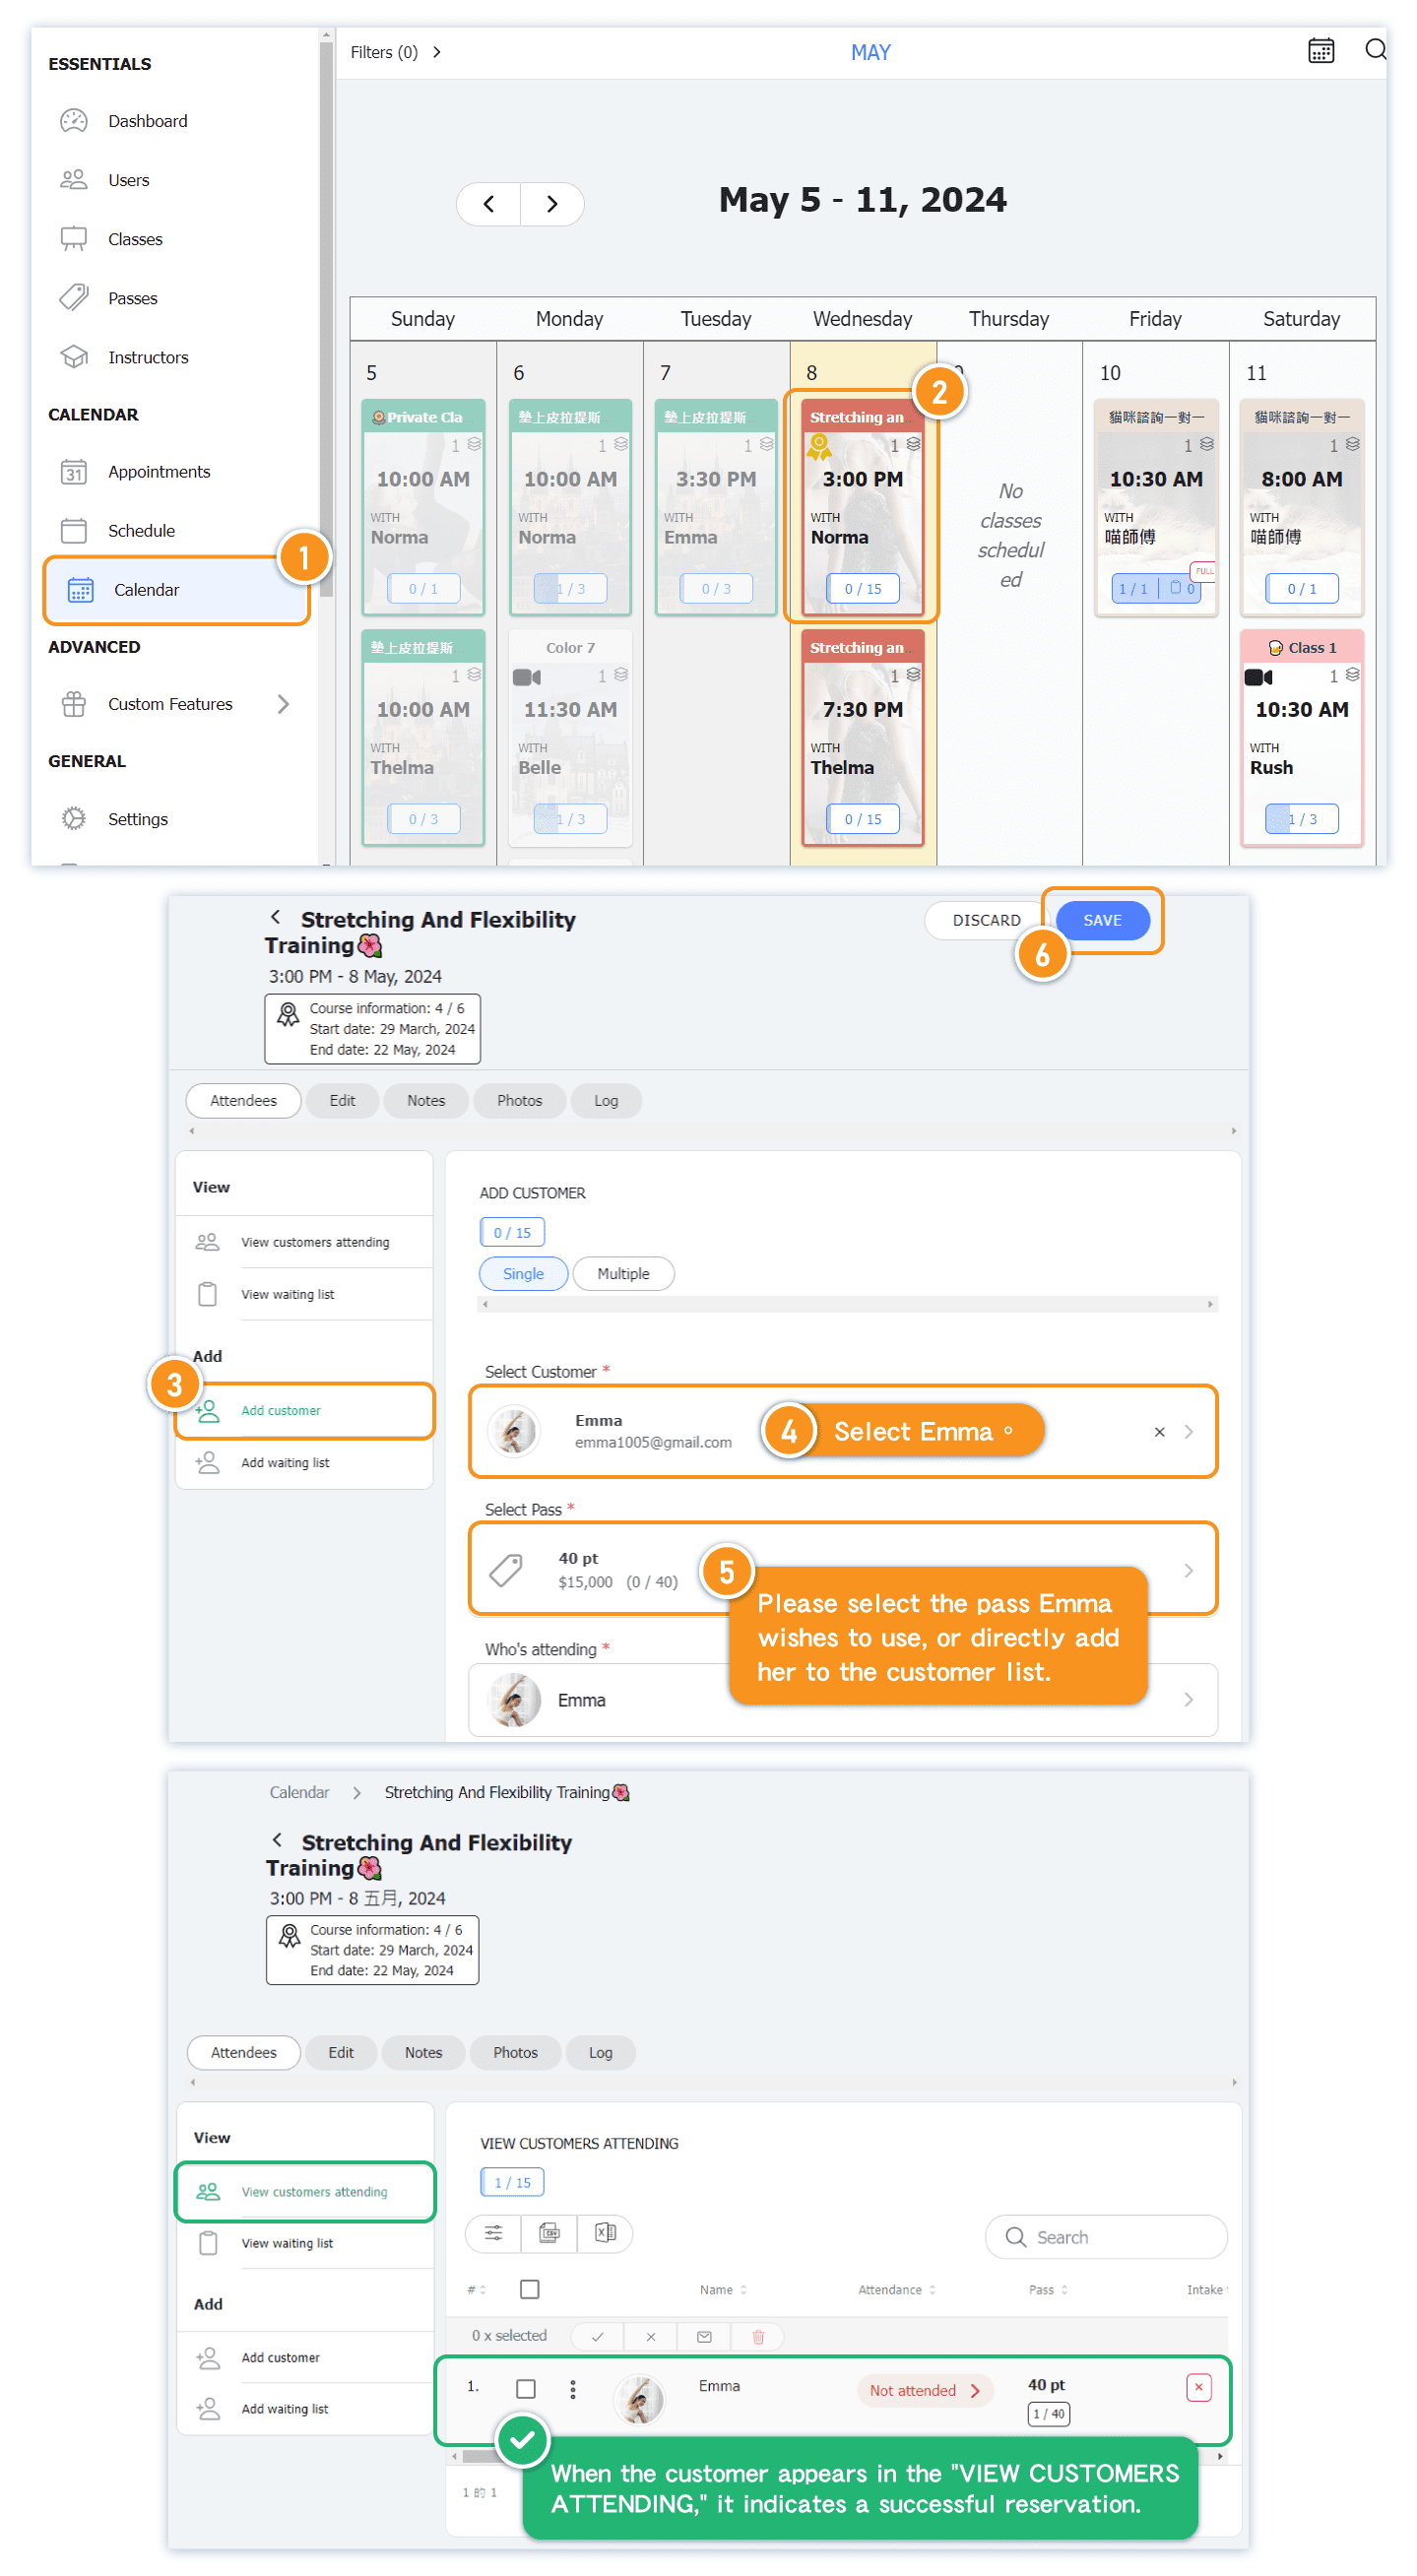
Before making a reservation, it’s recommended that administrators confirm with the customer which pass they wish to use. If you want to allow students to book first and pay later, you can select "Unpaid Class" when assisting with the reservation. Once the student purchases a pass later, you can link it to the reservation.
Note: Customers can still change the pass used for the reservation later. 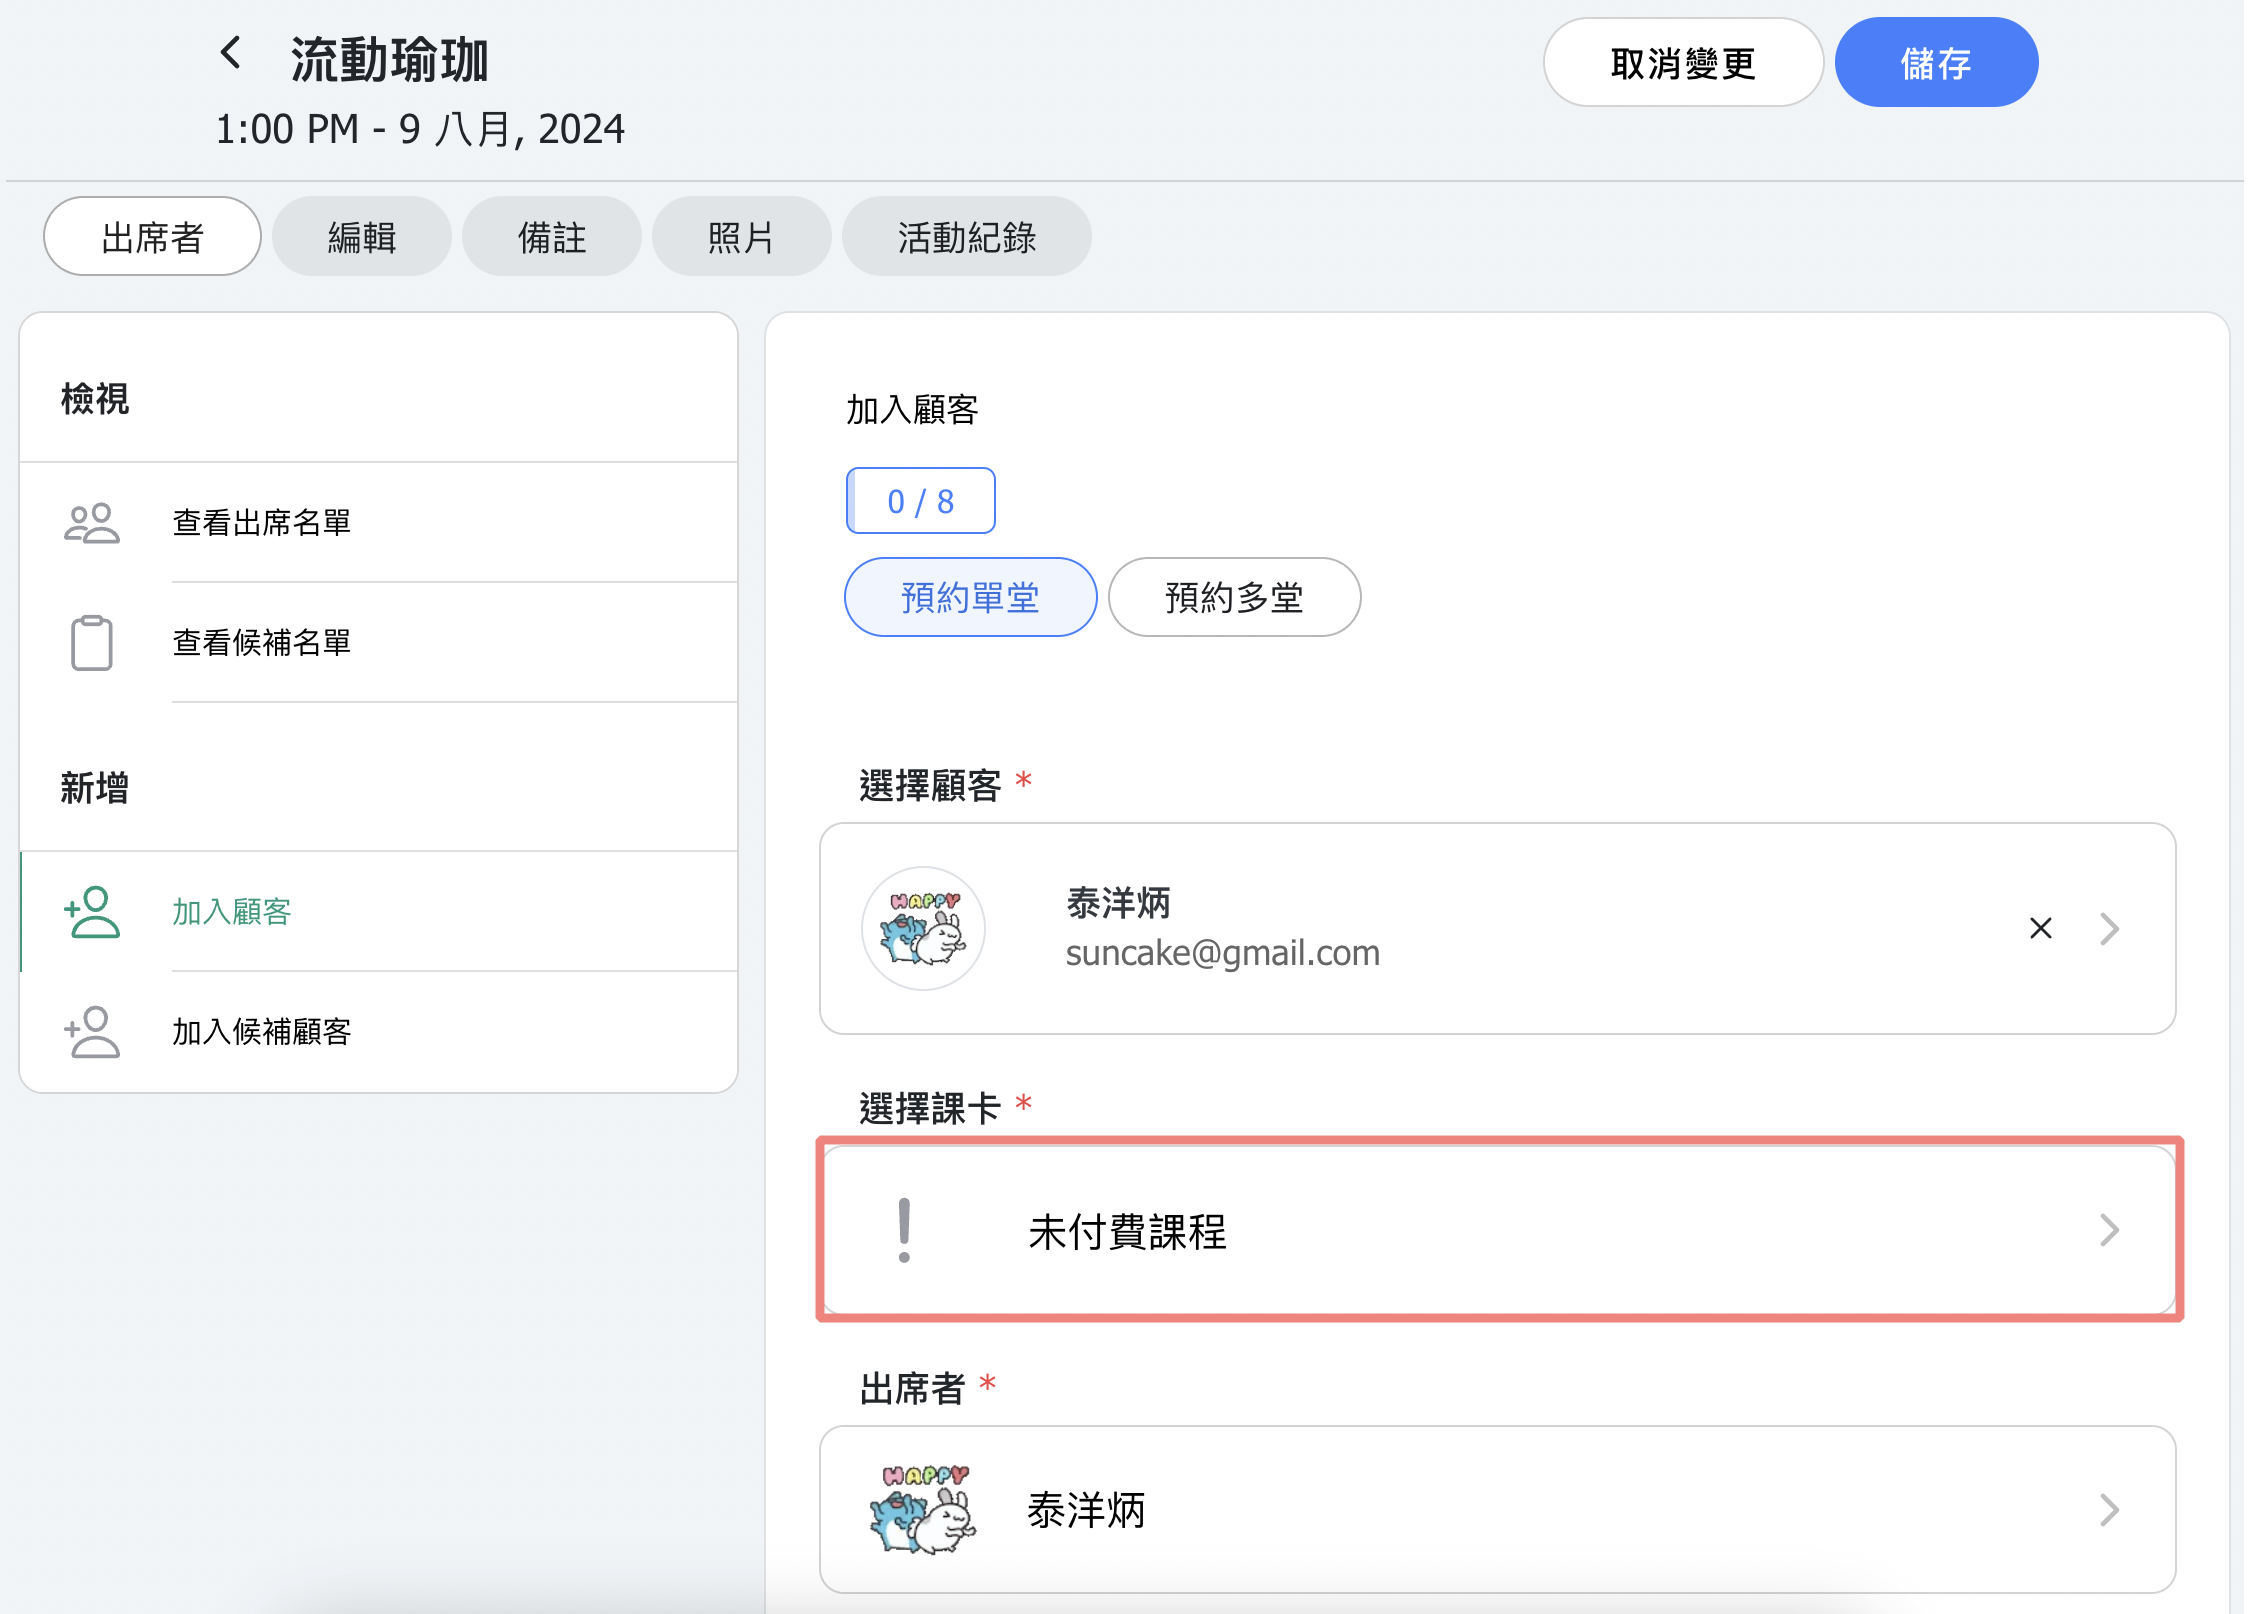
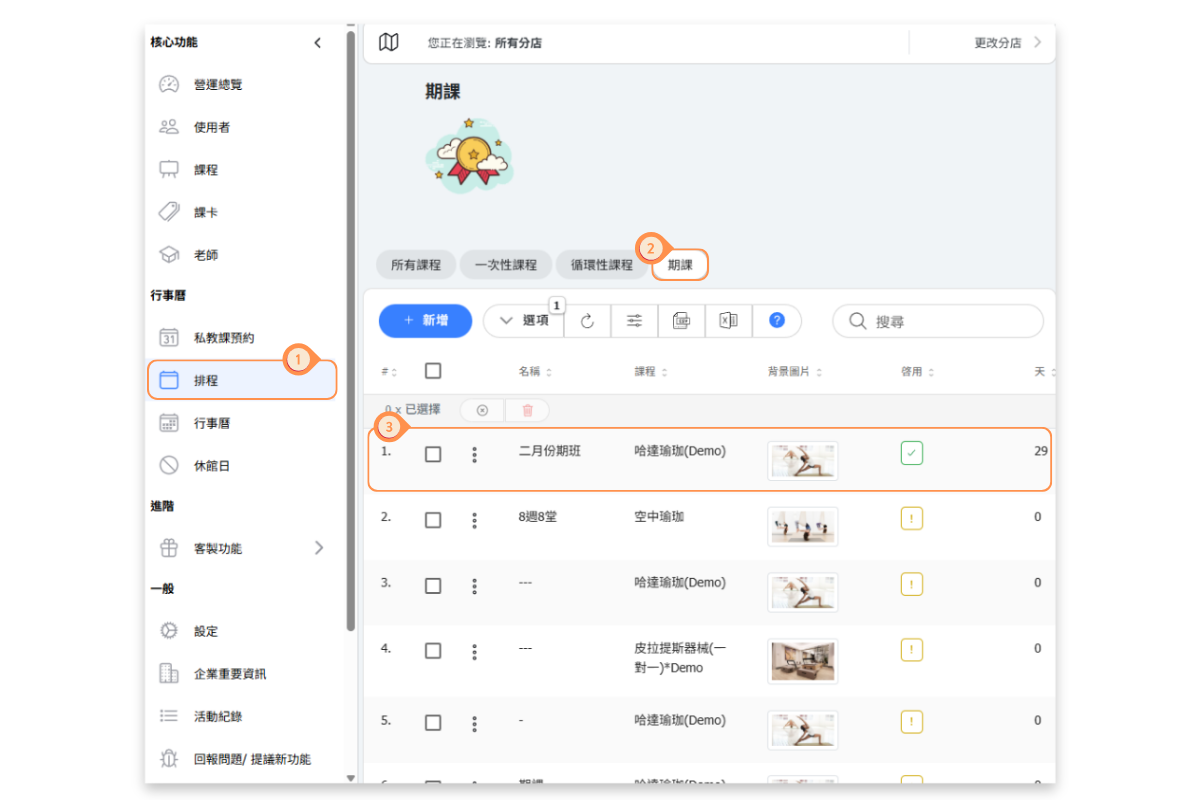
Schedule Module - How to Assist Customers with Booking Schedule Courses
Assuming instructor Amelia has offered a course "myofascial relaxation", and customer Amy is a regular attendee. The admin can assist customer Amy in booking all scheduled classes for this course (adding the customer to the attendee list for this course). After the admin assists with the reservation, customers can directly view upcoming classes in the inbox "Upcoming Classes", they don't need to book class one-by-one.
Note: Customers can still change the pass used for the reservation by themselves afterward. (Refer to this article below "How Customers Can Change the Pass Used for a Reservation")
[Instructions]
- Click Schedule in the left menu.
- Select the Recurring Courses tab.
- Click a recurring course.
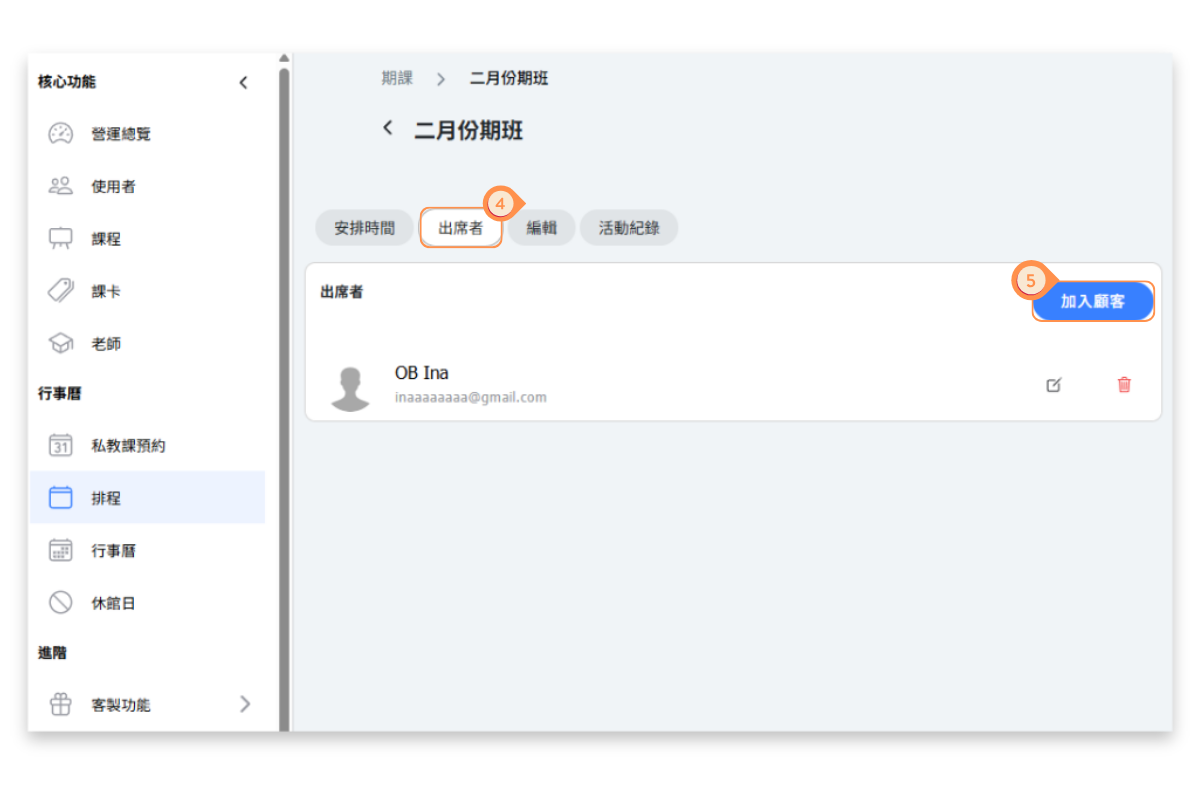
- Select the Attendees tab.
- Click Add Customer.
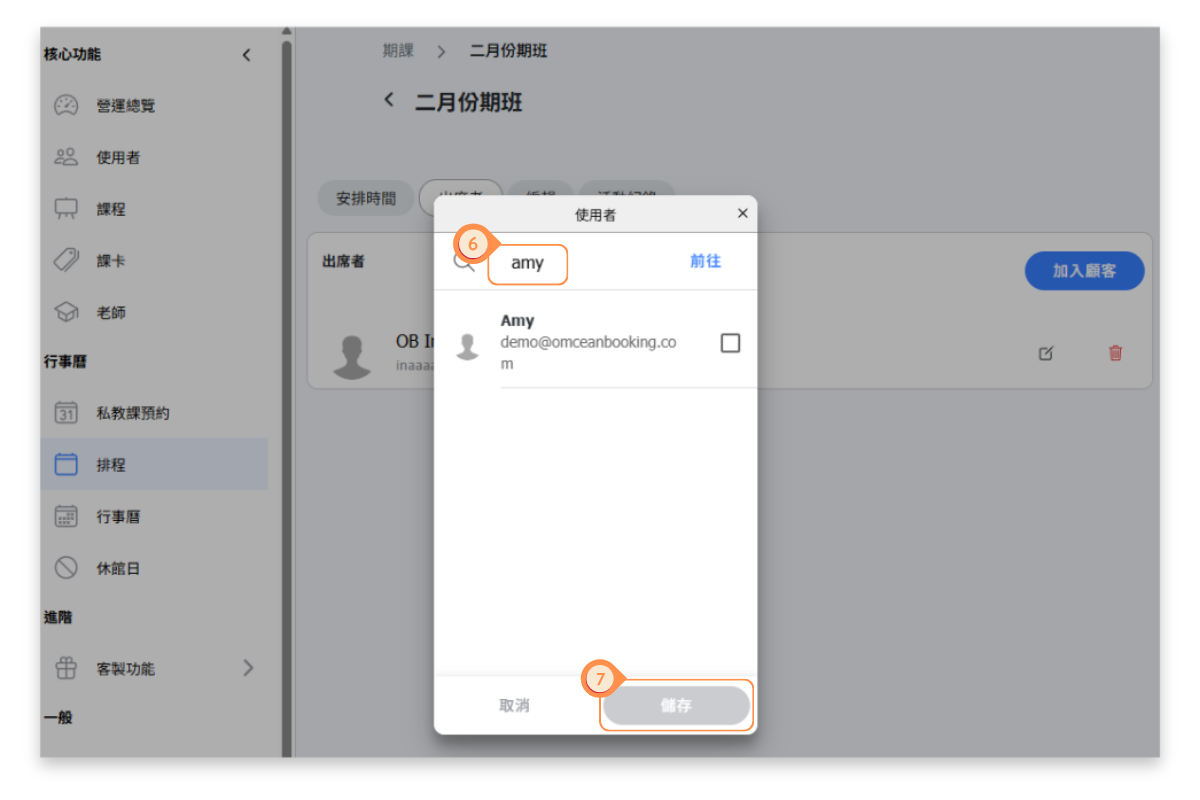
- Enter the account of the customer who will attend.
- Click Save.
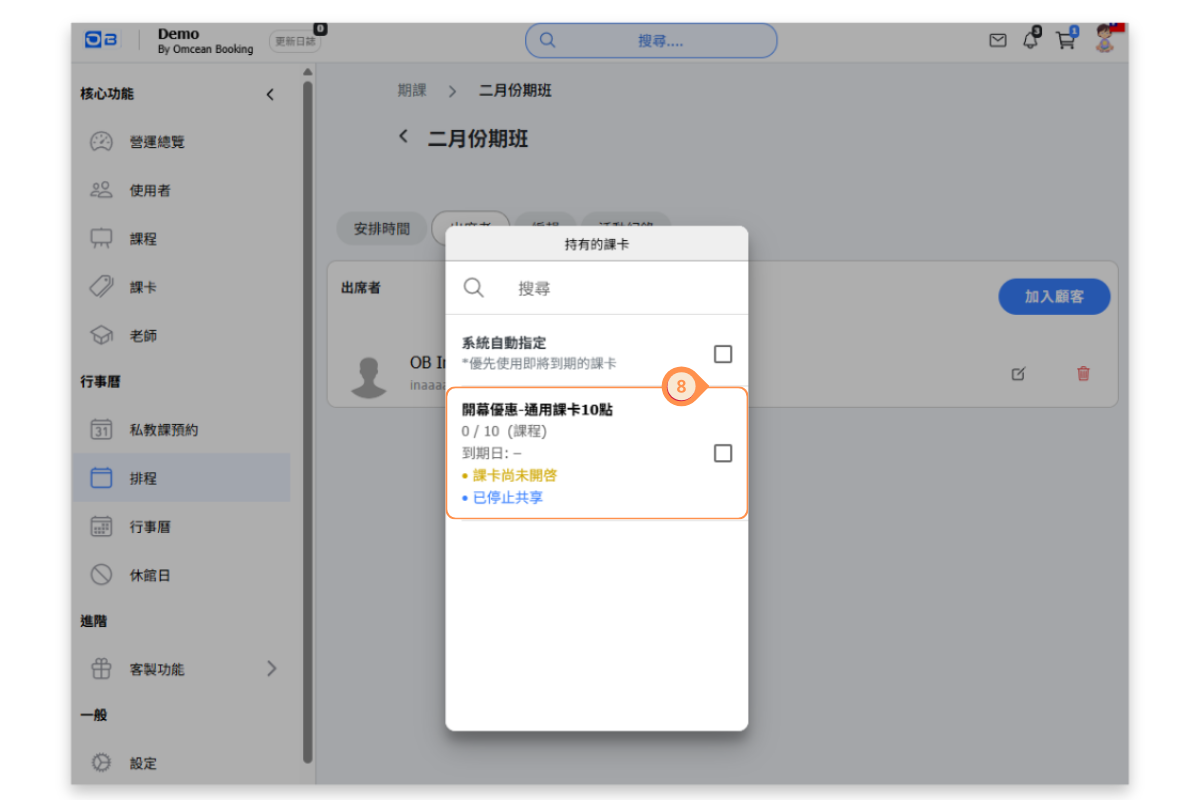
- Choose the course card the customer will use, or select Auto Assign by System.
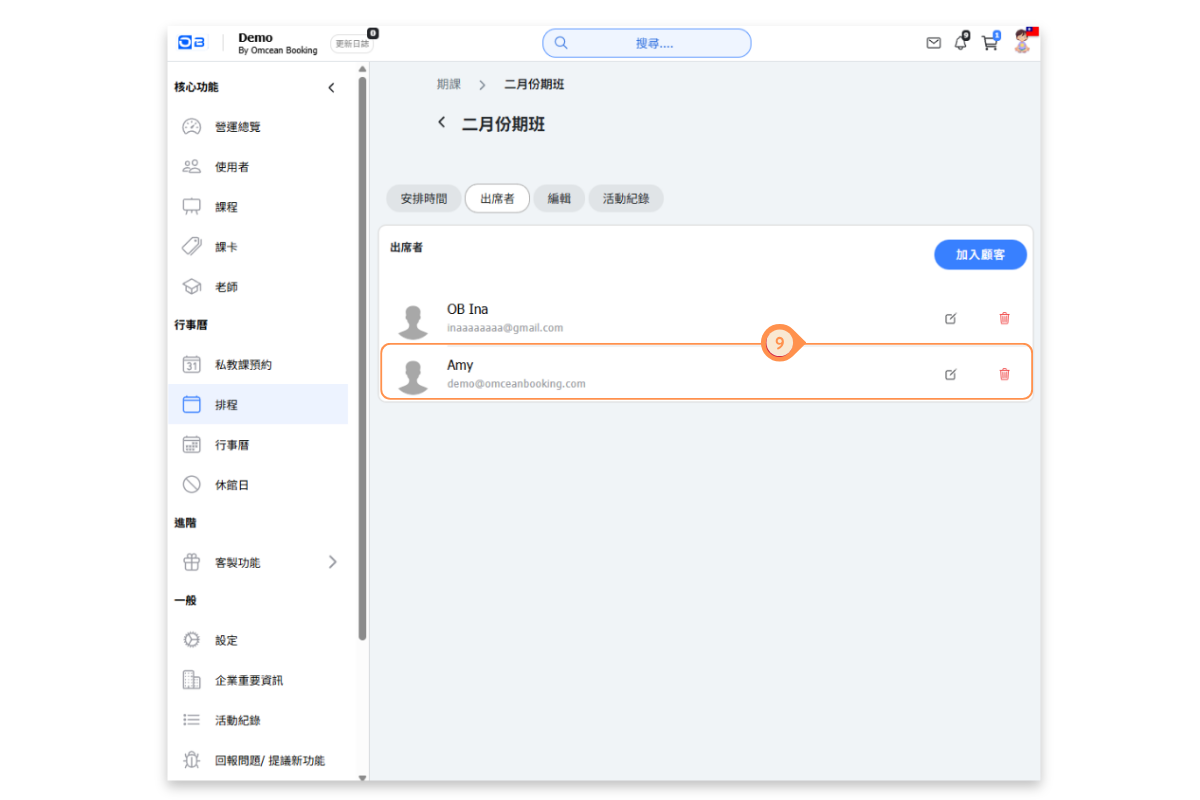
- You will then see the customer appear in the attendee list.
- On the customer’s page, the course will appear in the inbox under Upcoming Courses, labeled as a recurring course.
Appointments Module - How to Assist Customers in Reserving from Available Time Slots
When you choose this way to assist customers with reservations, you can select multiple available time slots at once for bulk booking.
[Instructions]
-
Select Bookings from the left menu.
-
Click + Add.
-
Select a course.
-
Choose an instructor.
-
Select one or more booking time slots.
-
Click Continue.
-
Select the customer account for the booking.
-
Choose the course card held by the customer.
-
Click Book.

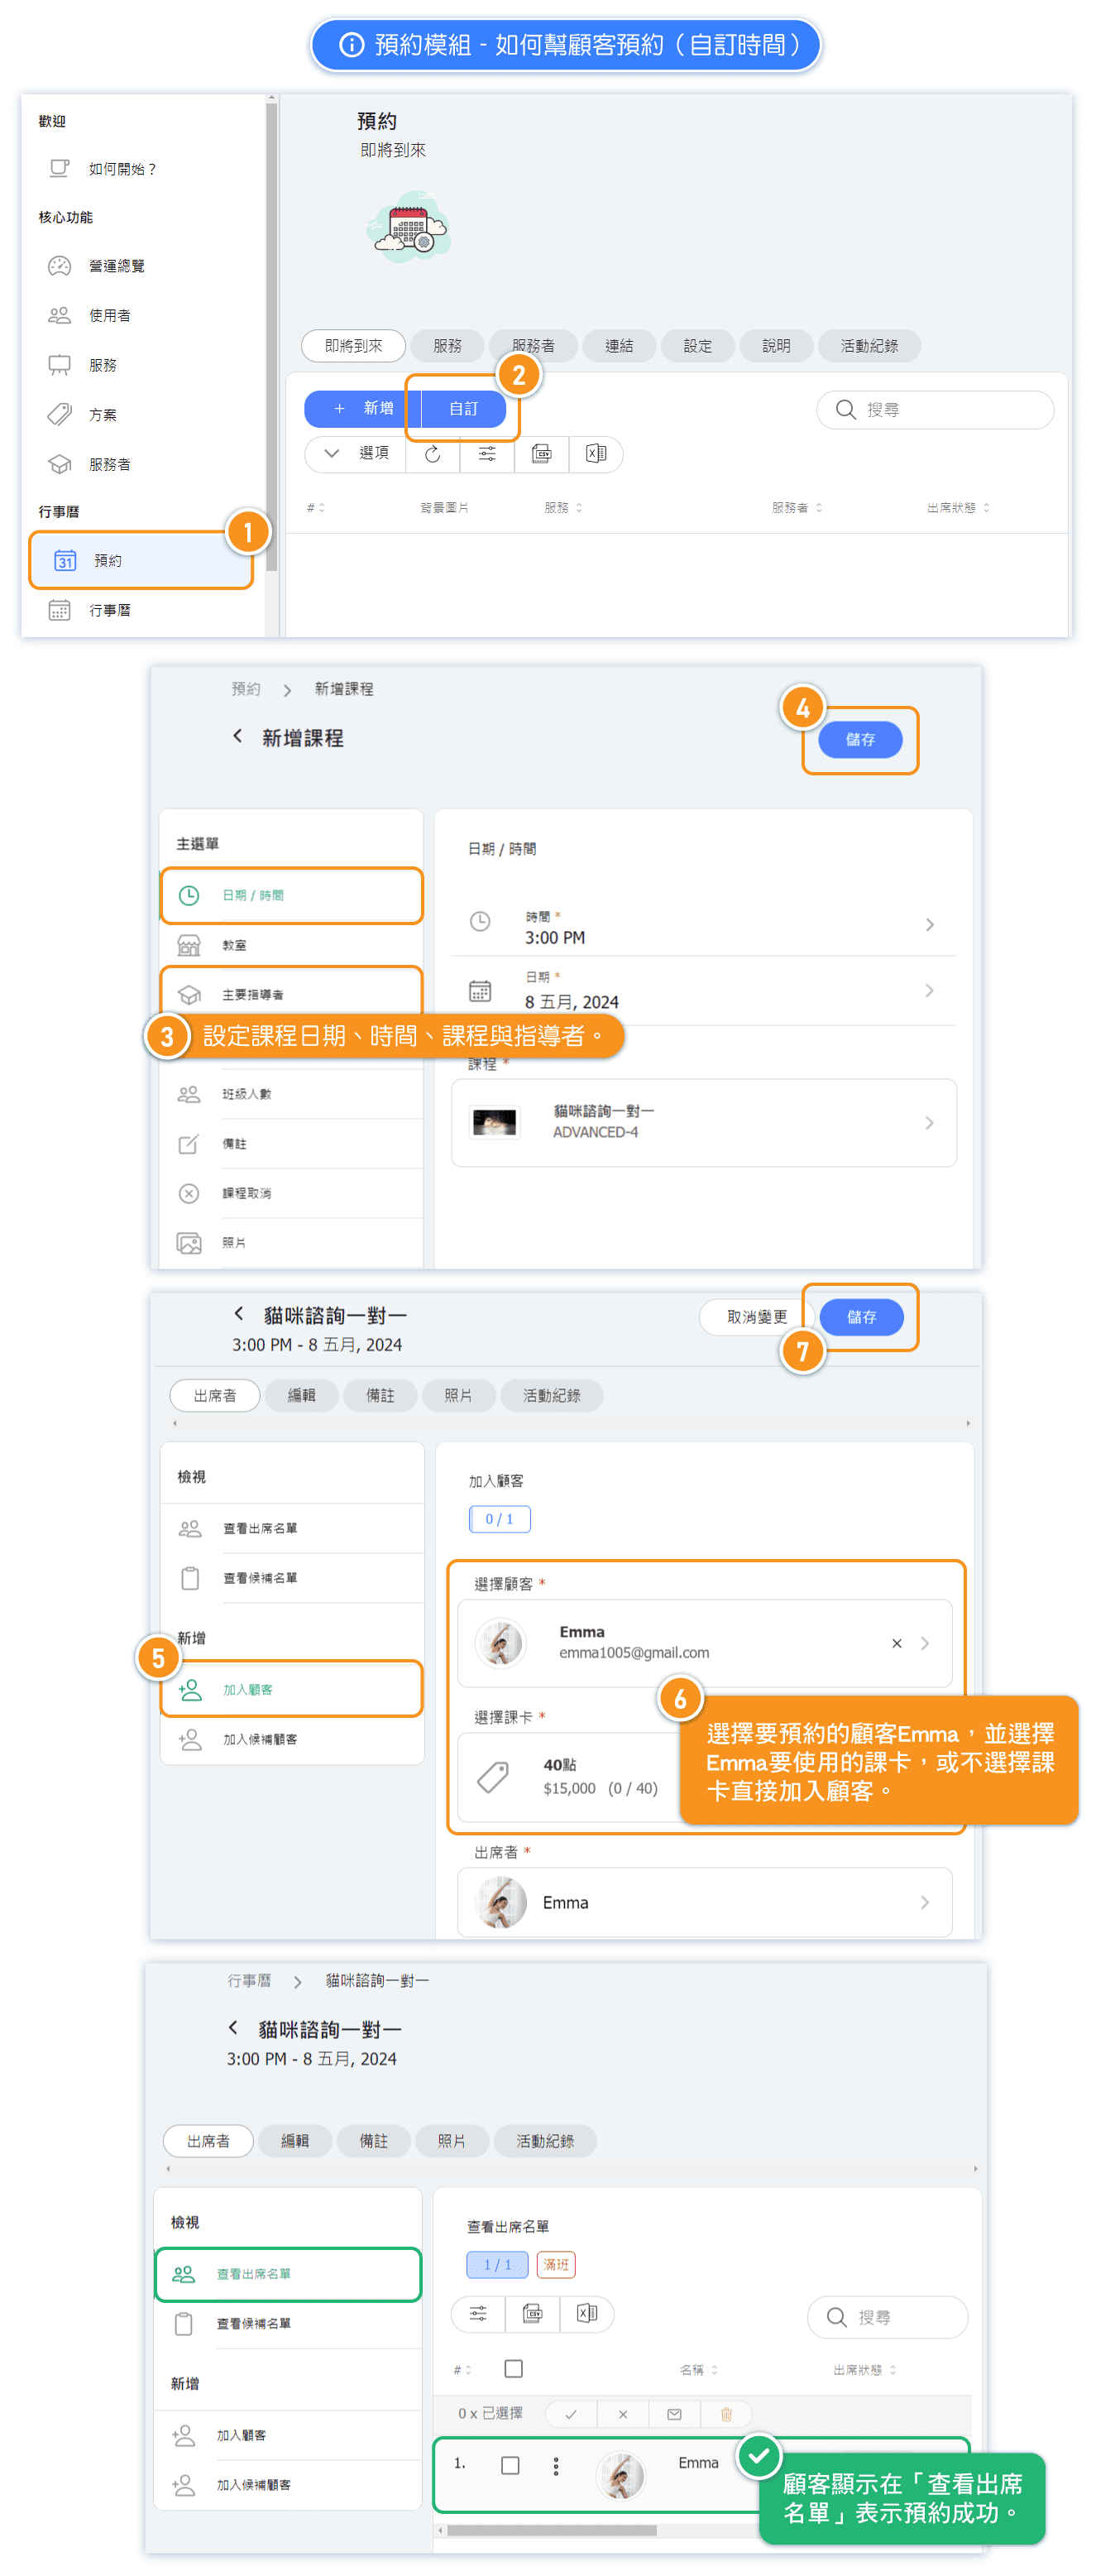
Appointments Module - How to Add Custom Time Slots for Customer Reservations
[Instructions]
-
Select Bookings from the left menu.
-
Click Custom.
-
Set the course date, time, course, and instructor.
-
Click Save.
-
Click Add Customer.
-
Select the customer account to be booked and the course card held by the customer.
-
Click Save.

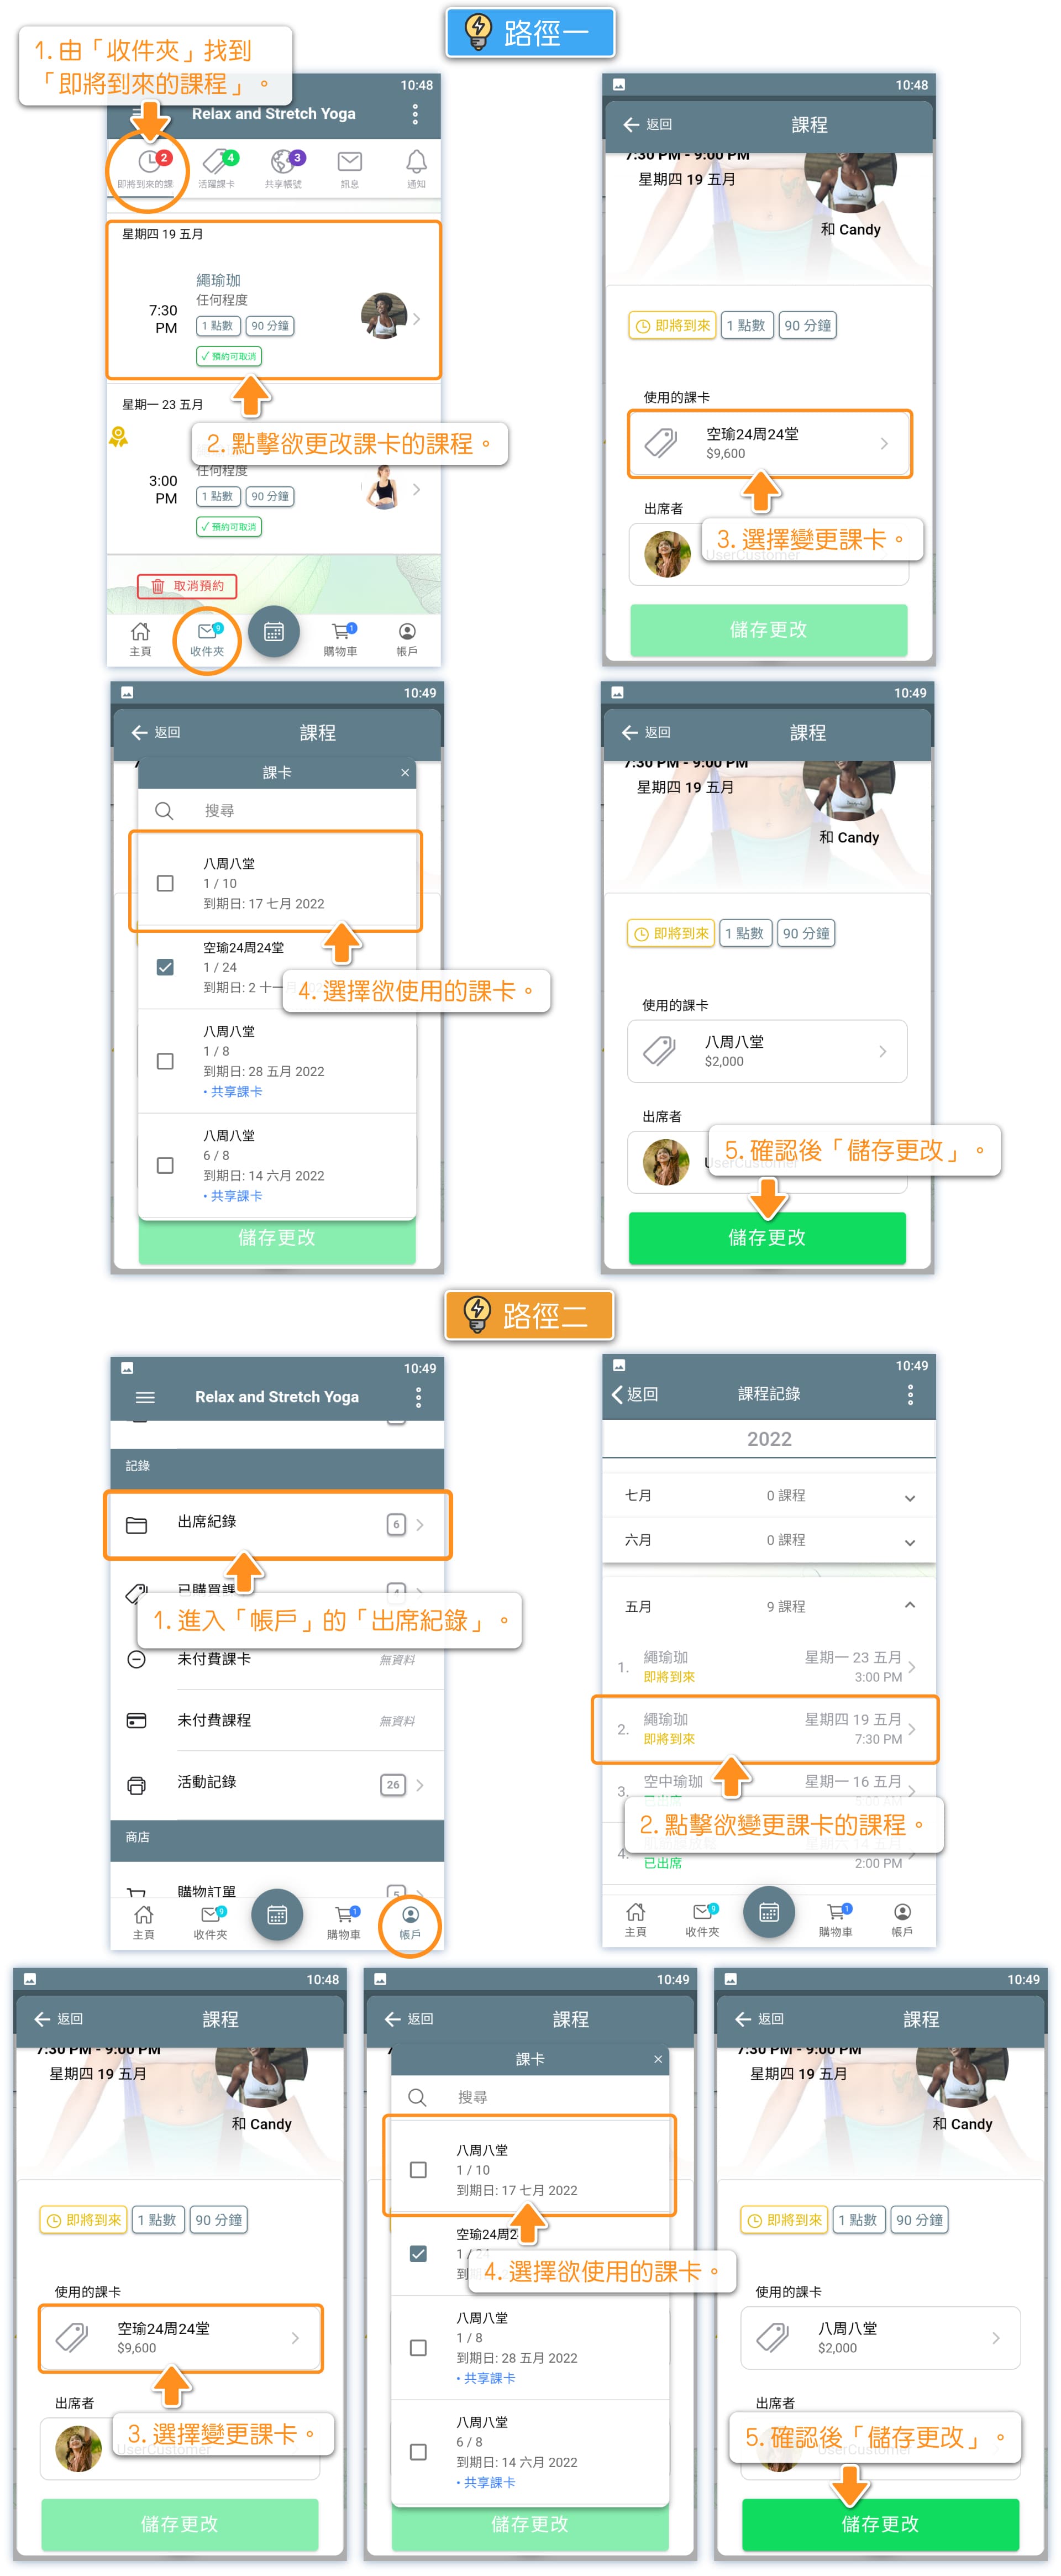
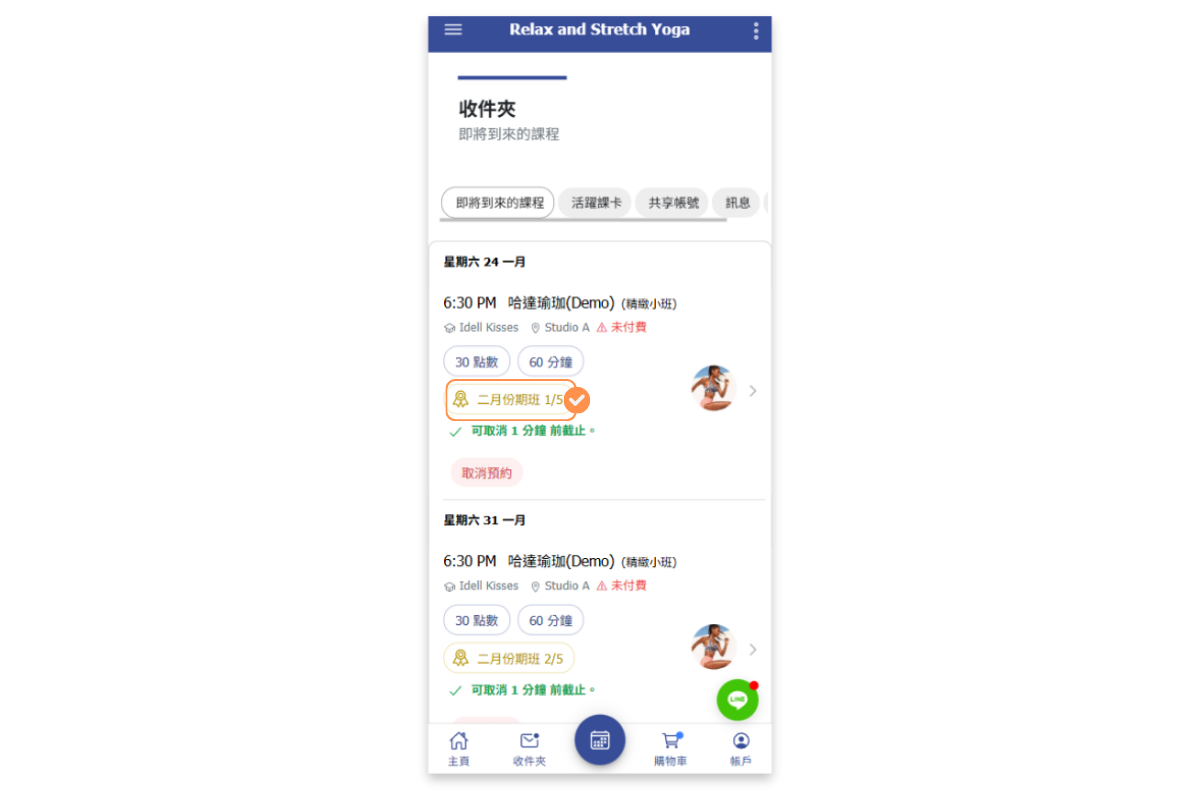
How Customers Can Change the Pass Used for a Reservation
[Instructions – Path 1]
-
Click Upcoming Courses in the inbox.
-
Select the course for which you want to change the course card.
-
Choose Change Course Card.
-
Select the course card you want to use.
-
Click Save Changes.
[Instructions – Path 2]
-
Go to Attendance Records in your account.
-
Select the course for which you want to change the course card.
-
Choose Change Course Card.
-
Select the course card you want to use.
-
Click Save Changes.