Core Functions
Reminder Before Adding Your Business Data:
- Each piece of data created in the system exists independently. Even if the names are the same, each has a unique identification number in the database.
- ⛔ Use the "Archive" or "End" function to hide/end classes or pass.
- ⛔ Please note that once data is deleted, it CANNOT be recovered. Be sure to read the warning text before deleting any data. It is recommended to use the "archive" function to hide data that is no longer in use.
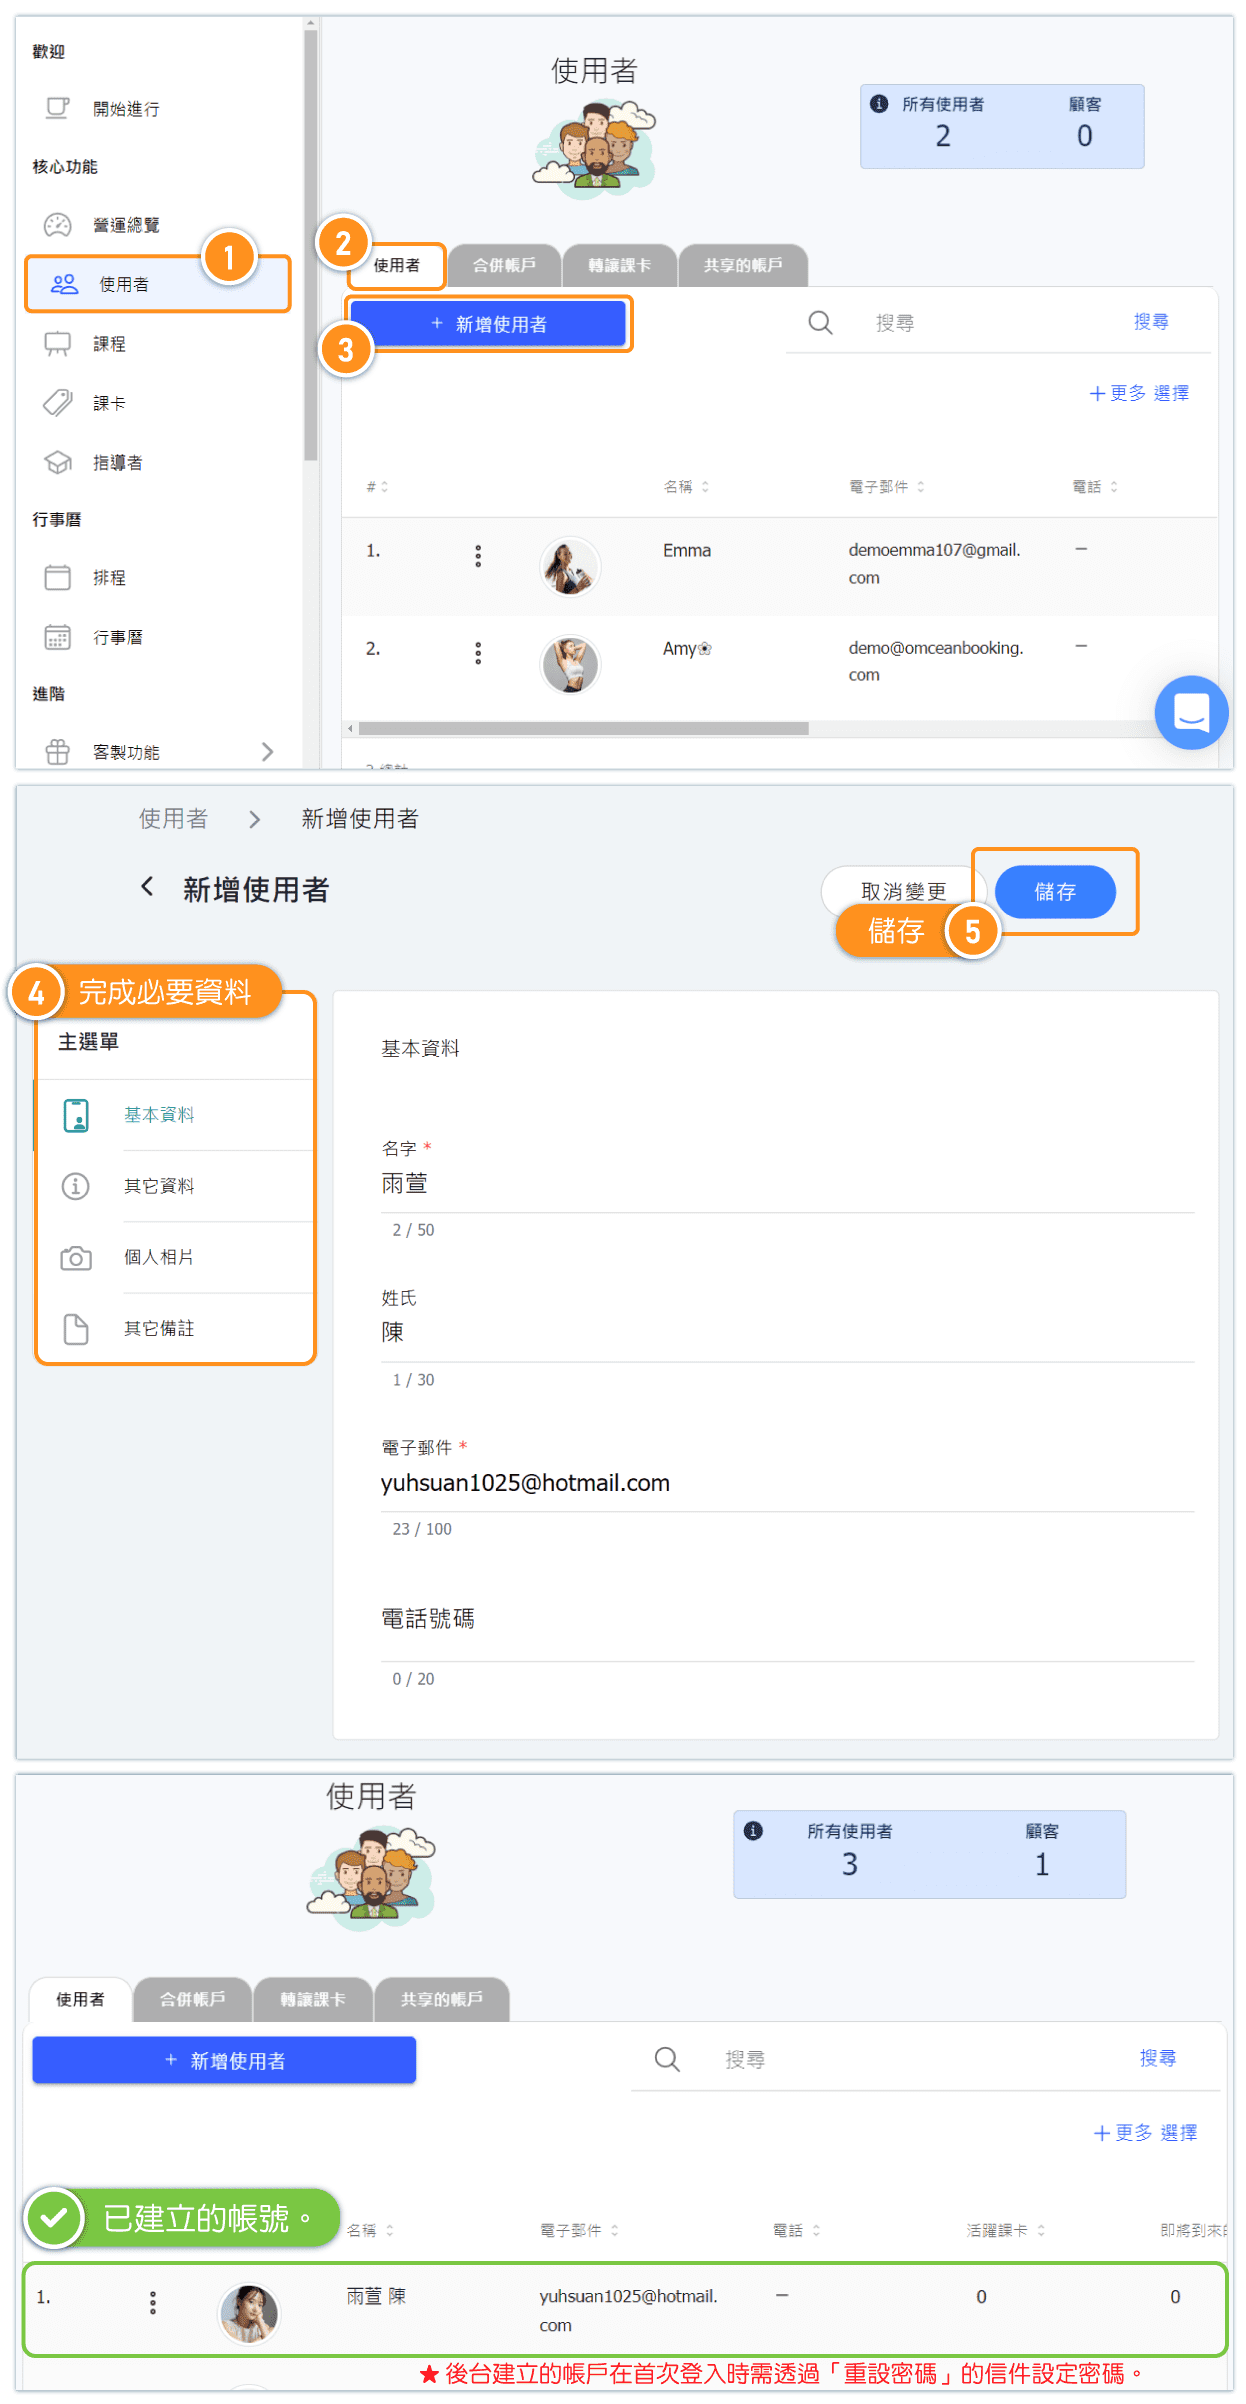
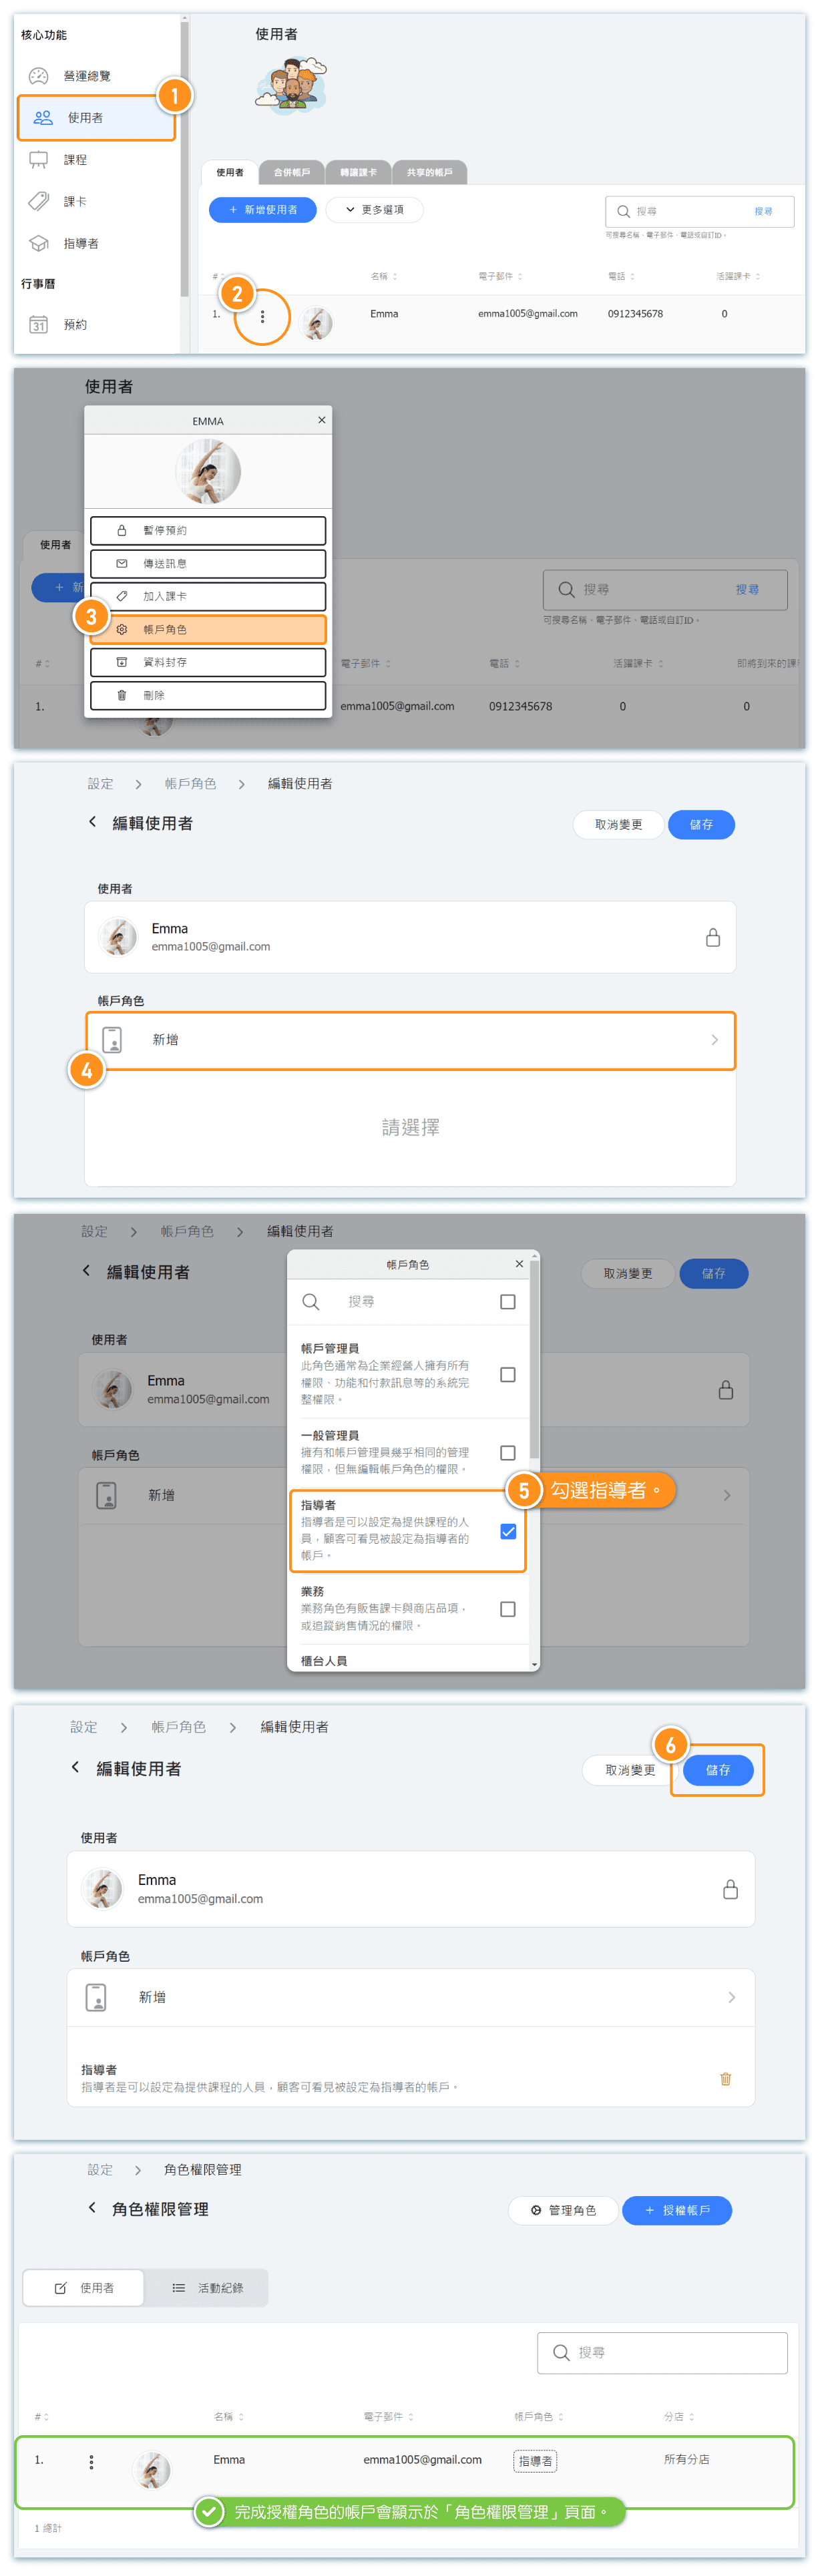
Add Users Account - 1. Create Account by Admin
After creating a new account on the "users" page, if the account is for a backend administrator or instructor, go to "Settings" and "Role Permissions Management" to adjust the account's role authorization and role permission settings.
For more information on setting up role permissions, please refer to the "Role and Permission Management" in the Help Center.
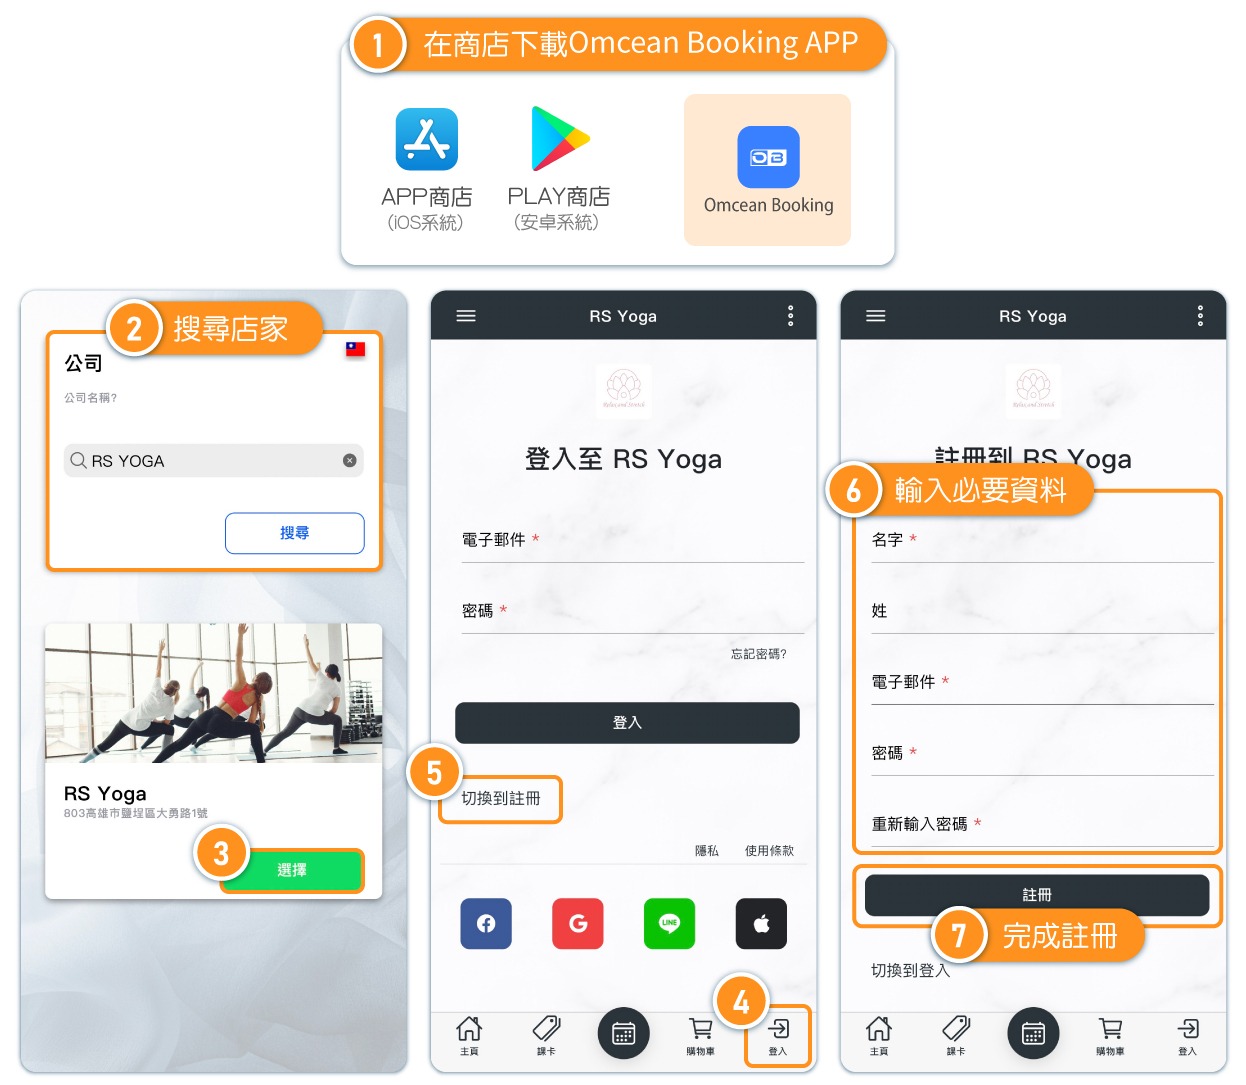
Add Users Account - 2. Customer Register Account by Themselves
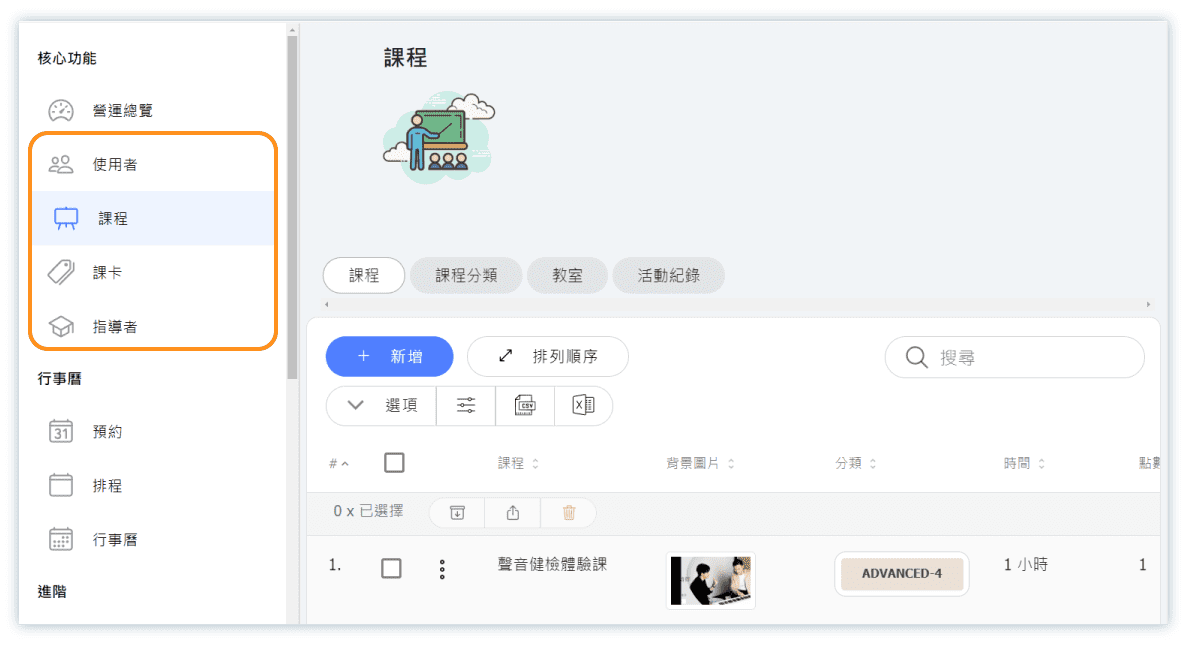
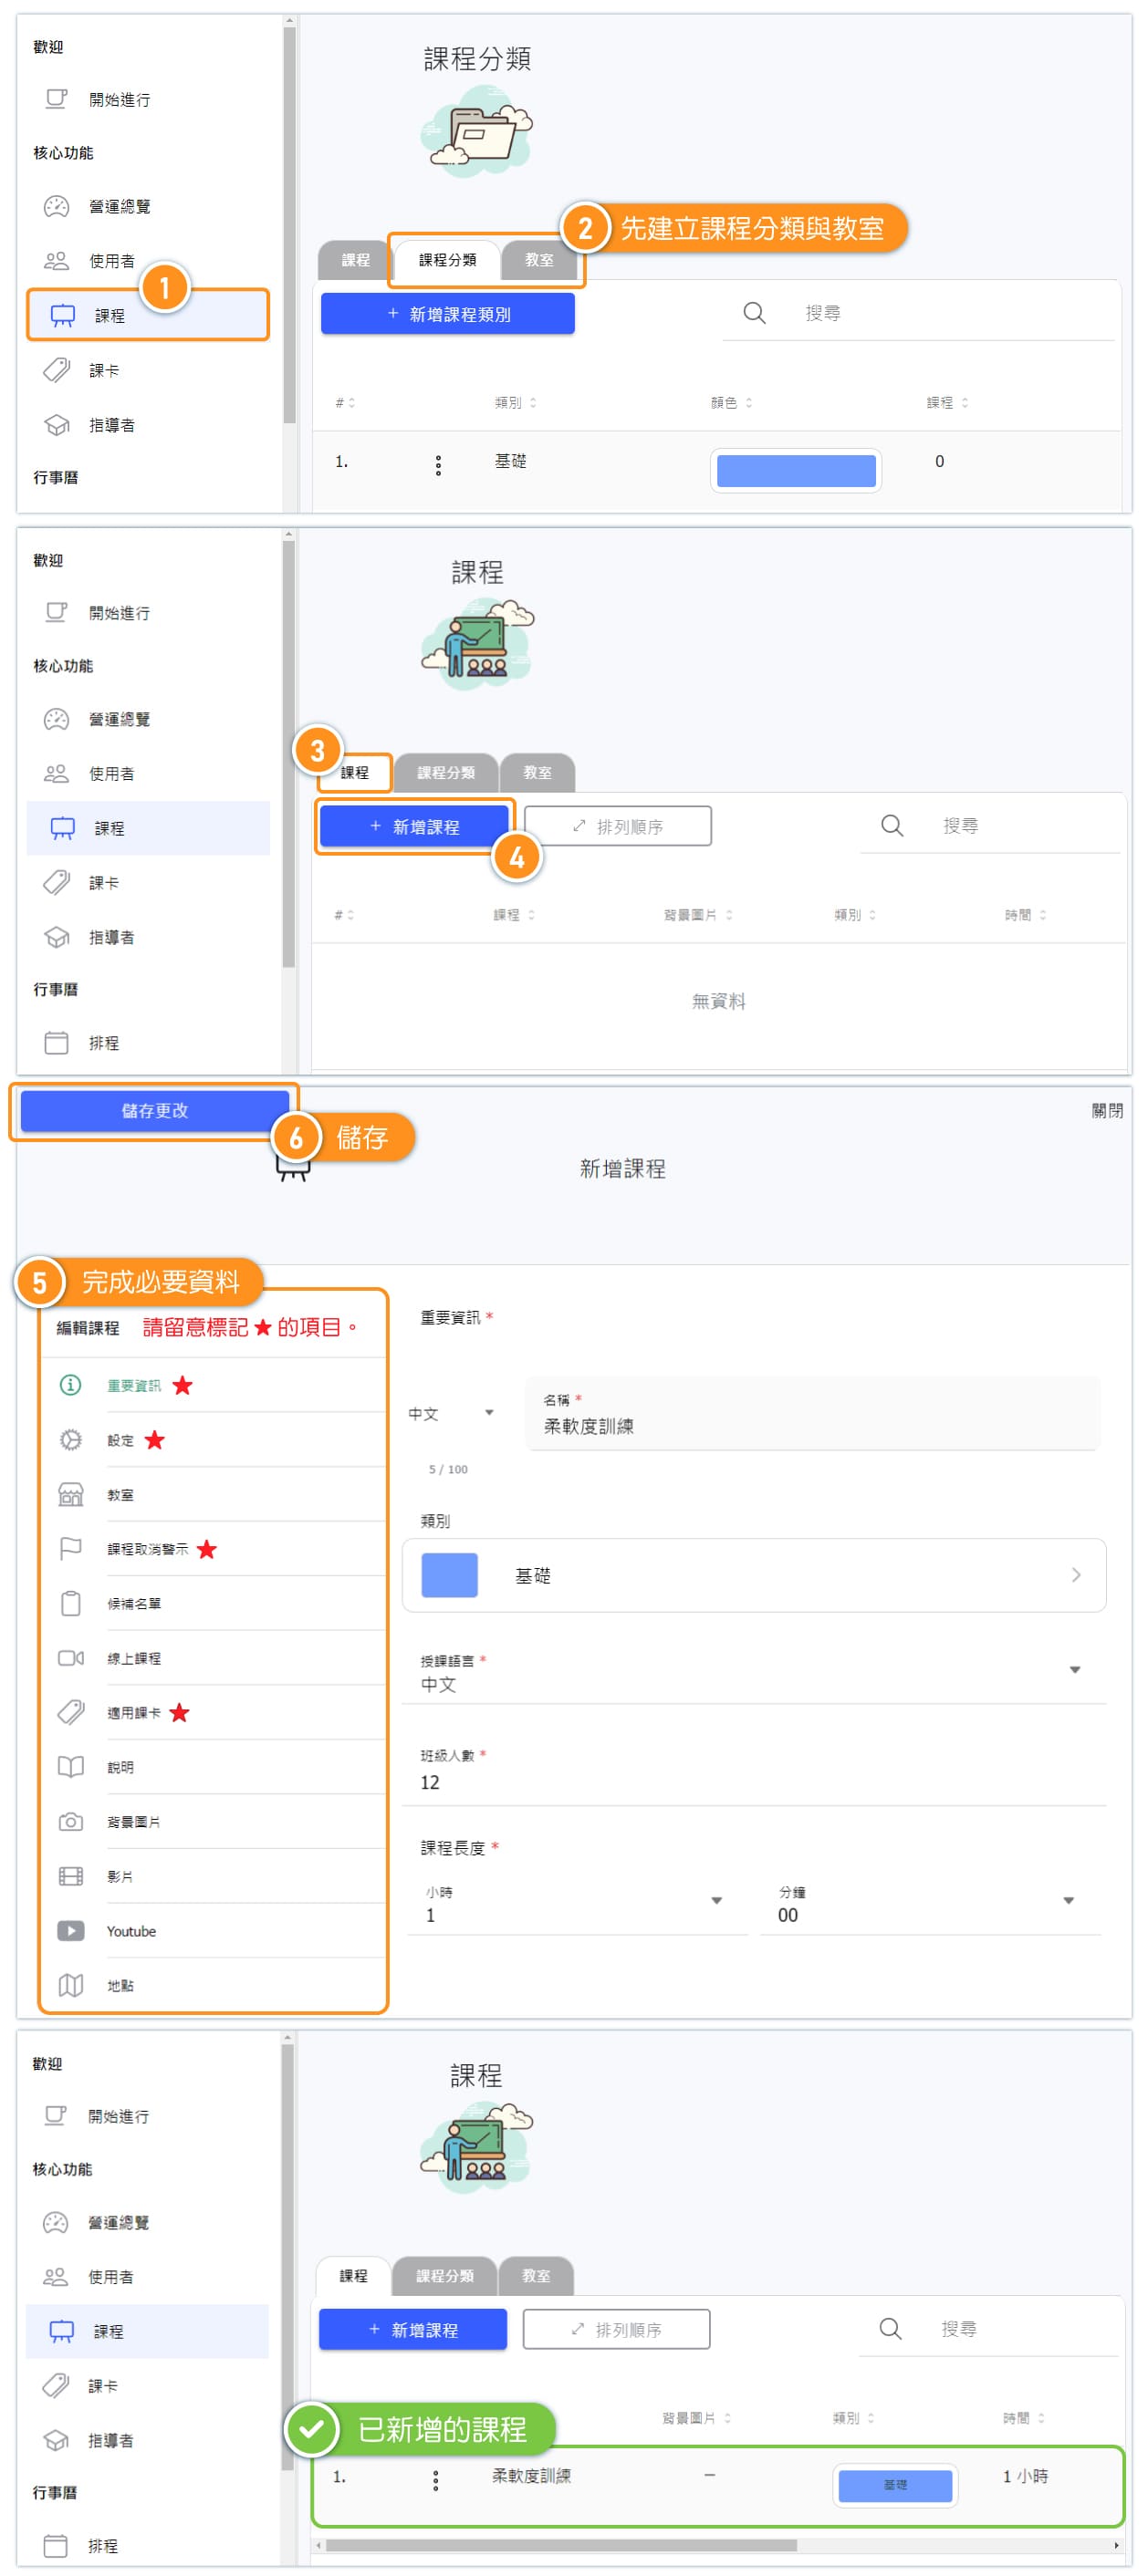
Add Classes
The class data created in the system is unique for class pass, even if they have the same name, there are different class numbers in the database.
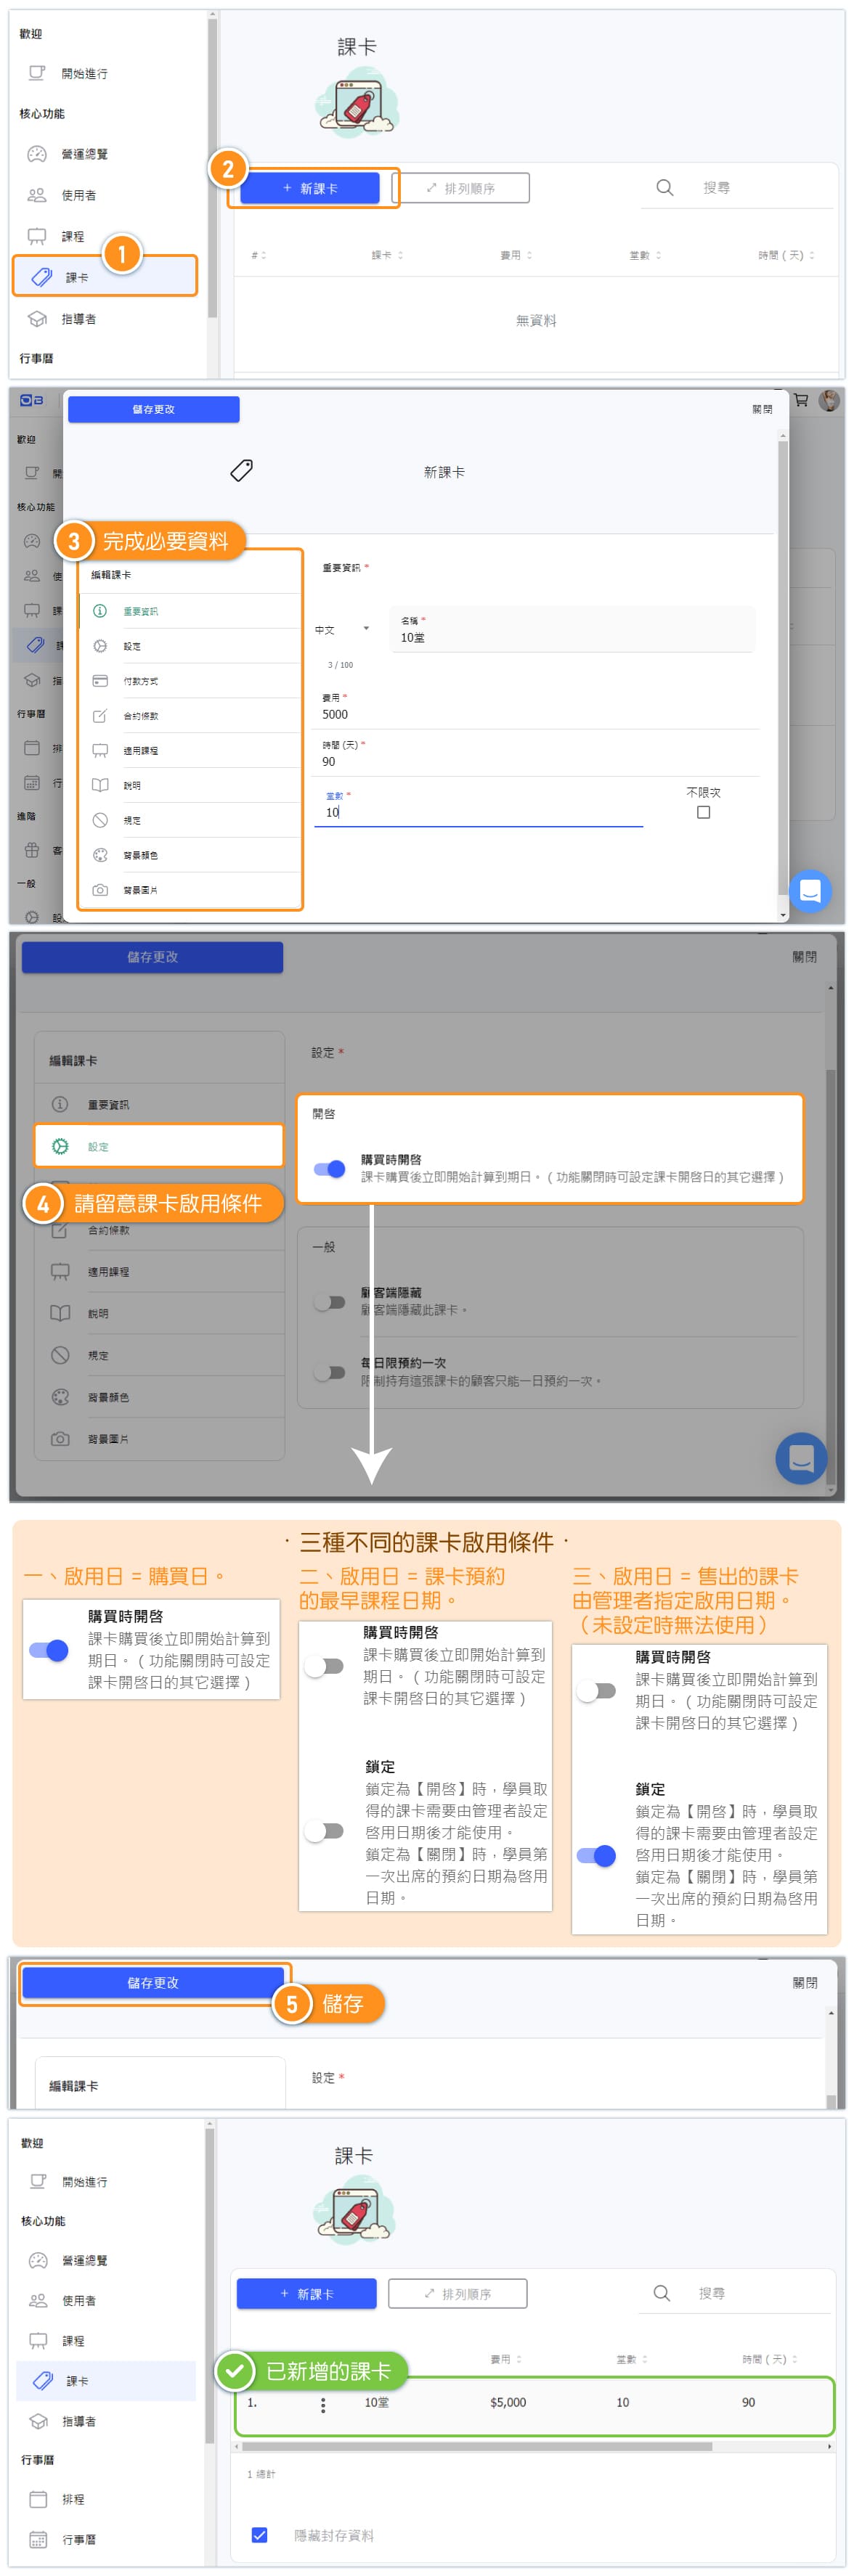
Add Passes
The pass data created in the system is unique for each pass, even if they have the same name, there are different pass numbers in the database.
For example, if two passes with the same name "10 points" are created, and first one is bound with a Flow Yoga class while the second one is not, even if a customer gets the second one, both cards are named "10 points," but without being bound to the Flow Yoga class, it cannot be used to reserve that particular class.
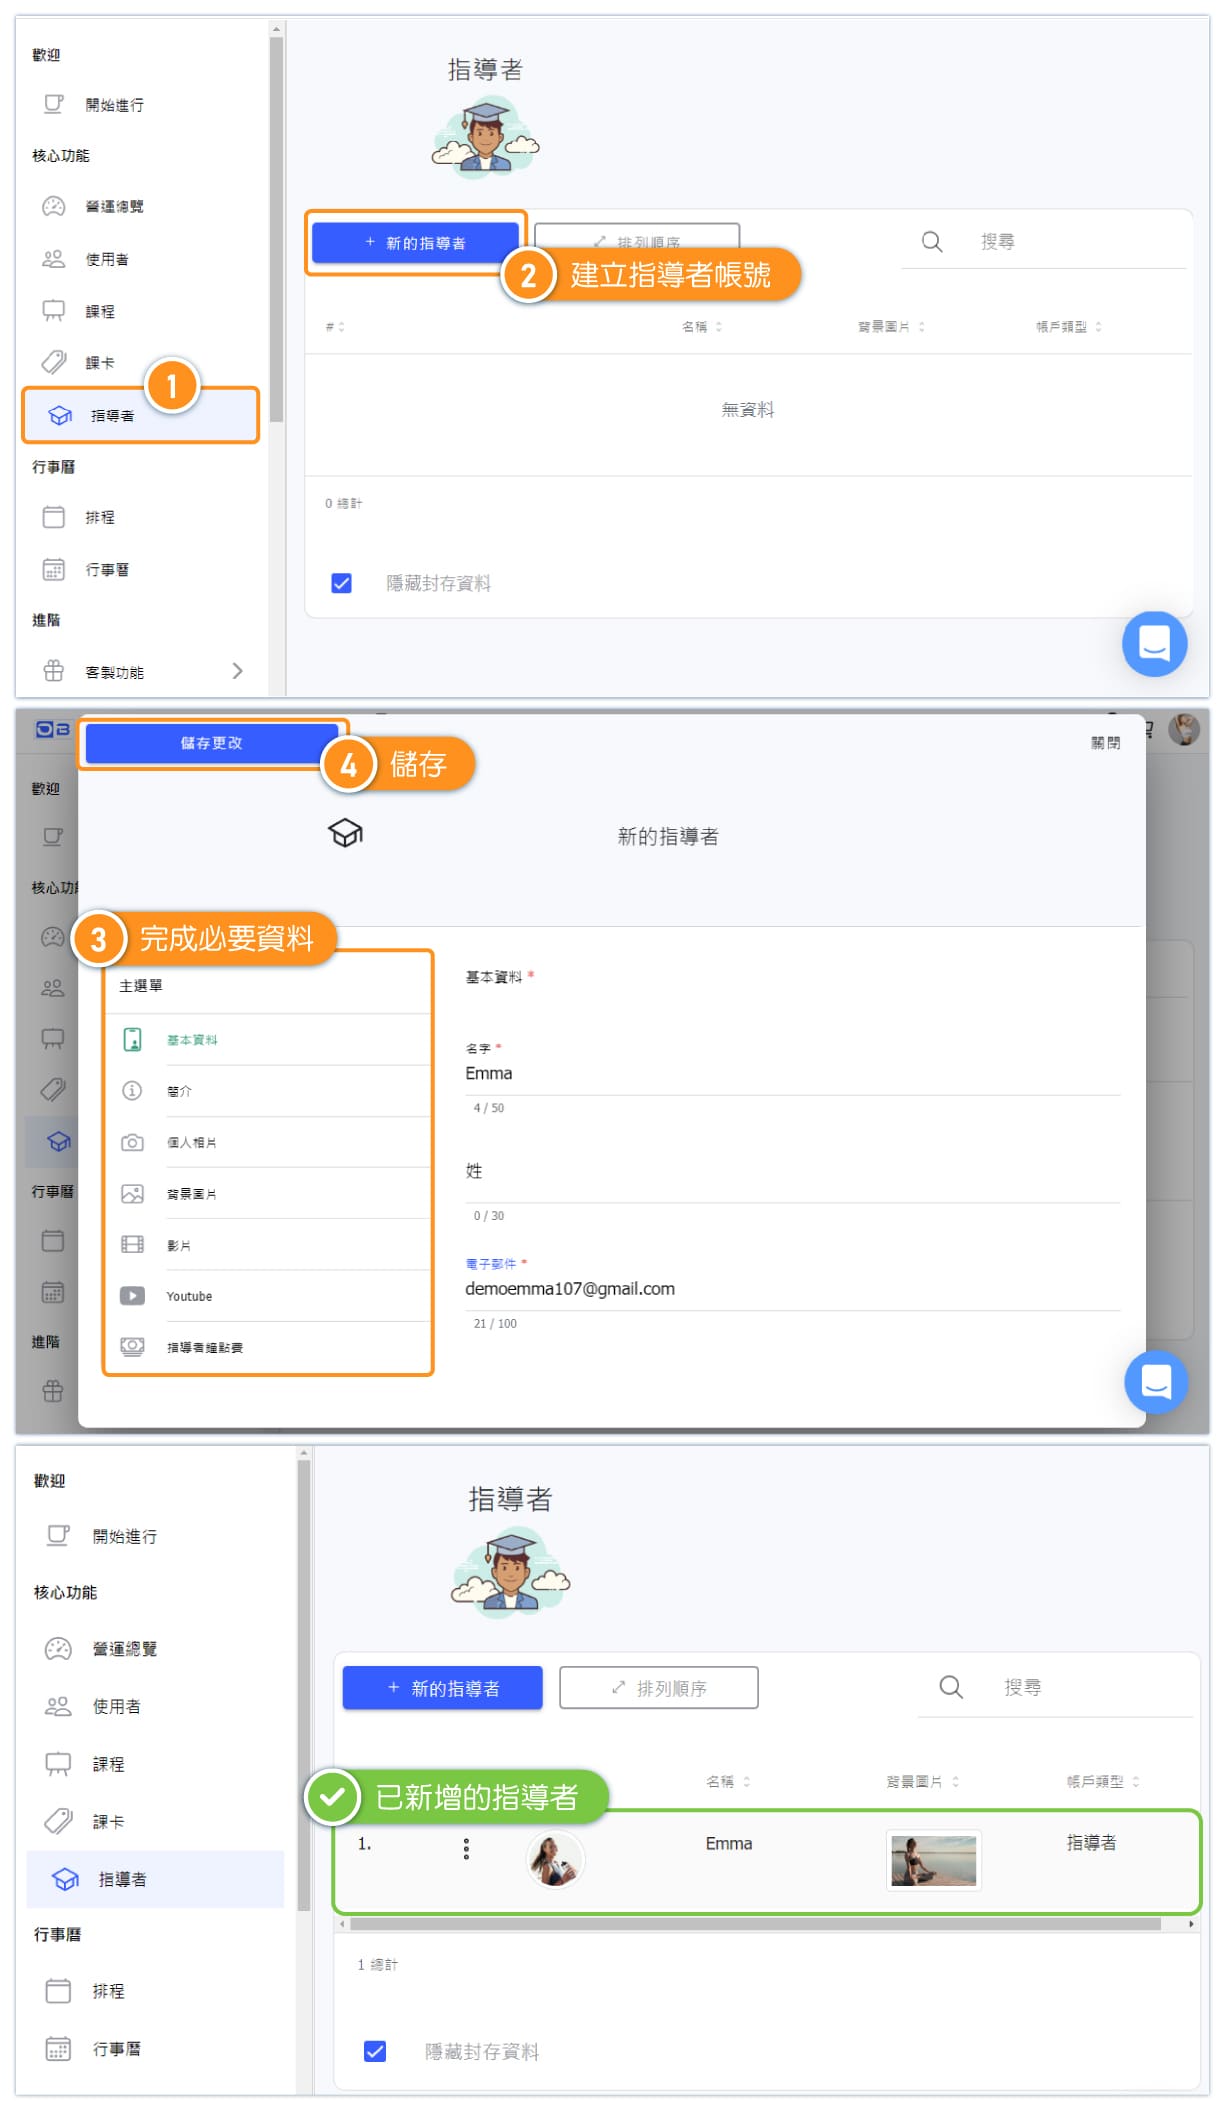
Add Instructor - 1. Admin creates instructor account.
There are two methods to create instructor accounts. The first method is for admins to create them, while the second method allows instructors to register themselves and then be granted instructor role by the admin.
Method 1: Admin creates instructor account.
Accounts created by administrators on the instructor page will automatically be granted the "Core Role: Instructor" privilege.
💡 Only account after assigned the "Core Role - Instructor" can be set as the instructor for classes and displaying on the instructor page.
💡 Tip: If each instructor at the business requires different permissions, the core role of instructor can be set to the minimum permissions. Additional custom roles can then be created with different permissions, allowing for customized permissions for each instructor.
For more information on setting up role permissions, please refer to the "Role and Permission Management" in the Help Center.
Add Instructor - 2. The admin Assigns Instructor Role to Exsiting Account.
Method 2: The admin assigns instructor role.
The instructor registers their own account, and the admin grants them instructor role.
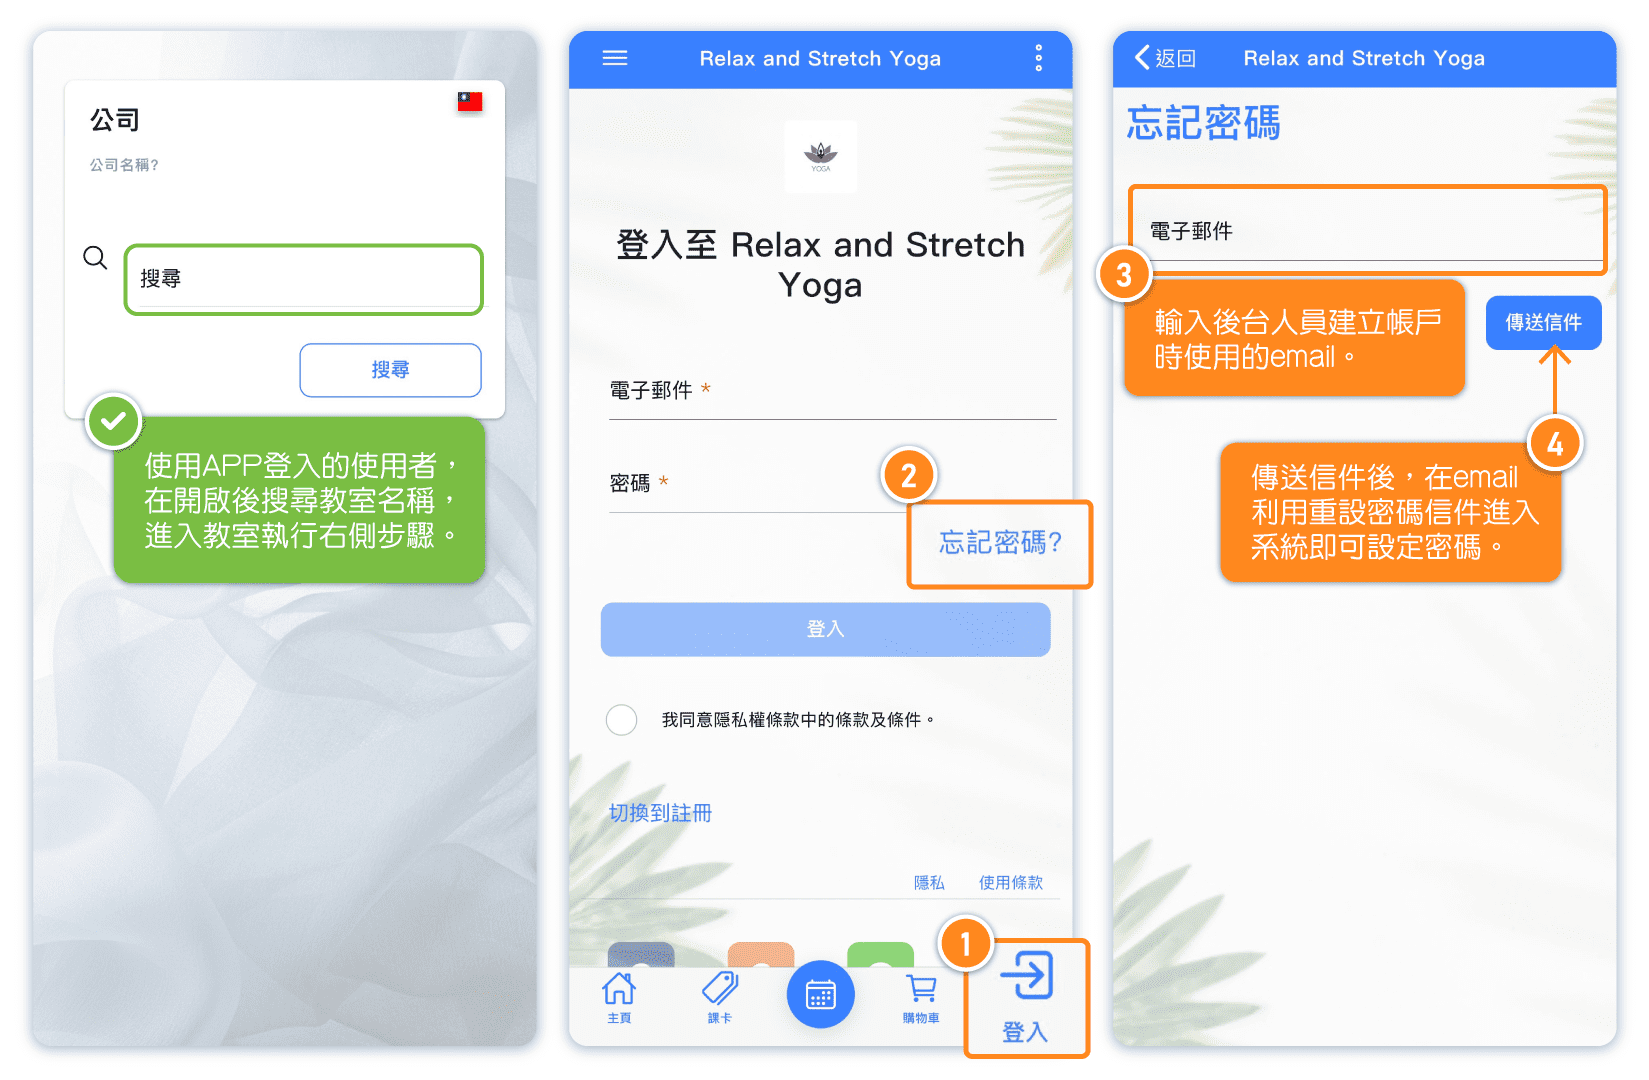
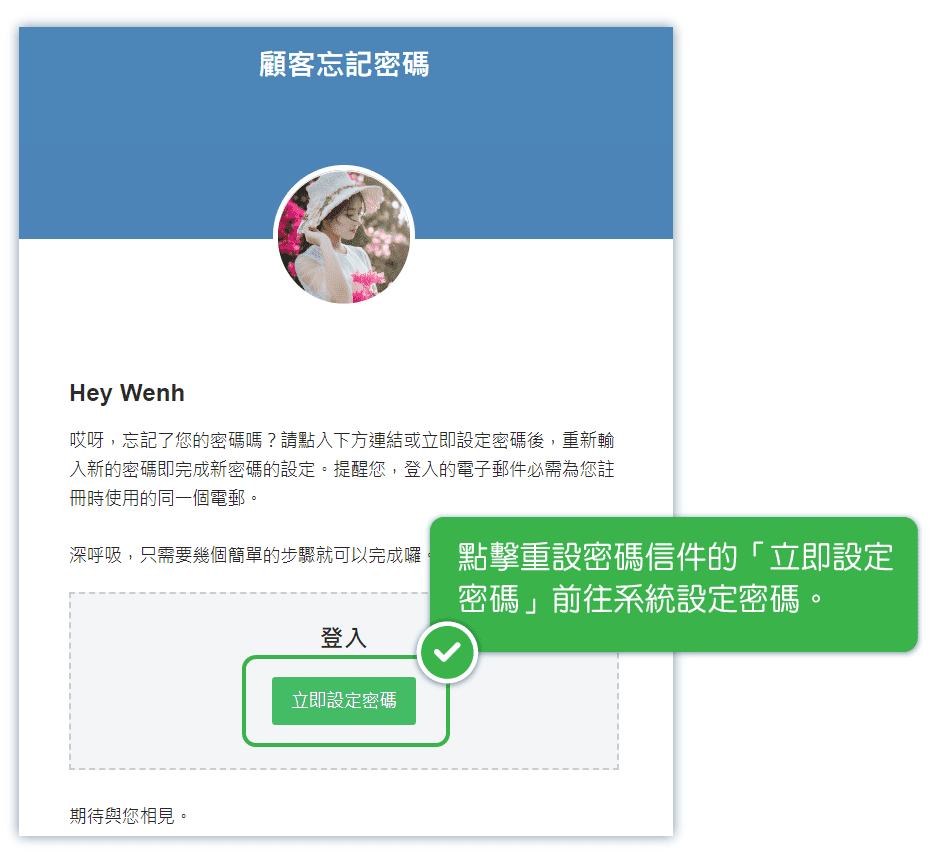
Reset Password - 1. Admin trigger Reset Password Email Sending to User
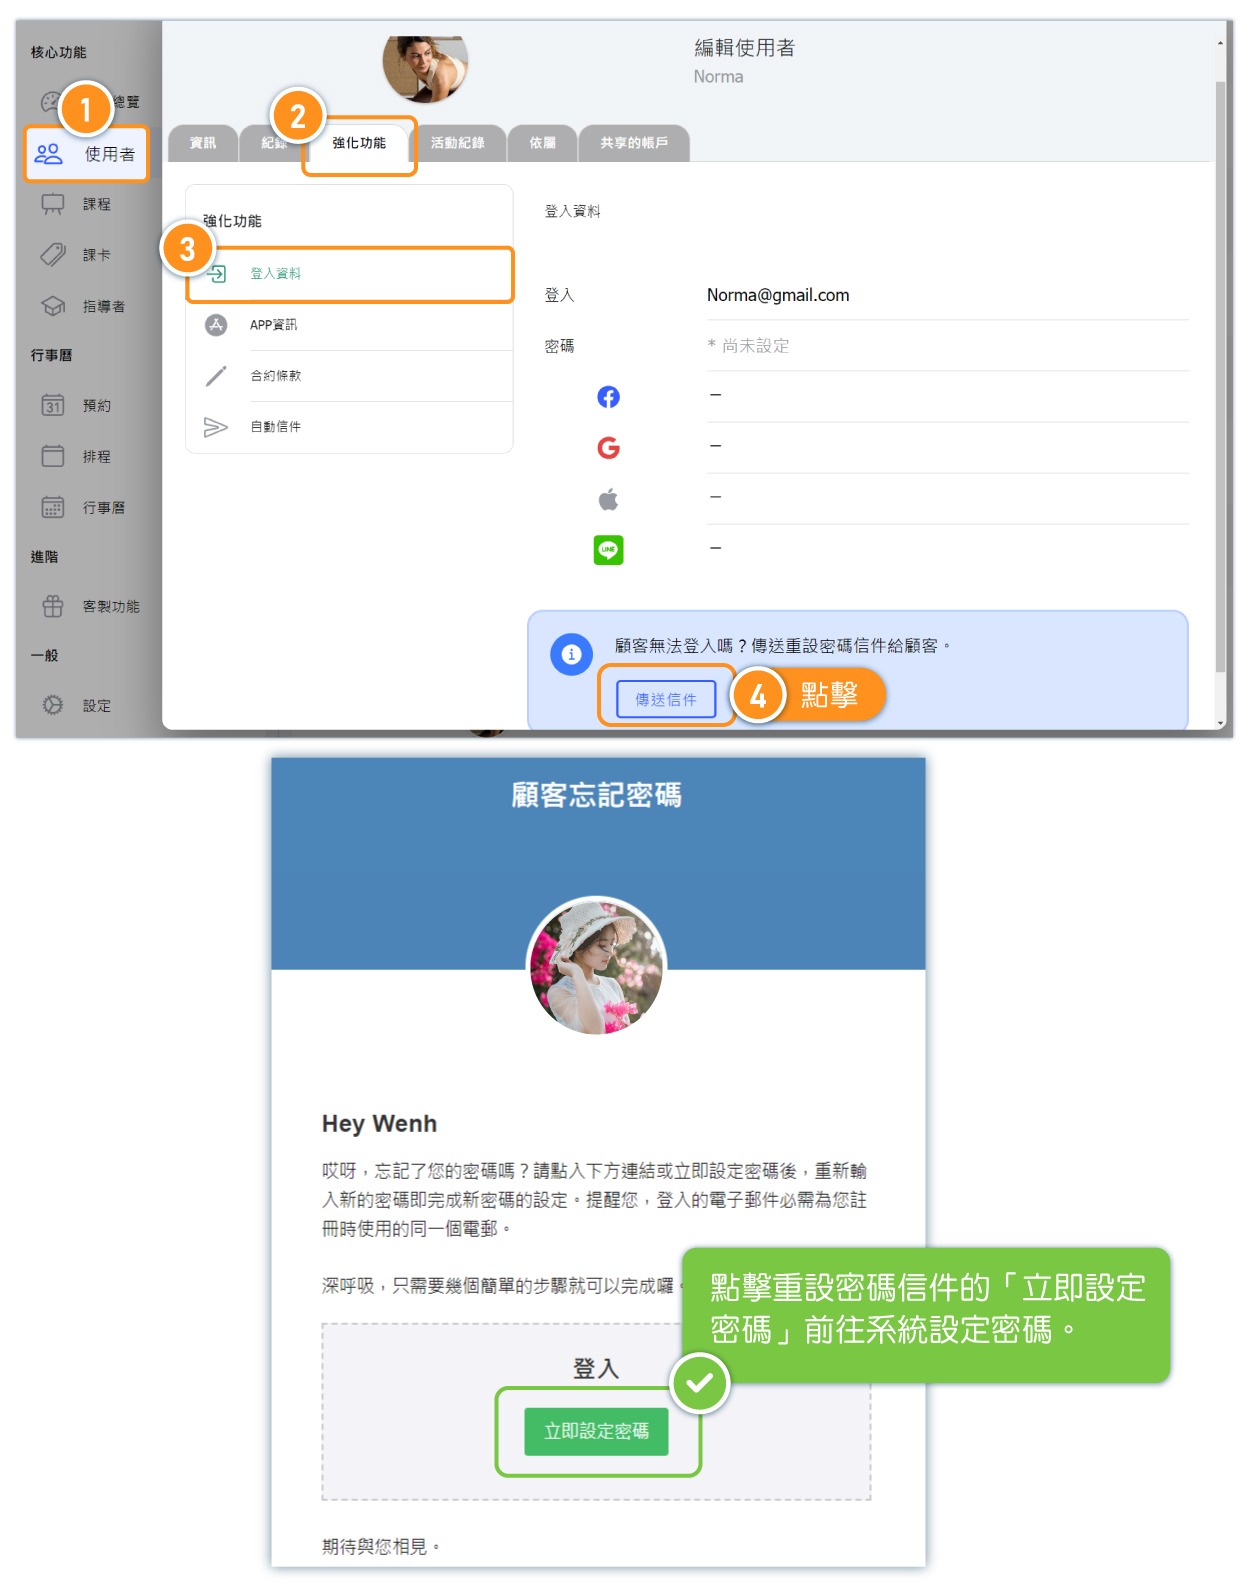
Reset Password - 2. User gets password reset email by themselves.