
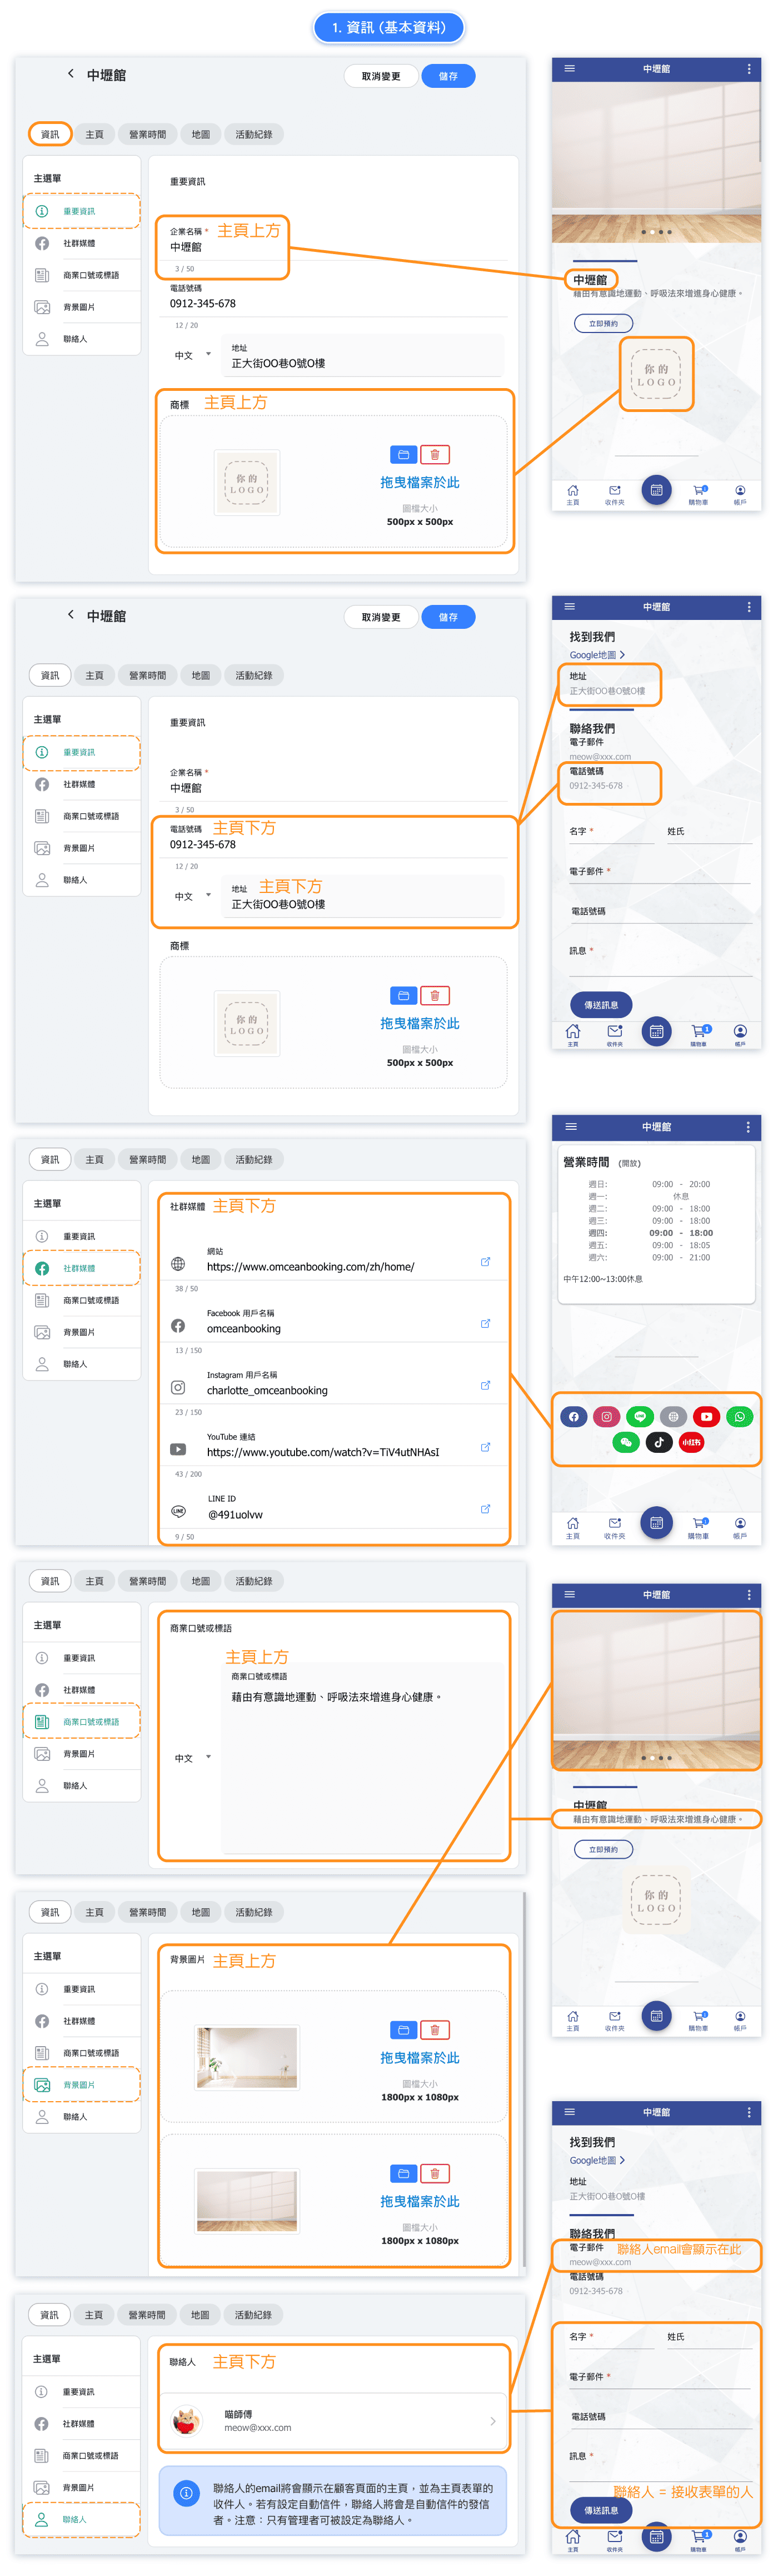
Information Tab - Basic Details
The Information tab contains essential business details that appear throughout your booking site. Click on any row to expand and edit that section.
Key settings in this tab:
- Important Information - Your business name, address, phone number, and email. This is the core contact information displayed to customers.
- Social Media - Links to your Facebook, Instagram, Twitter, and other social media profiles. These appear as clickable icons on your booking page.
- Business Slogan - A short tagline or description that appears on your home page to describe your business.
- Cover Photo - The main banner image displayed at the top of your booking site. Choose an image that represents your business well.
- Contact Person - The name of the primary contact person for your business.
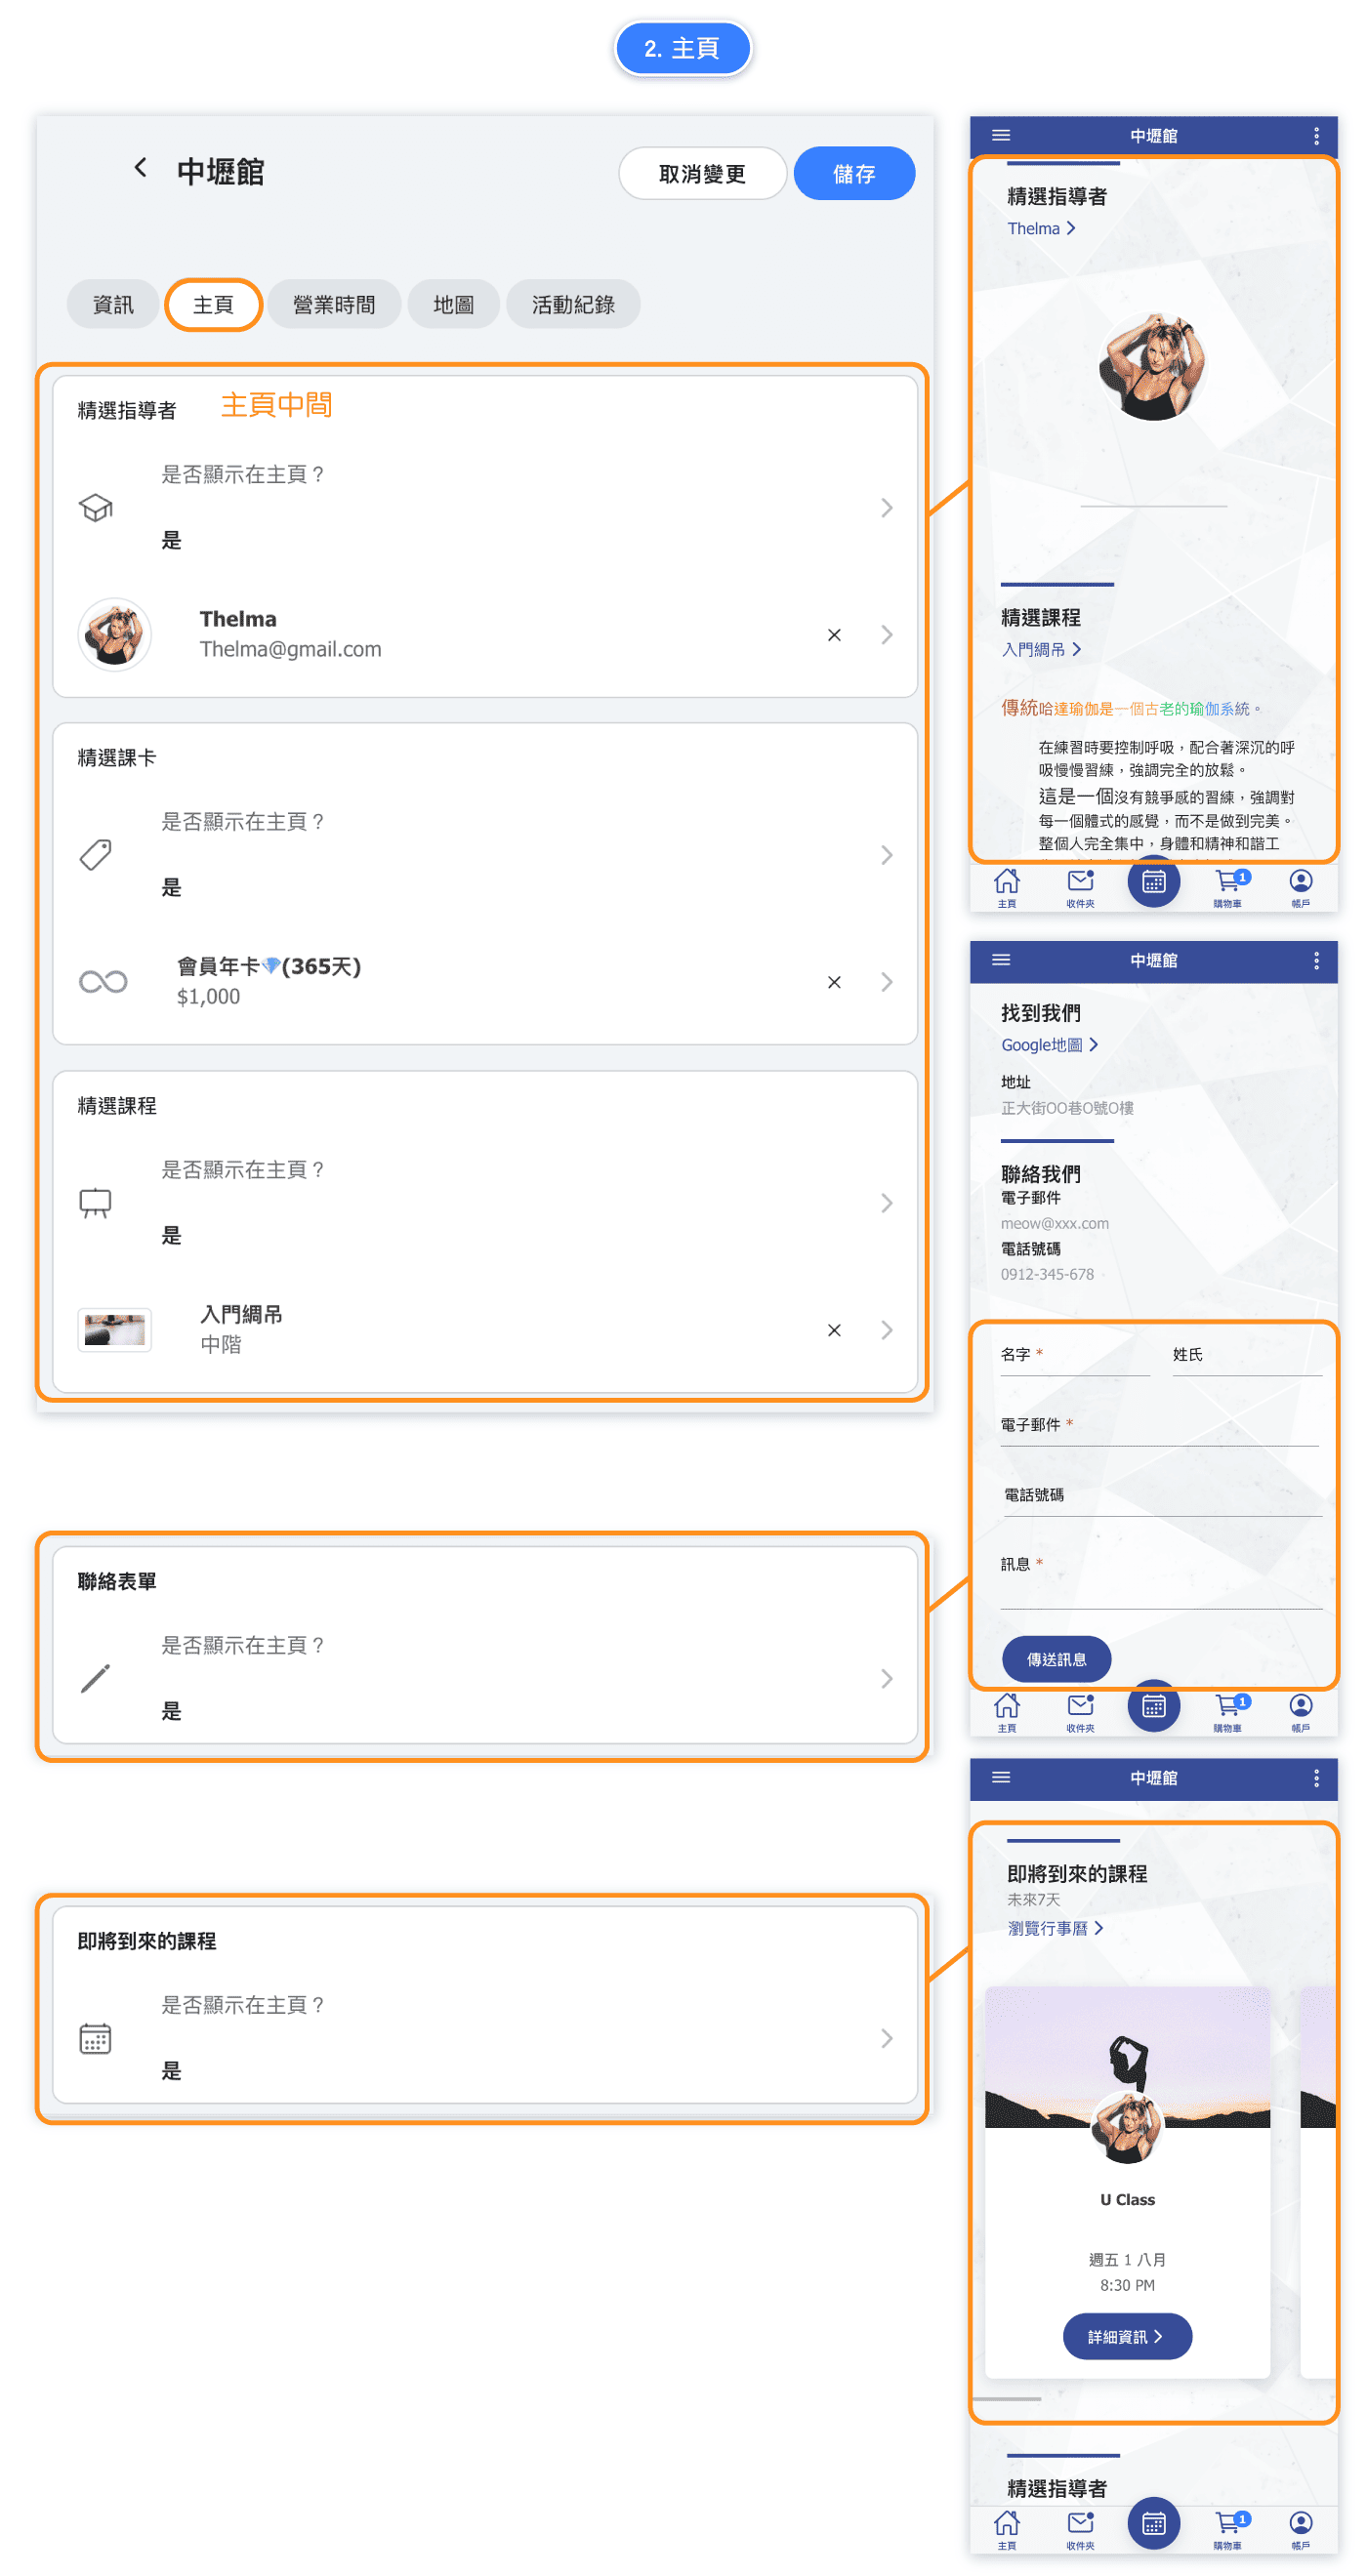
Home Page Tab - Featured Content
The Home Page tab controls what featured content appears on your customer booking page. This helps highlight your best instructors, popular passes, and classes.
Featured content options:
- Featured Instructor - Choose whether to display a featured instructor on your home page and select which instructor to highlight. This helps build trust and showcase your team.
- Featured Pass - Select a membership or pass to promote on your home page. You can enable random selection to rotate through different passes automatically.
- Featured Class - Highlight specific classes or services that you want customers to see first when visiting your booking page.
Each featured item has a "Display on home page" toggle to control its visibility. When enabled, customers will see these highlights when they visit your booking site.
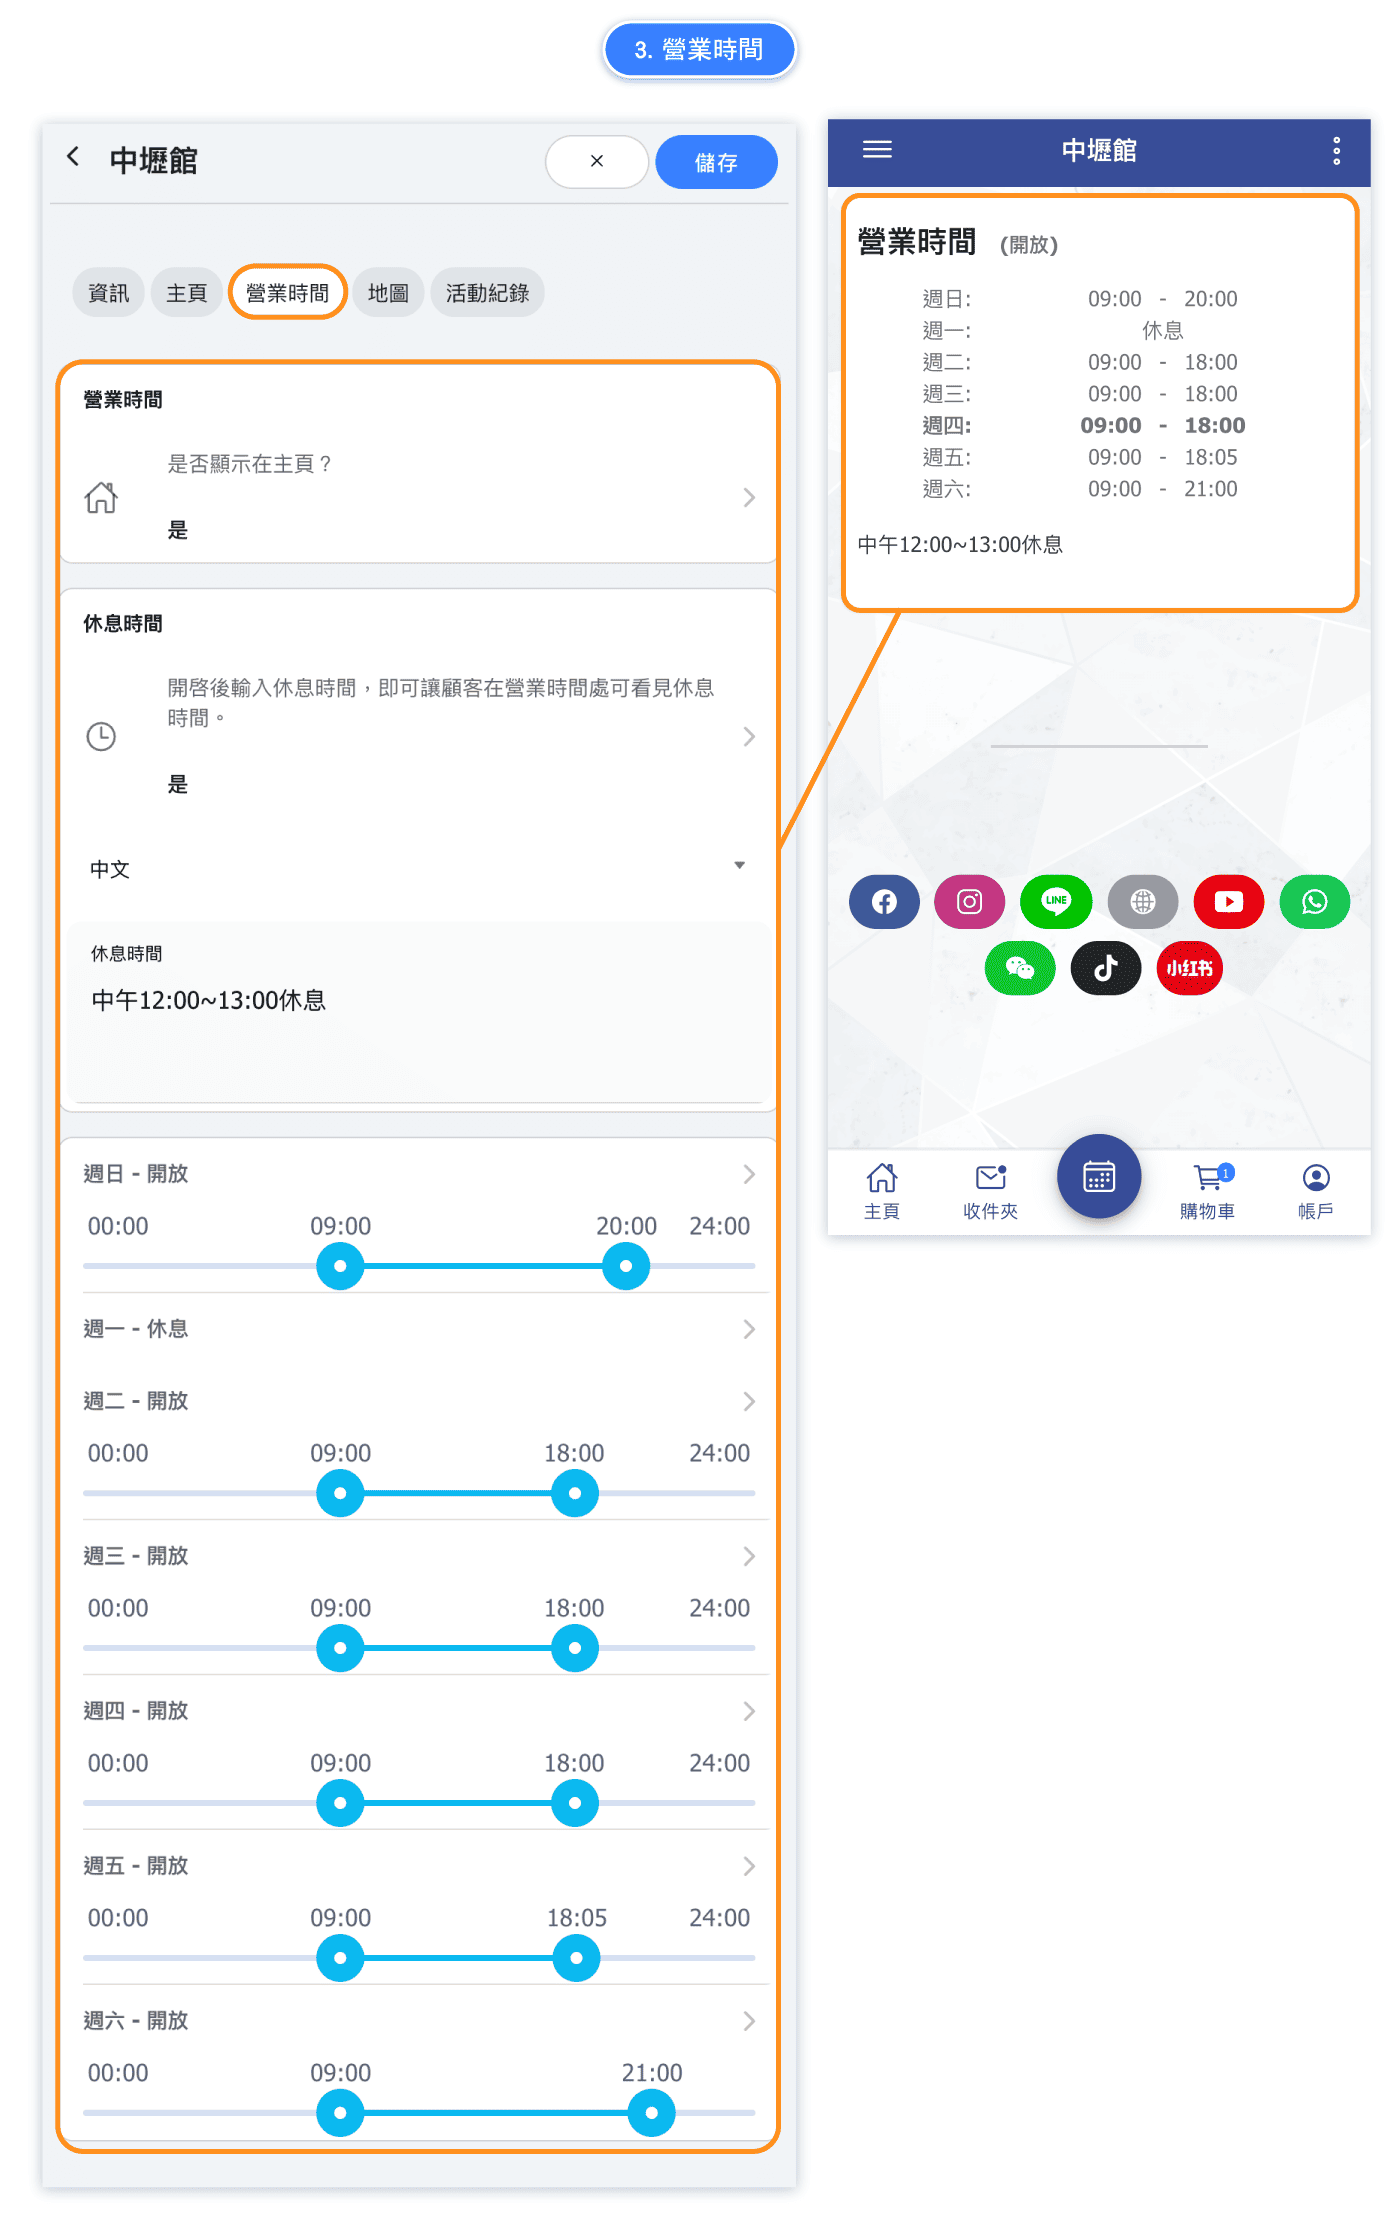
Opening Hours Tab
The Opening Hours tab allows you to set your business operating hours for each day of the week. These hours are displayed to customers on your booking page so they know when you're open.
How to set opening hours:
- Each day of the week has its own time slider
- Drag the left handle to set your opening time
- Drag the right handle to set your closing time
- The slider shows times from 00:00 (midnight) to 24:00 (midnight)
- You can set different hours for each day to accommodate varying schedules
Tips:
- If you're closed on certain days, you can set the hours to show no availability
- Opening hours help customers understand when they can expect service
- These hours are for display purposes and may differ from your actual booking availability which is controlled by your service schedules
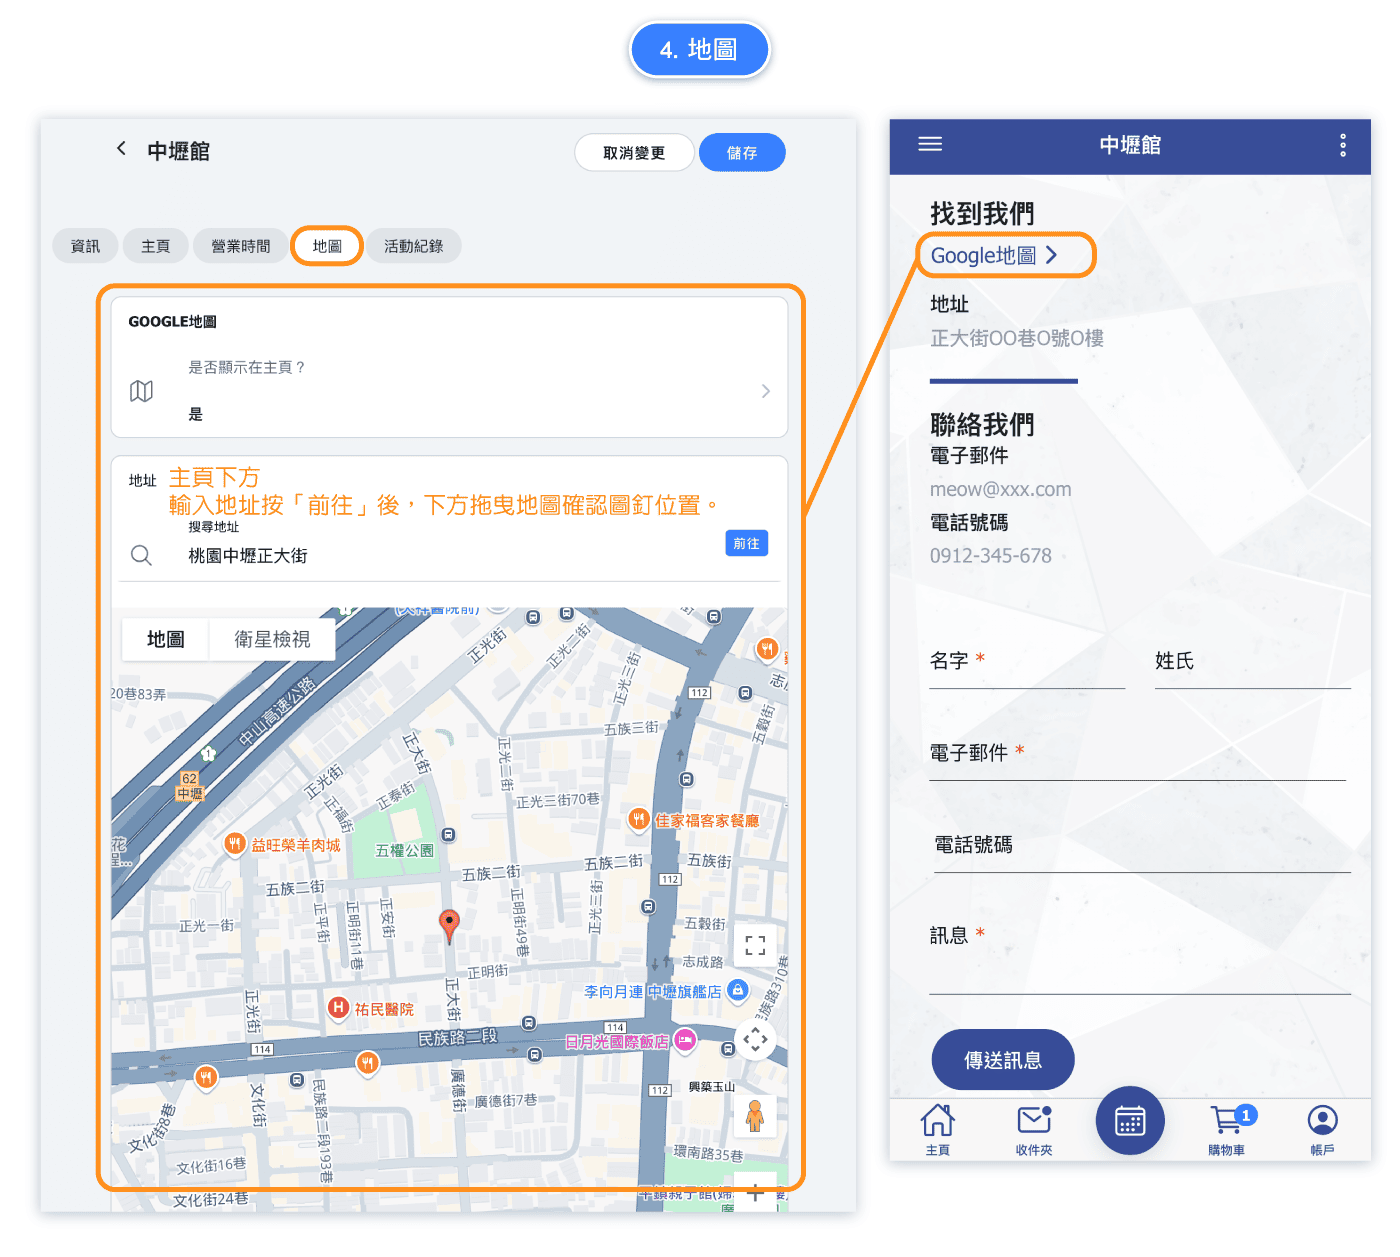
Maps Tab - Location & GPS
The Maps tab integrates Google Maps with your business location, making it easy for customers to find you.
Location settings:
- Address - Enter your full street address for accurate map placement
- GPS Coordinates - Fine-tune your exact location on the map using latitude and longitude coordinates
- Map Preview - See how your location appears on the embedded Google Map
Benefits of map integration:
- Customers can get directions directly from your booking page
- Your business location is clearly visible before booking
- Reduces confusion and no-shows by helping customers find your location easily
- Professional appearance builds trust with potential customers
Make sure your address and GPS coordinates are accurate so customers can find your business without difficulty.
Adding Multiple Locations
If your business operates from multiple locations or branches, you can add additional locations to manage them separately.
To add a new location:
- Go to Business Information in the left navigation menu
- Click the +NEW button in the Locations tab
- Fill in the details for your new location
Important requirements:
- The Multiple Locations custom feature must be enabled first
- Each additional location costs 5 custom feature points
- Each location can have its own business hours, address, and contact information
- Customers can select their preferred location when booking
For detailed information about managing multiple locations, see the dedicated Multiple Locations article.
Tutorial Video
Watch this video tutorial for a visual walkthrough of setting up your business information: