
How do I access the attendance list for a class?
To view and manage attendance for a class:
- Go to Calendar in the admin menu
- Click on the class you want to manage
- Click on the Attendees tab
- You'll see the View customers attending section
What you'll see:
- Customer list: All students who booked the class
- Attendance status: Shows "Attended" or "Not attended" for each student
- Pass information: Which pass they used and remaining credits
- Capacity indicator: Shows spots filled (e.g., "1/1" means full)
You can also view the waiting list and cancelled reservations from the same page.
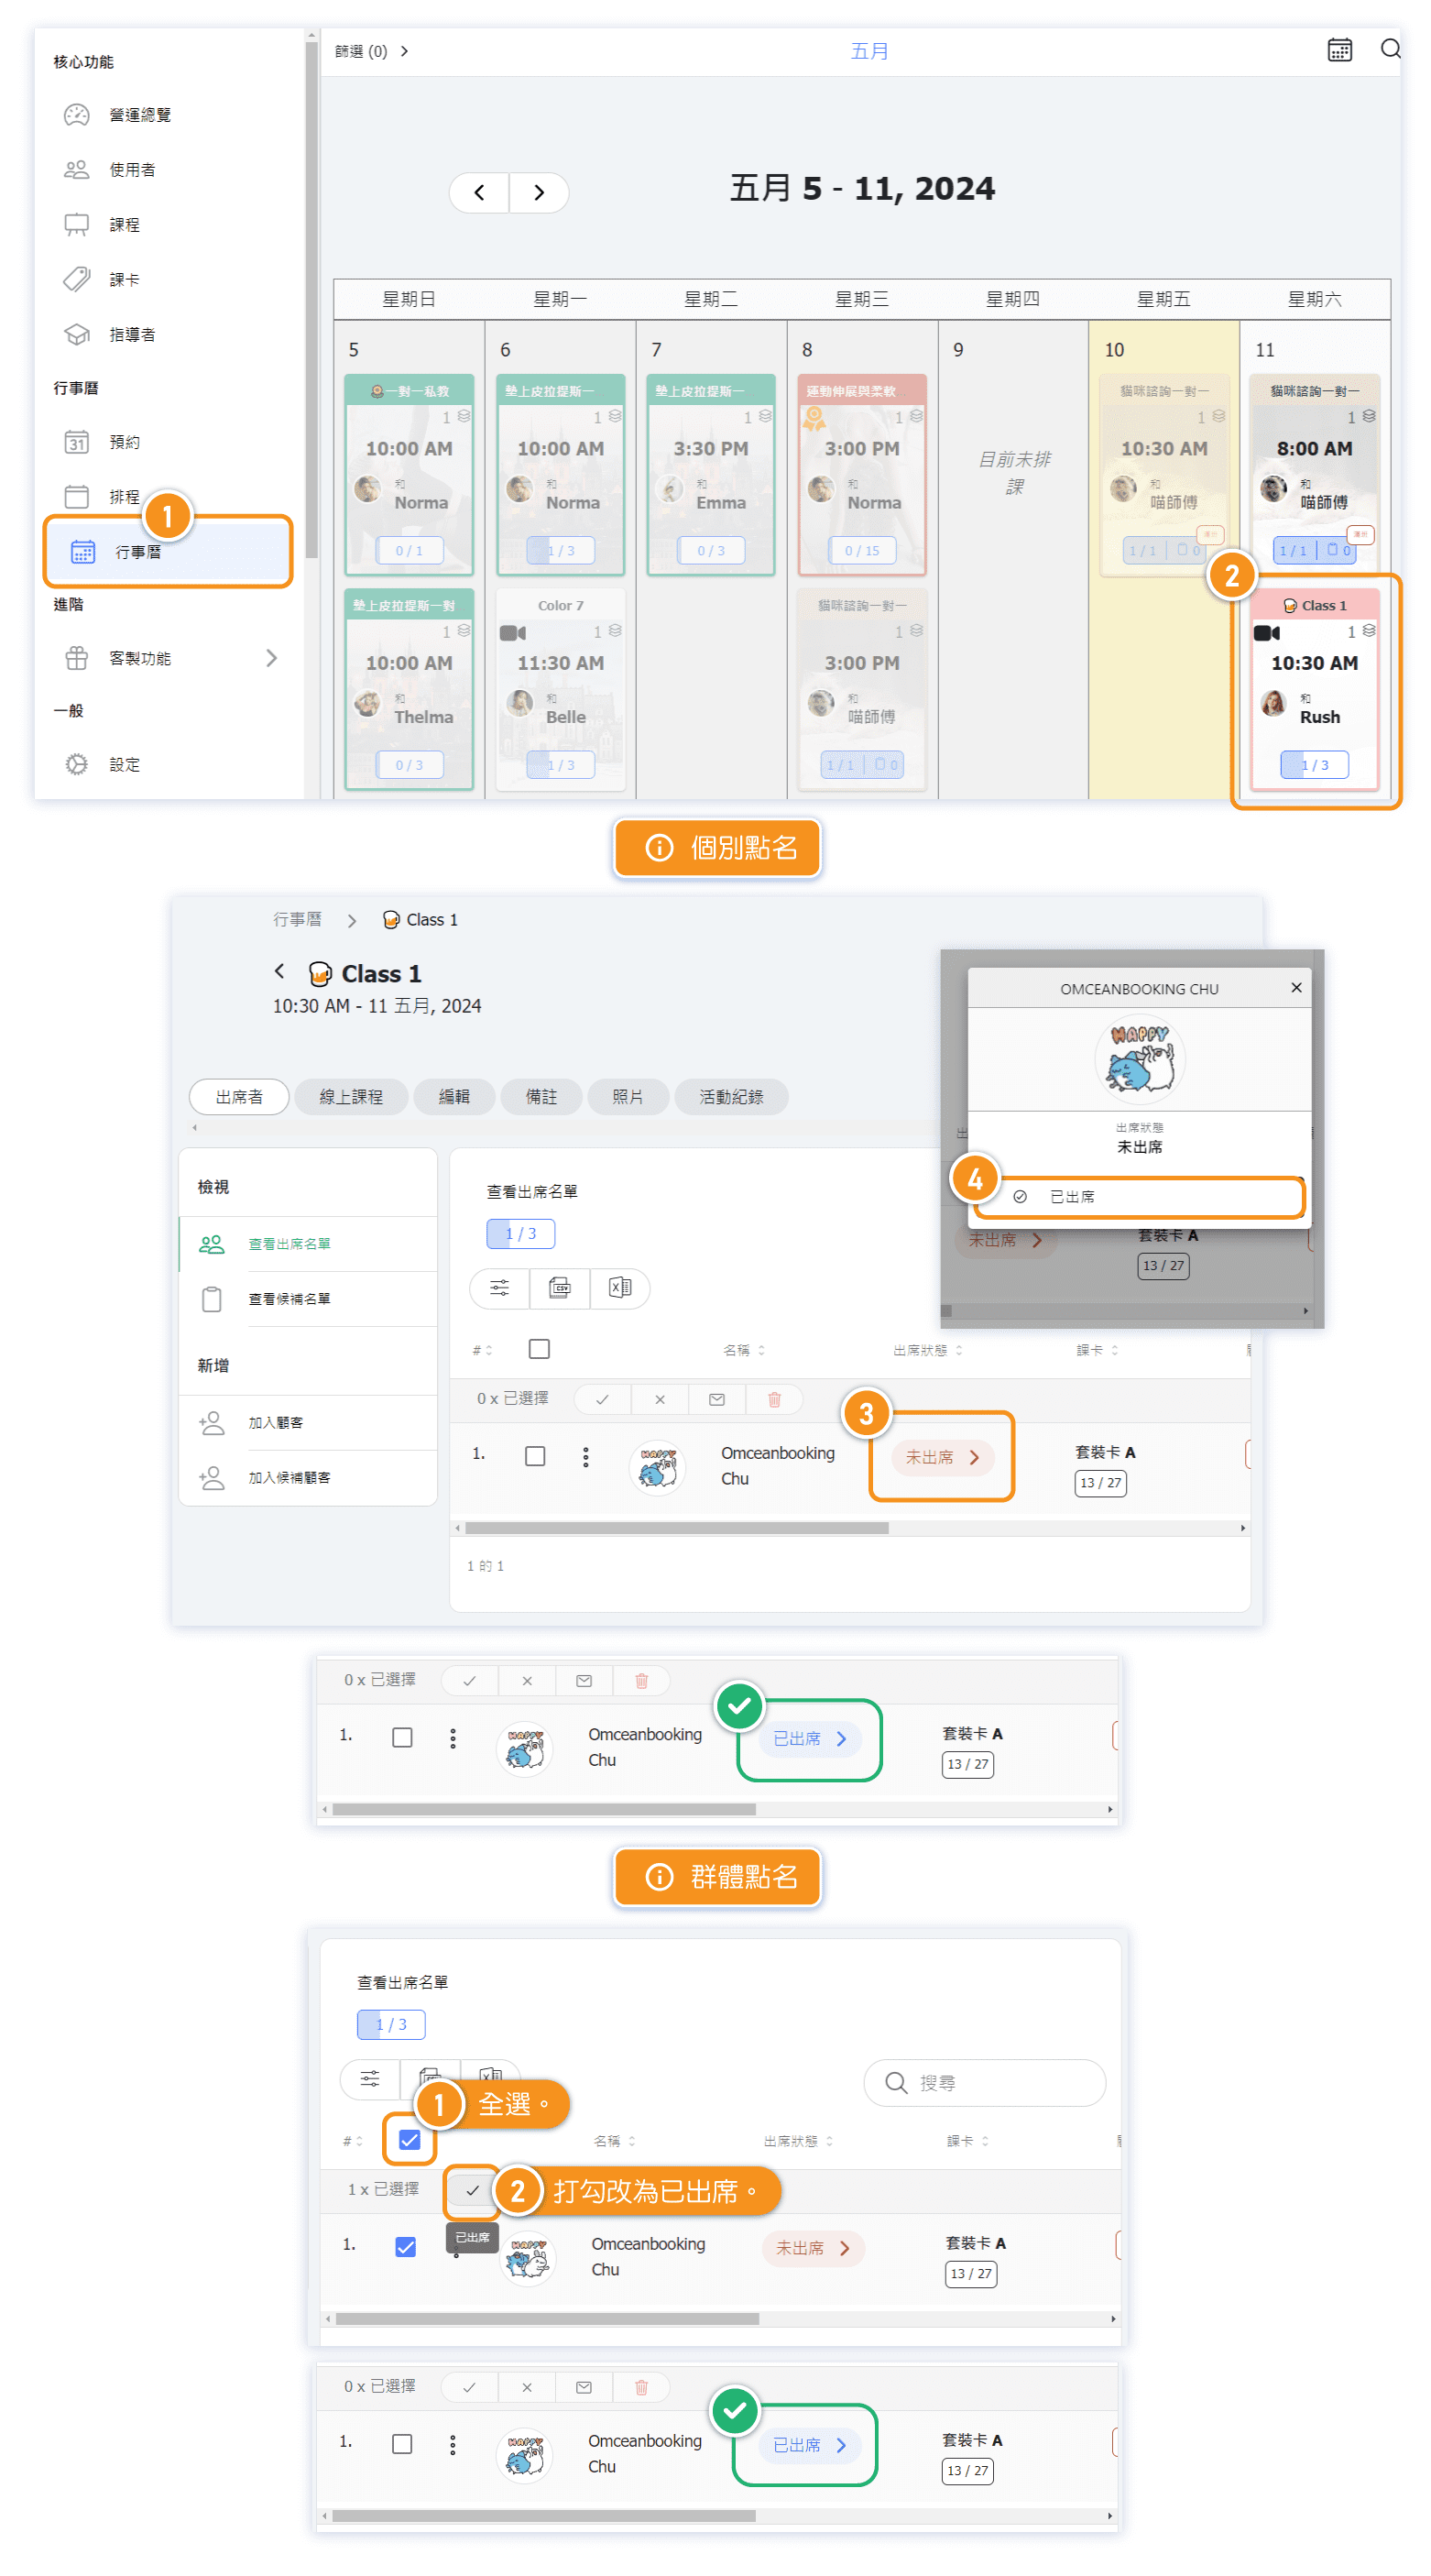
How do I mark a single student as attended?
To mark attendance for an individual student:
- Find the student in the attendee list
- Look at the Attendance column
- Click on the attendance status (shows "Attended" or "Not attended")
- Toggle to change between attended and not attended
Attendance indicators:
- Green/Attended: Student was present
- Red/Not attended: Student did not show up
Changes are saved automatically when you toggle the attendance status.
How do I mark multiple students at once?
Use bulk actions to mark attendance for multiple students quickly:
- Use the checkboxes next to each student's name to select them
- Or click the checkbox in the header to select all students
- The counter shows how many students are selected (e.g., "3 x selected")
- Use the bulk action buttons:
- ✓ (Checkmark): Mark all selected as attended
- ✕ (X): Mark all selected as not attended
Other bulk actions available:
- Envelope icon: Send a message to selected students
- Trash icon: Cancel reservations for selected students
Tip: This is especially useful at the end of a class when you need to mark everyone who showed up.
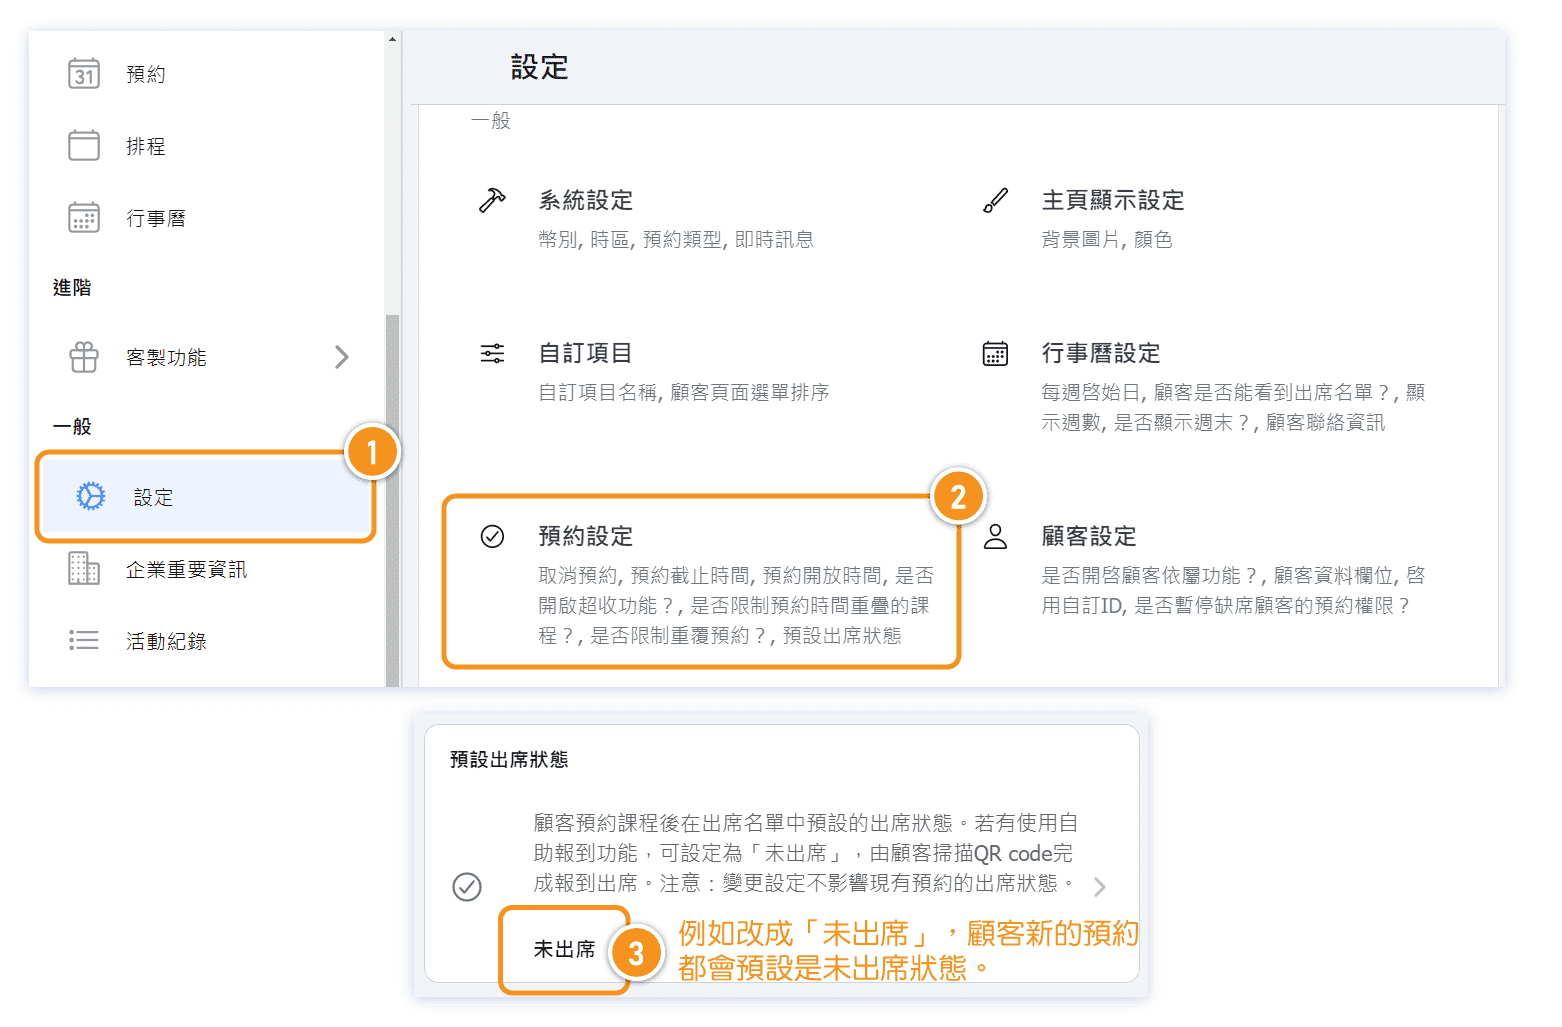
What's the difference between "Default Attended" and "Default Not Attended"?
You can configure how the system handles attendance by default:
Default Attended (Reservation = Attendance):
- When a customer books a class, they are automatically marked as attended
- You only need to uncheck students who were absent (no-shows)
- Best for: Studios where most students show up reliably
Default Not Attended (Activate Check-In):
- When a customer books, they start as "Not attended"
- Instructors must manually mark students as attended when they arrive
- Best for: Studios using kiosk check-in or needing strict attendance tracking
To change this setting:
- Go to Settings → Reservation
- Find the Activate check in option
- Toggle it ON to use "Default Not Attended"
- Toggle it OFF to use "Default Attended"
- Click Save
Can instructors mark attendance?
Yes, instructors can mark attendance for their own classes:
- The instructor logs into the system
- Goes to their class on the calendar
- Opens the Attendees tab
- Marks students as attended or not attended
Instructor permissions:
- Instructors can only see and manage attendance for classes they are teaching
- They cannot access other instructors' classes
- Administrators can see and manage all classes
Tip: If using "Activate check-in" mode, make sure instructors know they need to mark attendance manually for each student who arrives.
Why does attendance matter for passes?
Attendance tracking is connected to pass usage:
How it works:
- When a student books a class with a pass, credits are deducted
- The attendance record shows which pass was used
- You can see remaining credits (e.g., "19/60" means 19 credits used out of 60)
For no-shows:
- Students marked as "Not attended" still have the credit deducted (they booked and didn't show)
- This is the default behavior to discourage no-shows
- If you want to refund a no-show, you can cancel their reservation instead
For late cancellations:
- Depending on your cancellation policy, late cancellations may still count against the pass
- Check your Reservation settings for cancellation policies